
Everyone’s talking about signal-based outbound (aka intent-based outbound) – and for good reason. After running ABM programs on LinkedIn for years, I can tell you that guessing who to contact is over. With signal-based outbound, just using 1-st party intent signals you can find in your CRM + a couple of cheap tools (Like RB2B, Vector for website visitor deanonymization or ZenABM for Linkedin ad engagement deanonymization) you can finally use the signals already sitting in your CRM and LinkedIn Ads to drive timely, automated, highly relevant outreach that actually turns into pipeline – by making the outreach so relevant, the prospects are asking for a call themselves.

In this guide – I will walk you through setting up your first Signal based outbound play from scratch.
![]()
If you only have a few minutes, here’s what signal-based outbound is and how to use it:
If you want to see this in action on your own data, you can book a demo or just start a 37-day free trial of ZenABM and play with signal-based outbound yourself.

Signal-based outbound is a sales and marketing motion where buyer behaviour – not your hunch – decides who gets sequenced, when, and with what message.
Instead of starting with a cold list (“all SaaS companies 50–500 employees in North America”), you let intent signals drive your targeting:

Signal-based outbound flips the usual outbound approach on its head:
This is why intent/signal-based outbound came out as one of the top GTM bets for 2026 in the study by Maja Voje & Kyle Poyar – it’s cheaper, more scalable and frankly, more humane than “spray & pray” SDR teams burning through lists.

Everyone loves to talk about “intent data providers”, but the truth is: your CRM is already the best source of signals. You’re just not using it that way yet.
Some of the strongest first-party signals are hiding in plain sight:

The problem so far? Acting on these signals has been painful. You had to:
That’s exactly the headache we set out to remove with ZenABM’s signal-led outbound features.
In ZenABM, your intent signals get turned into live, auto-updating “buckets” of accounts using a feature we originally called ABM Stages and have now extended into full-blown signal-led outbound.
In practice, it works like this:
For example, you can create a bucket like:
“All companies that visited high-intent pages 3+ times, had 3+ LinkedIn ad clicks in the last 30 days OR are in the Marketing Qualified Lead lifecycle stage OR downloaded a white paper AND have ever had > 100 ad impressions.”
ZenABM then:


This is what turns your CRM from a static black box into an open book of signals that your sales and marketing teams can actually use.
Once you have clean signal buckets, you can plug them into a very lean, very powerful outbound stack. Here’s the exact pattern we’ve been using:

Start by defining the moments that matter for your ICP. For example:
You don’t need 50 conditions for evey outreach touchpoints – 3–5 strong, well-defined signals per stage are enough. You don’t want your signal-based outreach emails to look like this after all 😉

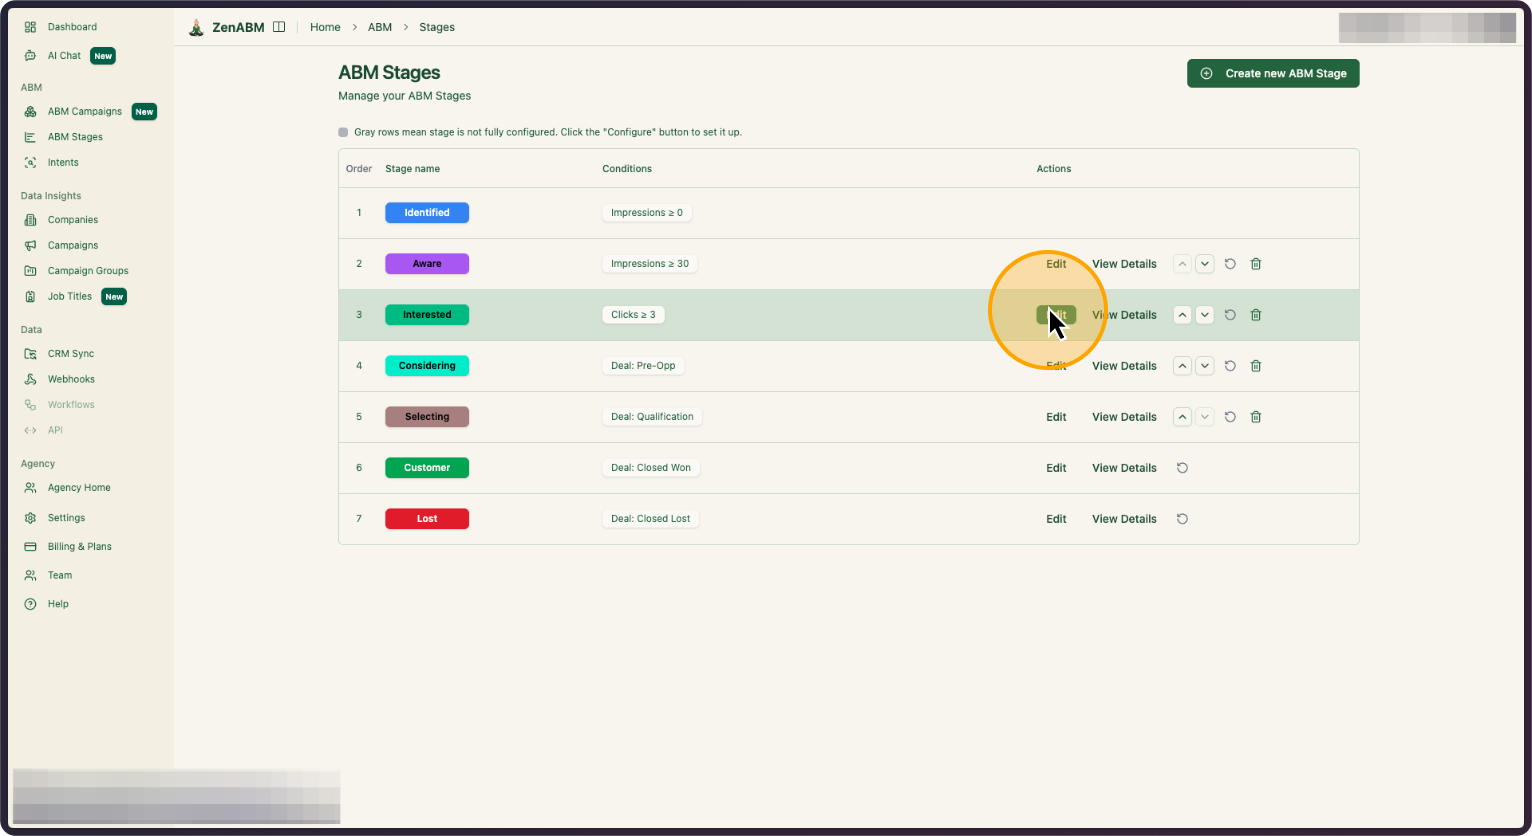
Next, go into the ABM Stages tab in ZenABM and create stages like:
Under the hood, those stages are just signal-based filters across your CRM and ad data. Once you save them, ZenABM automatically calculates the right stage for every targeted company and keeps it up to date.
Now comes the fun part. From ZenABM, you set up a webhook that sends all accounts in a given stage (e.g. “Interested” + “Analytics” intent) into a Clay table – exactly like in the warm outbound playbook.
In Clay, you:
Below, I will show you how to push the hot, engaged accounts from your ABM campaigns into Clay, and automate prospecting for specific personas there.
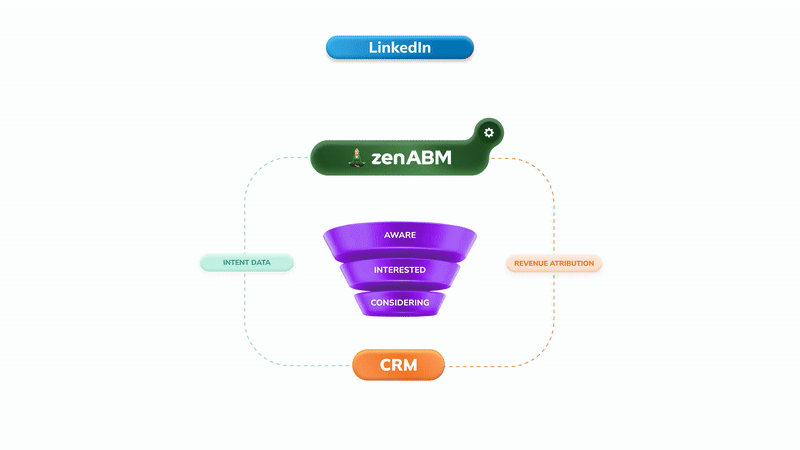
ZenABM de-anonymizes your LinkedIn ad engagements (= tells which company engaged with which campaign) and then pushes this data automatically into your CRM – both the raw engagement date (impressions, engagements, clicks) and computed “account scores” (=ABM stages based on combinations of LinkedIn ad engagements, lifecycle stages and custom properties = any of the intent signals you have in your CRM that we’ve discussed before)

…as well as intent (from the qualitative ad engagements = which campaigns the accounts engaged with):

ZenABM ingests your LinkedIn ad interactions at the company level, computes a real-time score for every account, and tags each account with the campaign or content they engaged:
Then all these intent signals flow directly into your CRM – ZenABM syncs account them into your CRM as custom fields automatically (and creates these fields as well).
You can then build workflows so that any company hitting a certain intent threshold triggers an alert or outreach task – or you can push the data to Clay for autoprospecting (automatically finding the right personas in these accounts for outreach), and then automated lead routing or follow-up sequences.

In short, ZenABM bridges marketing signals and sales action with very little rev-ops required.
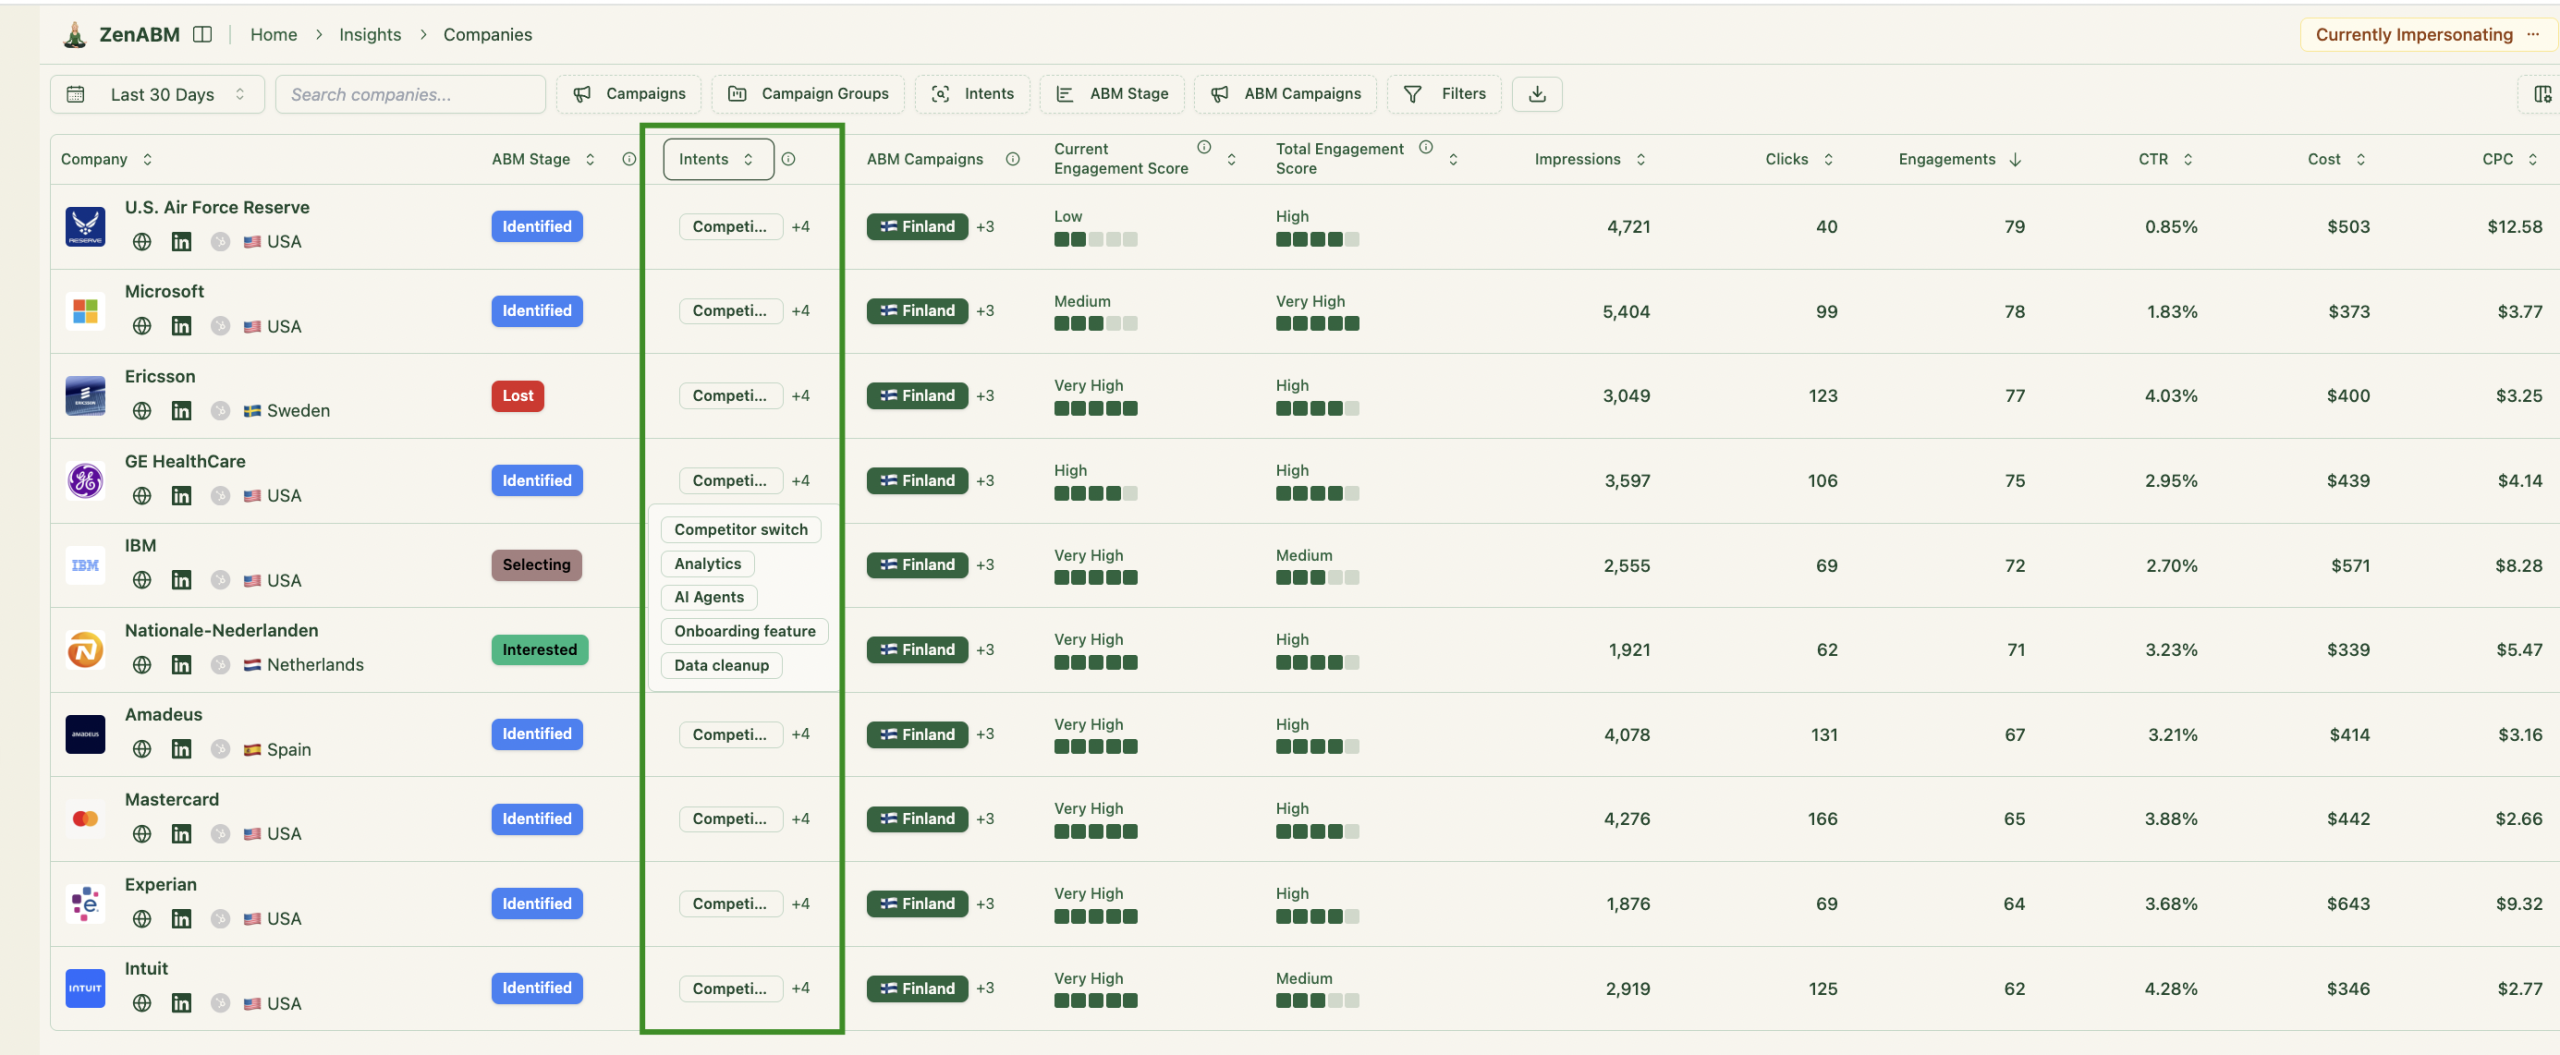
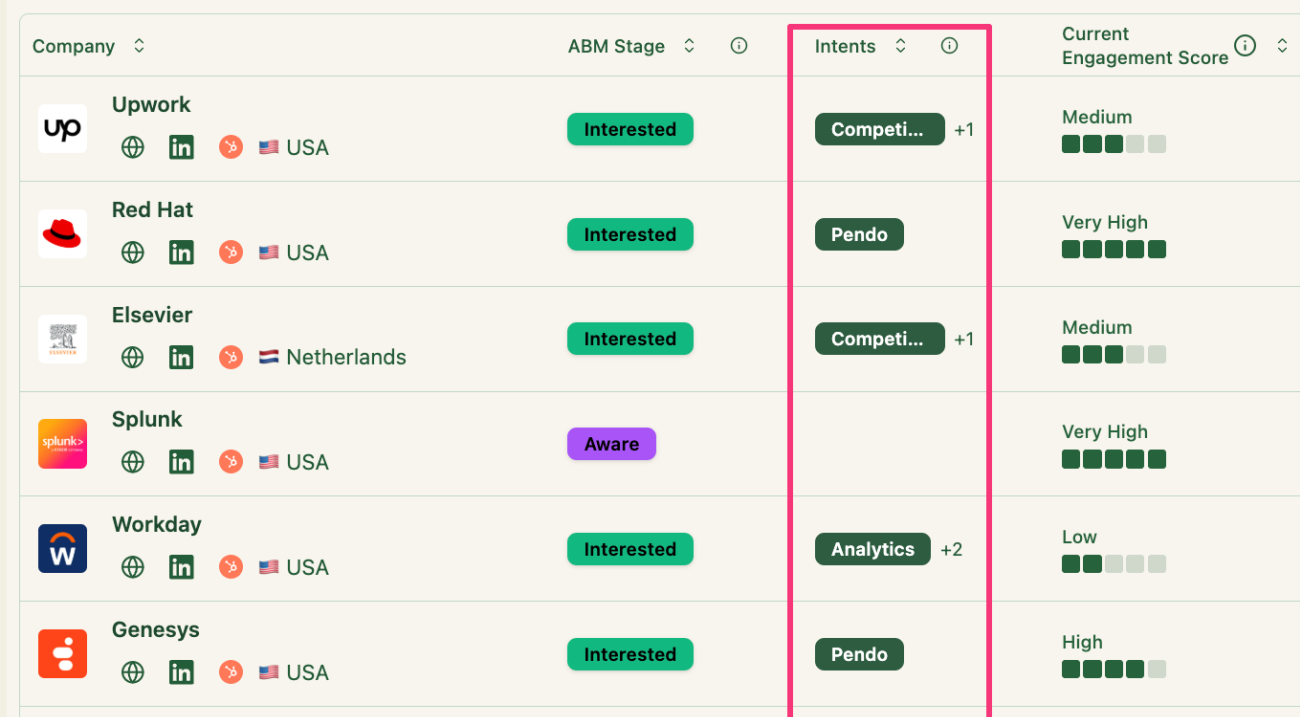
In ZenABM’s dashboard we see company-level LinkedIn engagement visualized: each target account is listed with the campaigns it clicked and an inferred intent or ABM stage. You can also use its AI chatbot, Zena, to pull a specific list of accounts that engaged with any campaign, in any timeframe:

With ZenABM, those LinkedIn ad engagements and web visits automatically turn into CRM triggers, so your sales reps only spend time on accounts already primed to buy. As soon as a company shows buying signals, you can either automatically prospect into those accounts with Clay and send them into automated outreach sequences e.g. in Smartlead/Heyreach, or notify your sales team in your CRM (Hubspot).
I will explain how to set the automatic prospecting up in more detail in the next few paragraph.
OK but now you still need to know how to use the intent signals from account level, that you have in ZenABM – to find prospects for outreach in Clay, and add them to the right respective intent-based outreach sequences.
Below, I will show you how to do that + set up filters, connect your Smartlead (email outreach) account, and configure automatic updates to keep your campaigns running smoothly.
0. Copy the Clay Template from here [LINK – FREE CLAY TEMPLATE].

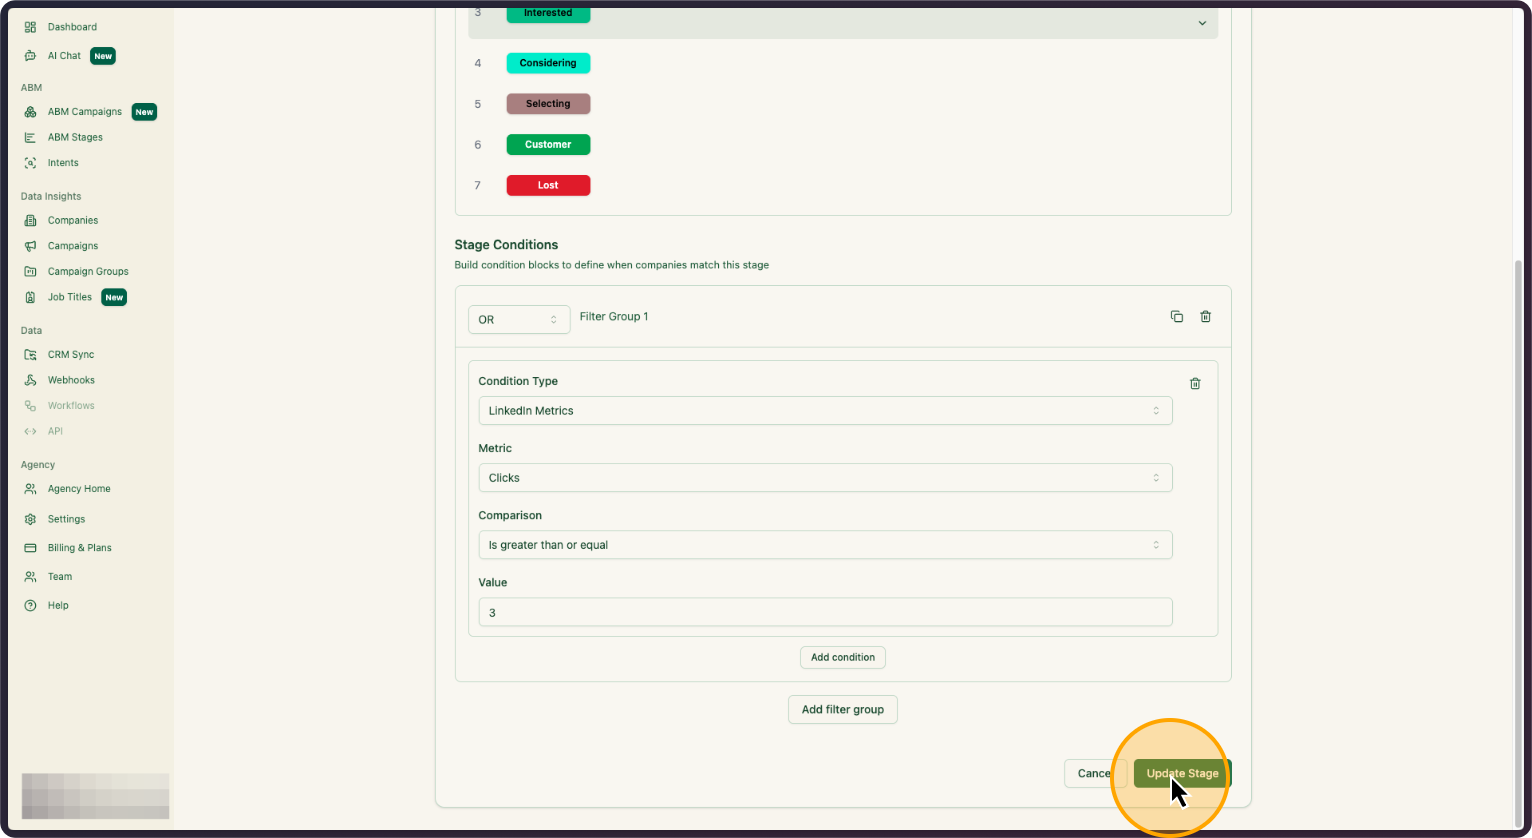
In this example, it’s companies with three or more clicks. Select what you prefer and then, click on “Update Stage”
2. Click on “Update Stage”
This playbook works only with Clay’s Explorer plan or higher or on the free trial because Webhooks and Email sequence integrations are only available with those plans.
3. You will need Clay’s Explorer plan at least to run this playbook
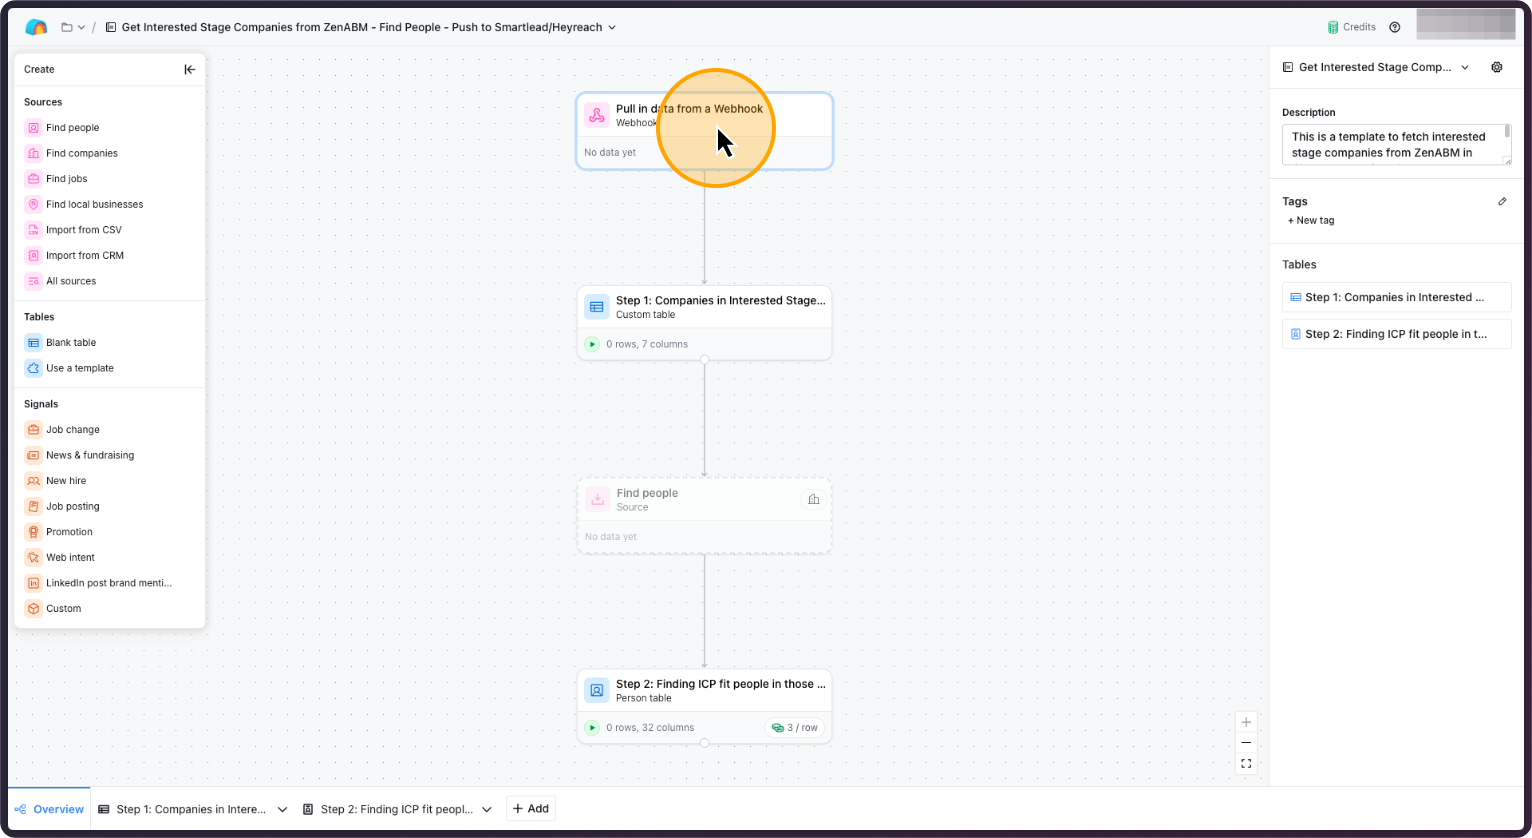
After you copy the Clay template, you will see the full workbook with 2 tables and an Overview.
Go to the first step and click on it.
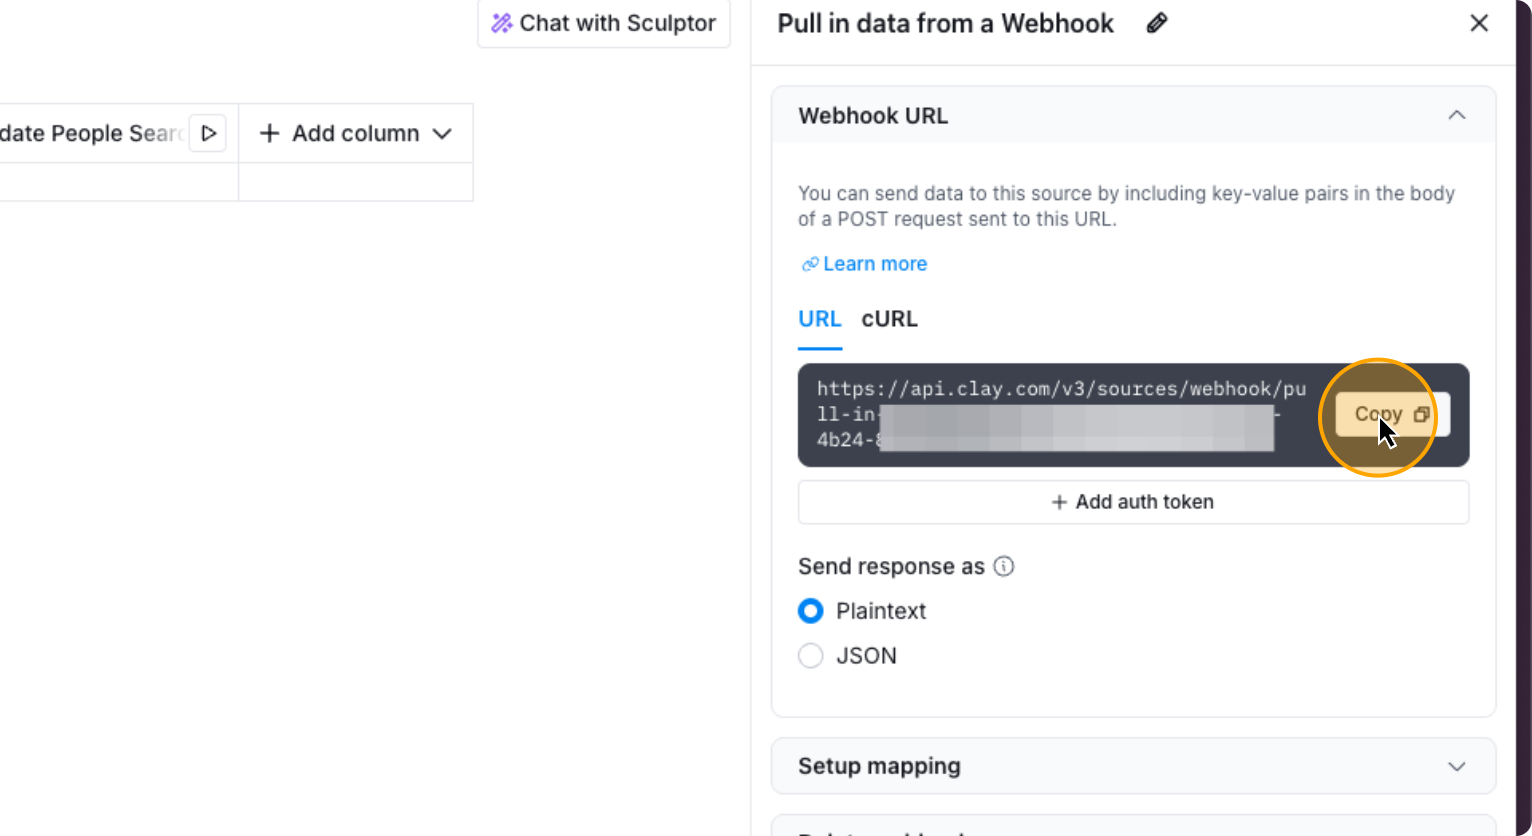
4. Click on “Pull in data from a Webhook”
5. Double-click here
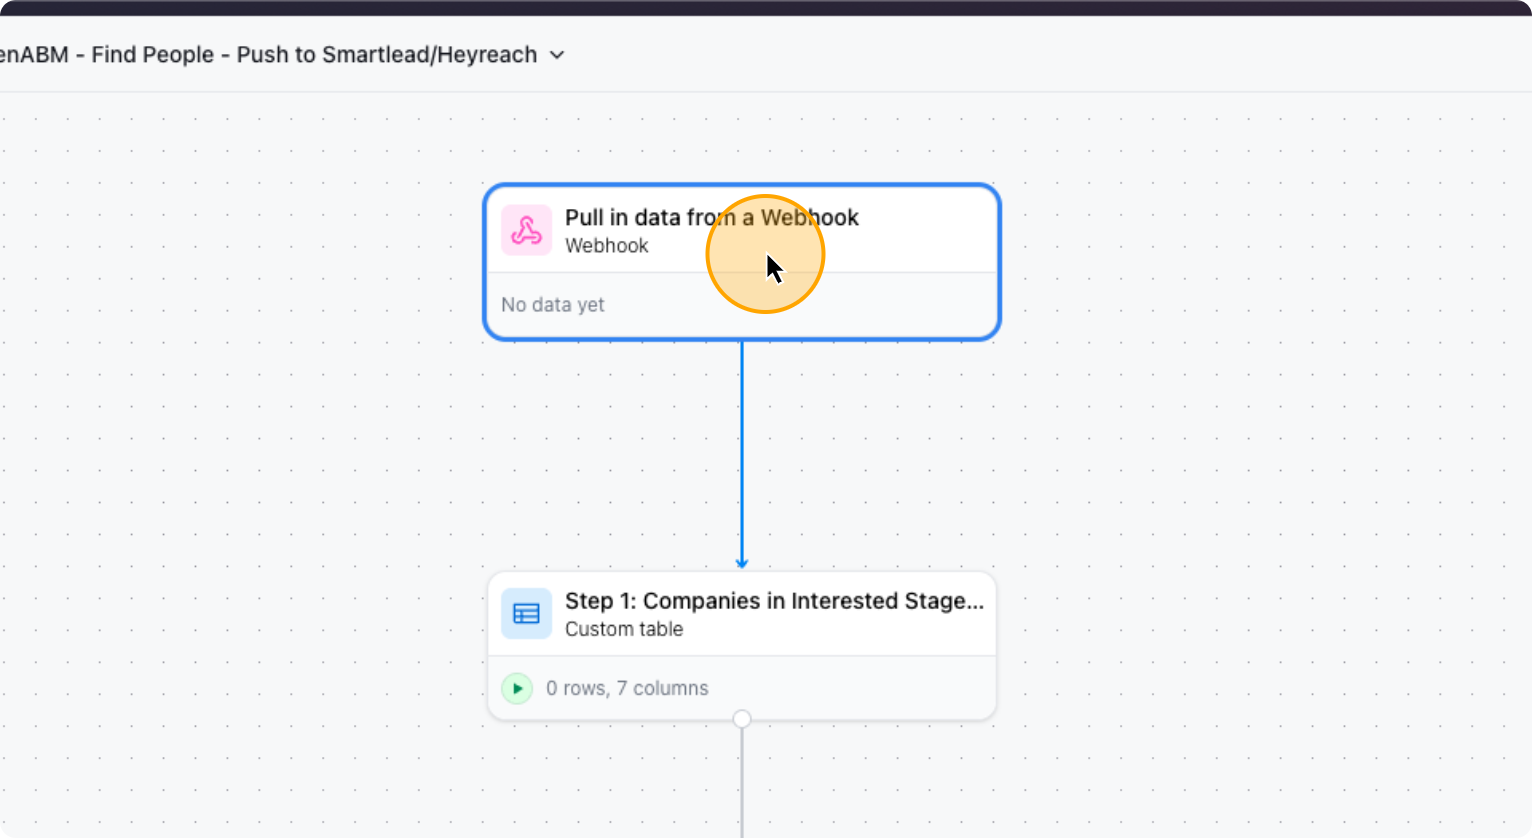
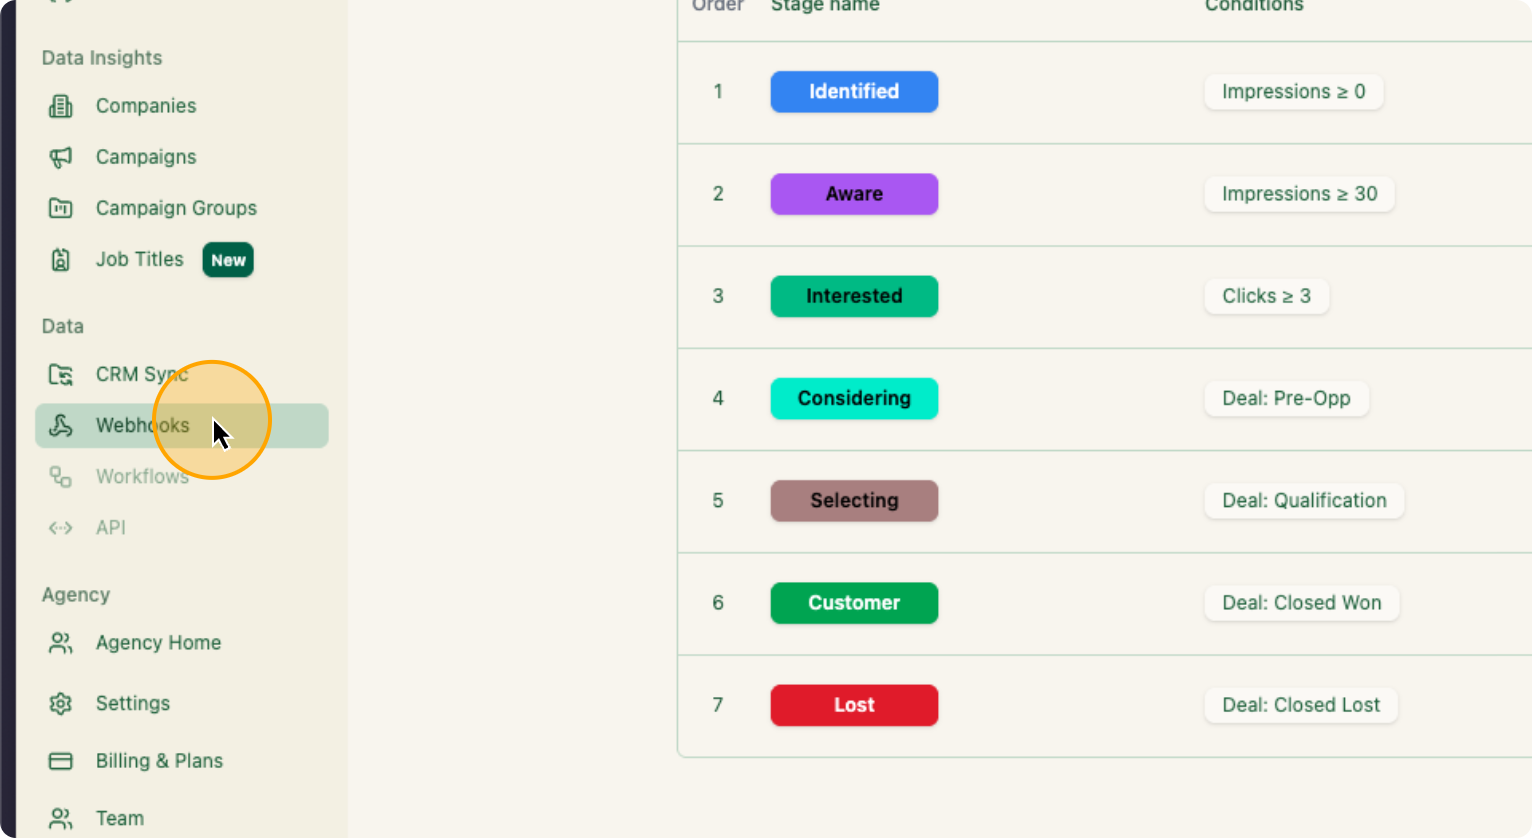
It will take you to step one, where you need to complete the first step. The first step is to copy the webhook URL you see. Copy it, then go to ZenABM. Click on “Webhooks,” and select “Create a new webhook.”
6. Click on “Copy”
7. Go to ZenABM, Click on “Webhooks”
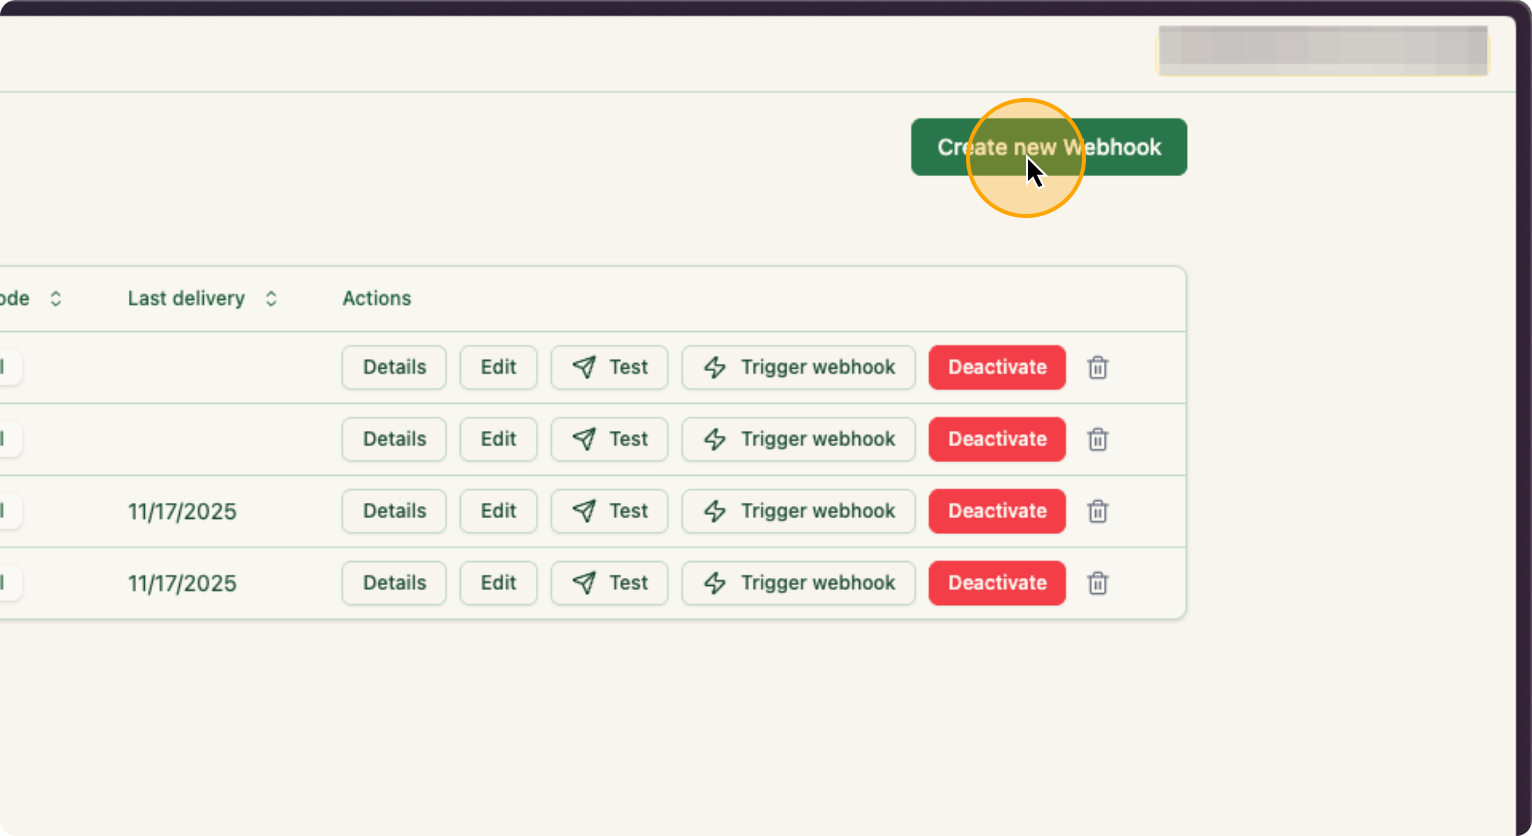
8. Click on “Create new Webhook”
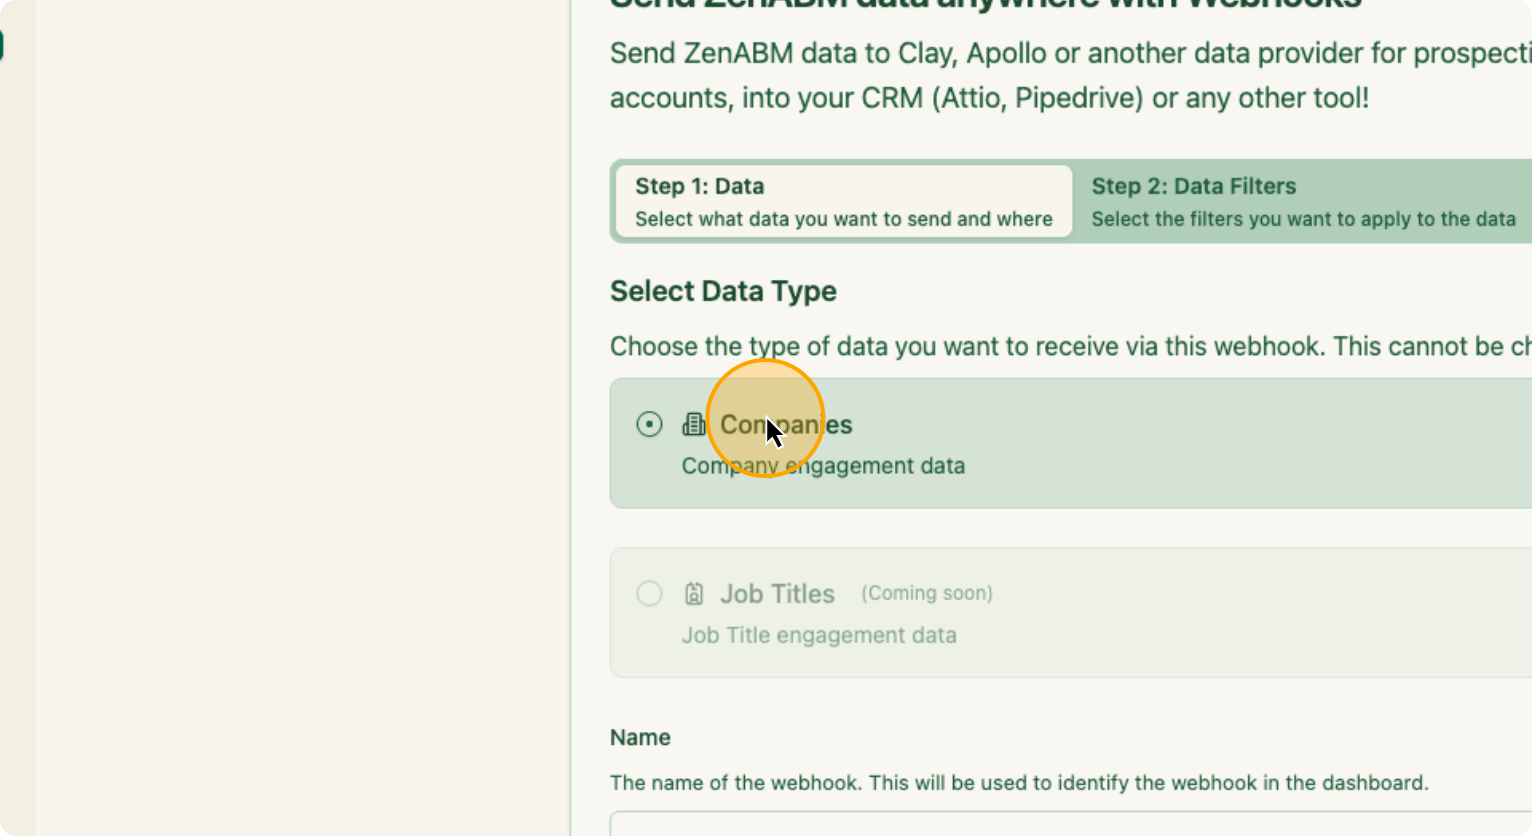
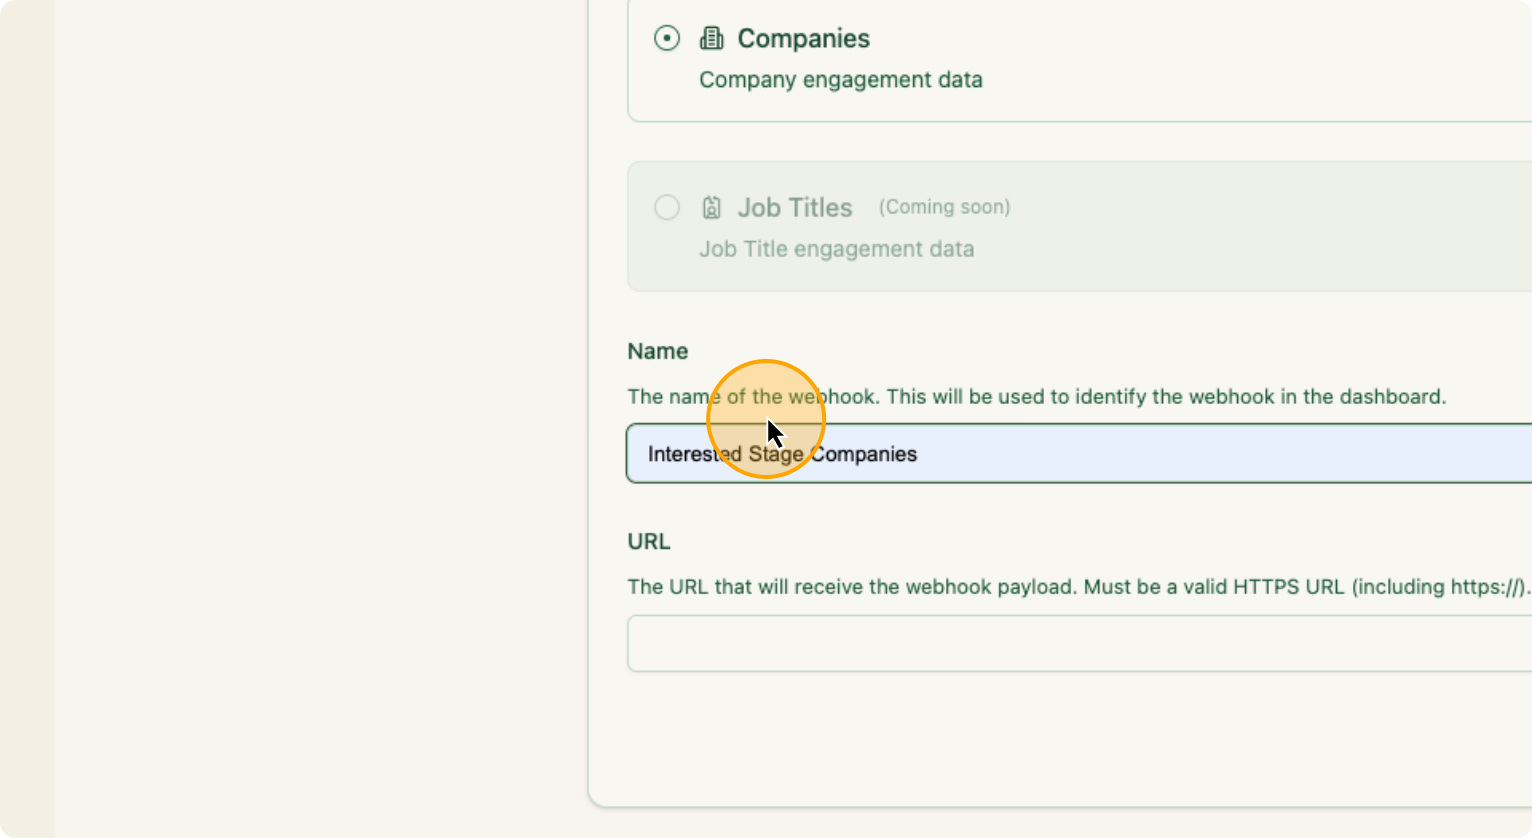
In this webhook, you will select companies and then name the webhook.
9. Click on “Companies”
10.Name the Webhook here:
Paste the webhook you just copied from Clay in the “URL”. Click Next.
11. Paste the webhook you just copied from Clay here
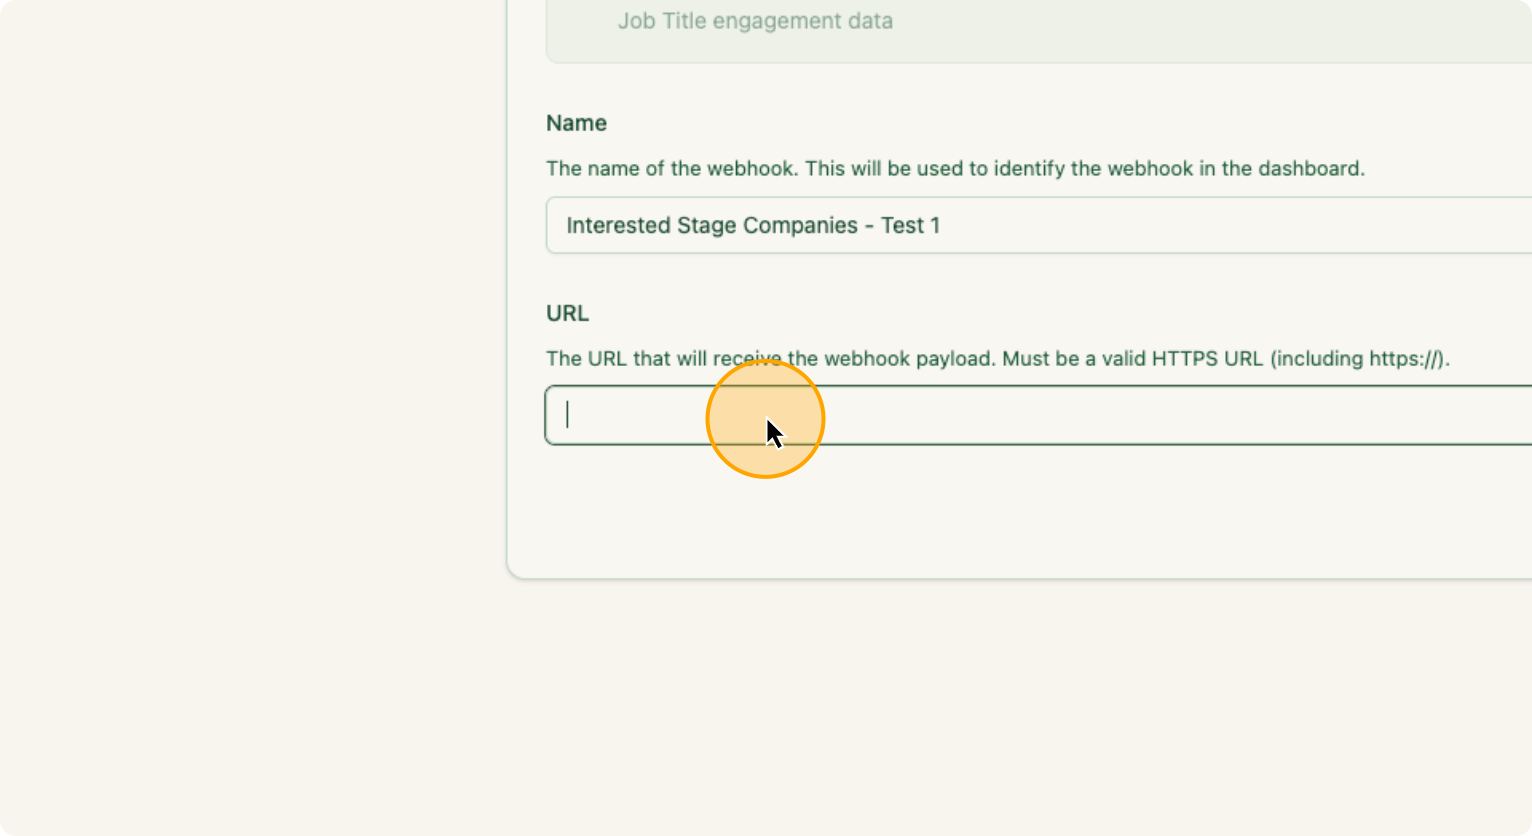
After you paste the webhook, click Next.
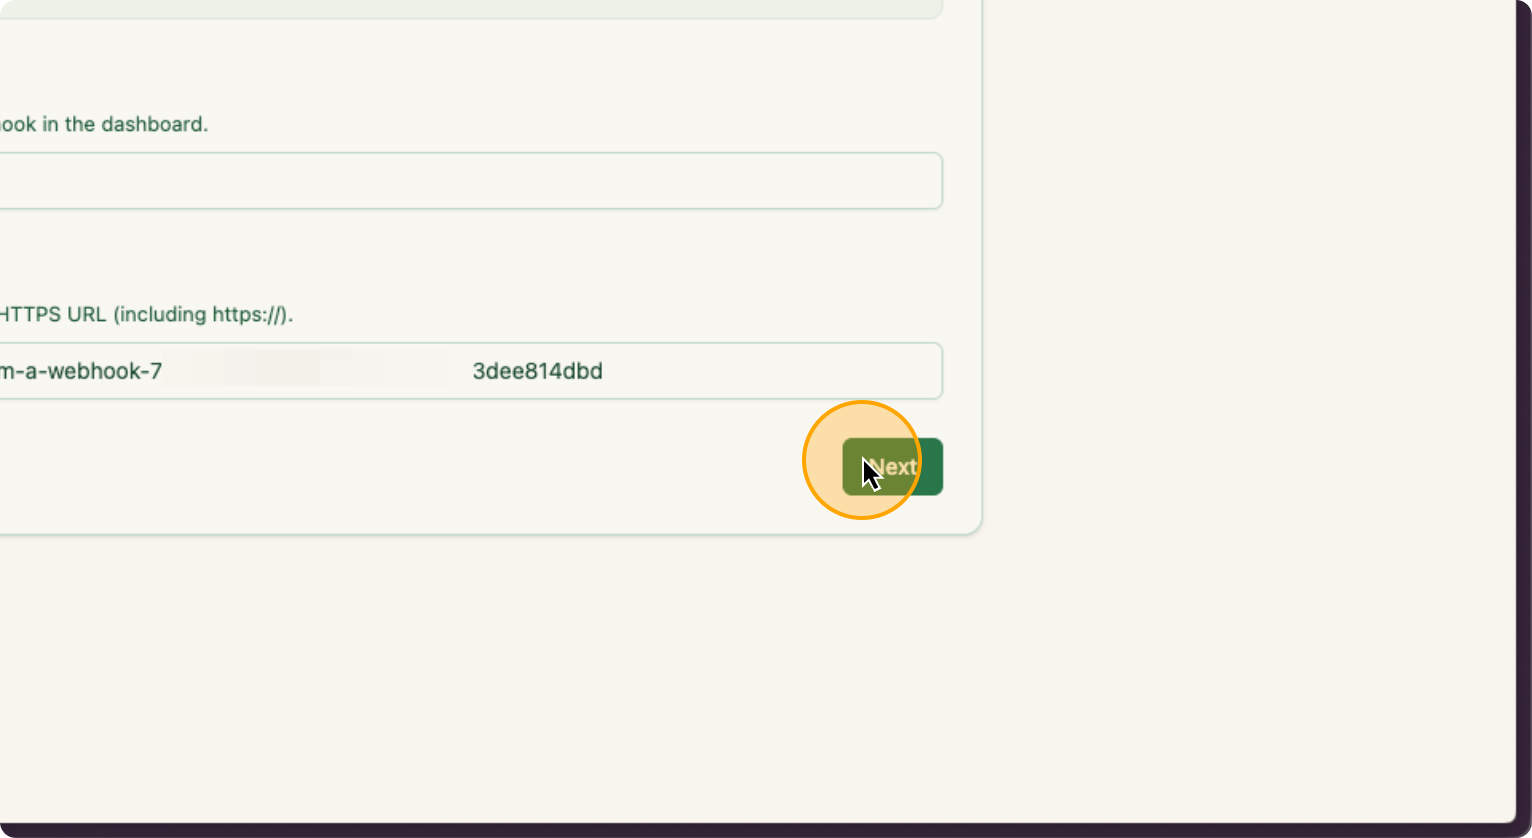
12.
Click on “Next”
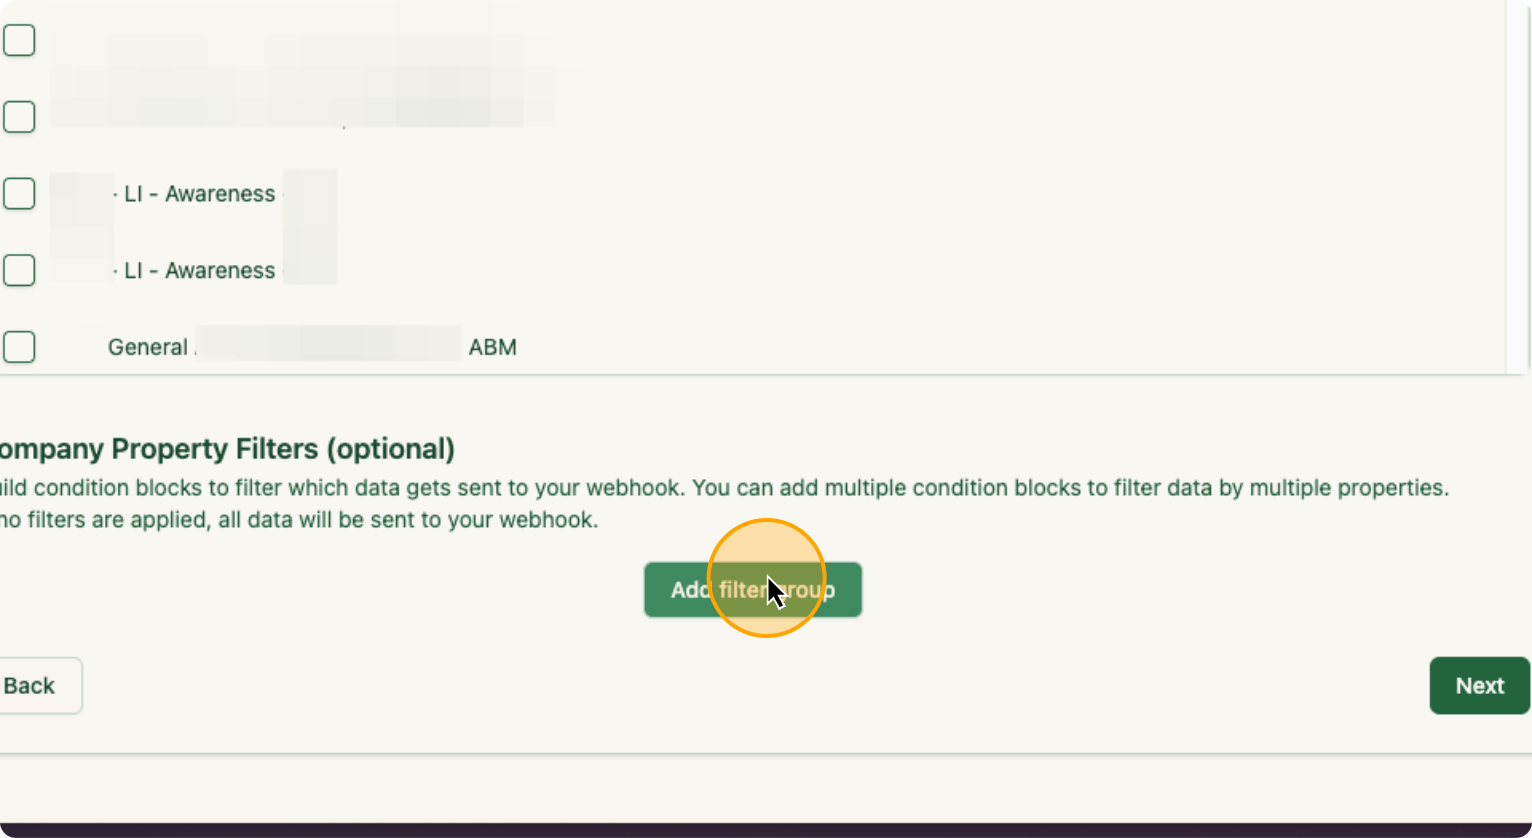
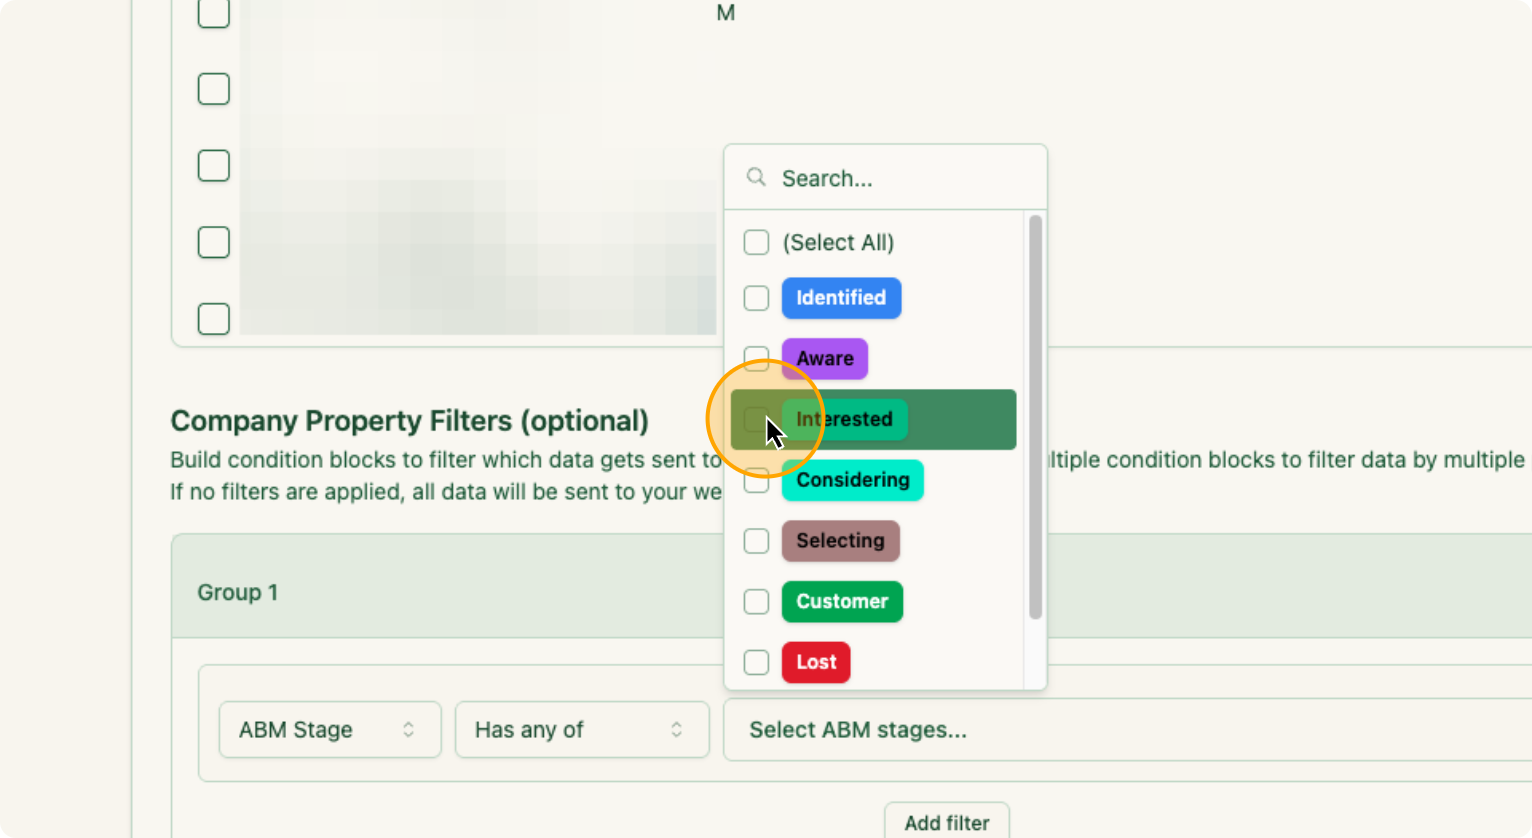
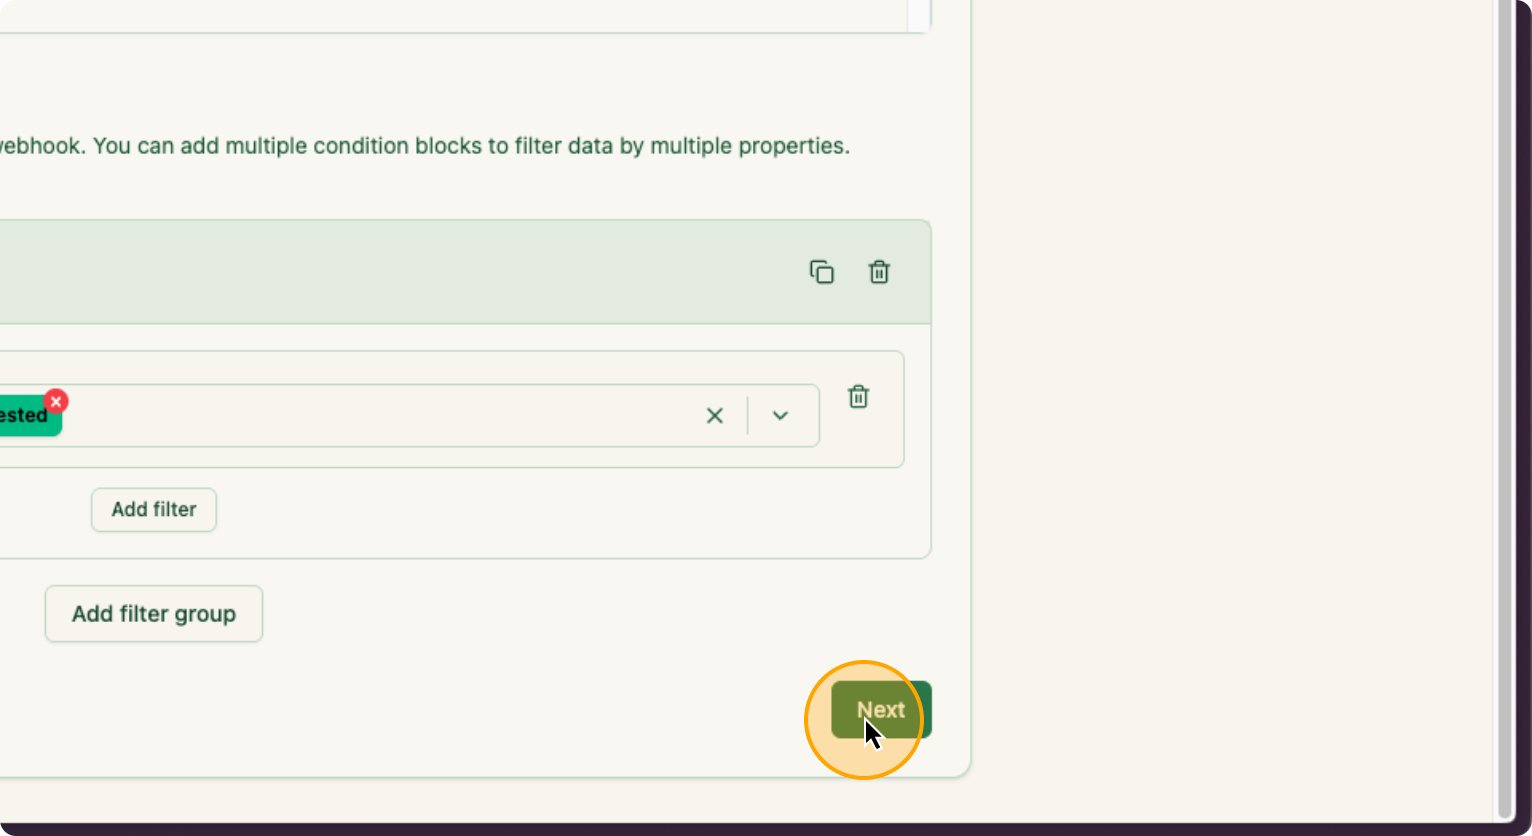
These are the filters. If you want companies from specific campaign groups, campaigns, or ABM campaigns, you can select them. I want everything, so I will ignore this. Click on “Add Filter.” Select “ABM stage” and choose “any of interested.” Ignore the other options.
13. Click on “Add filter group”
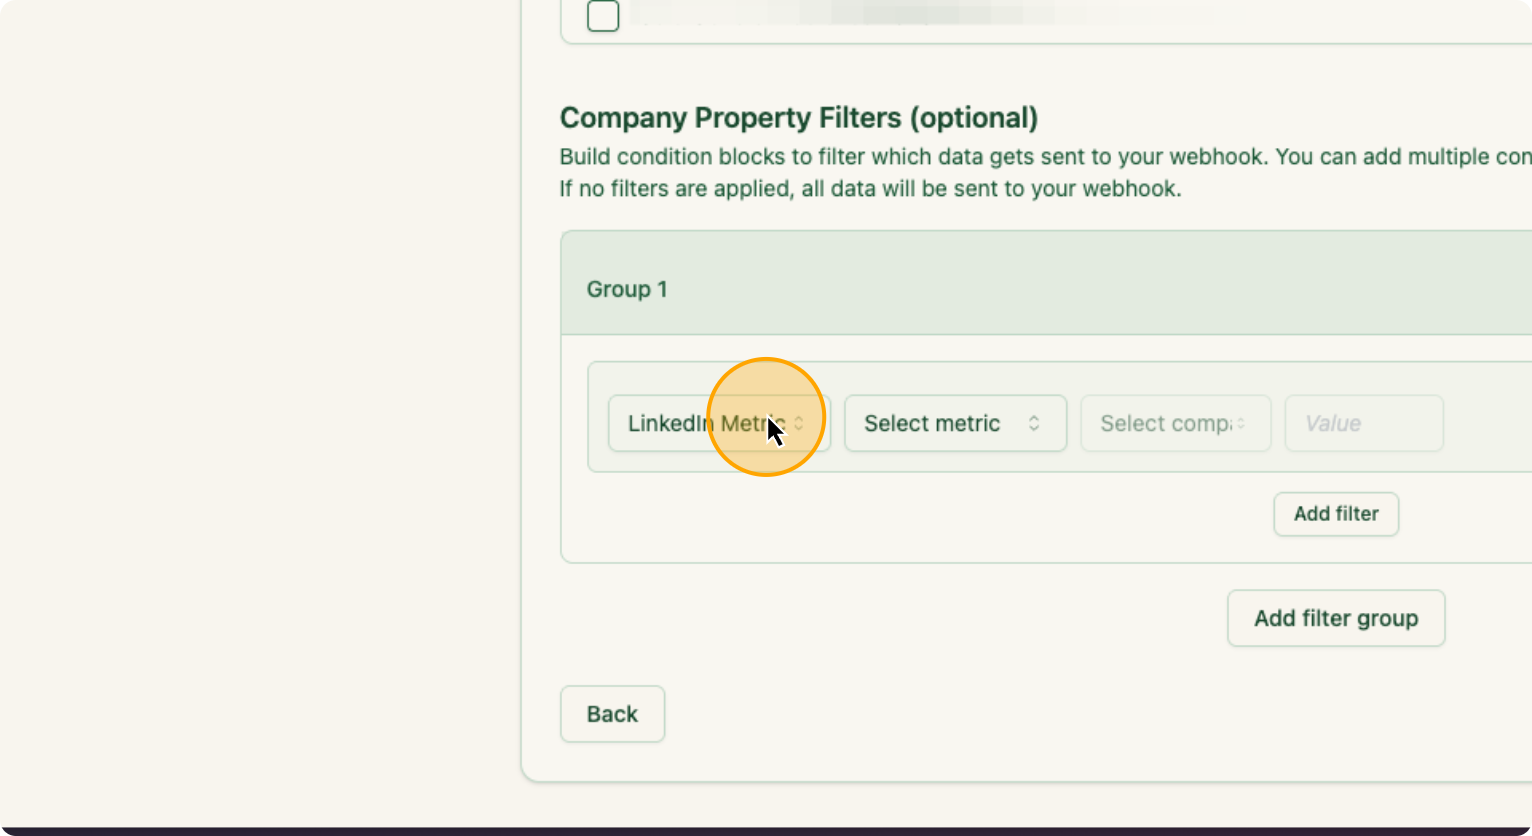
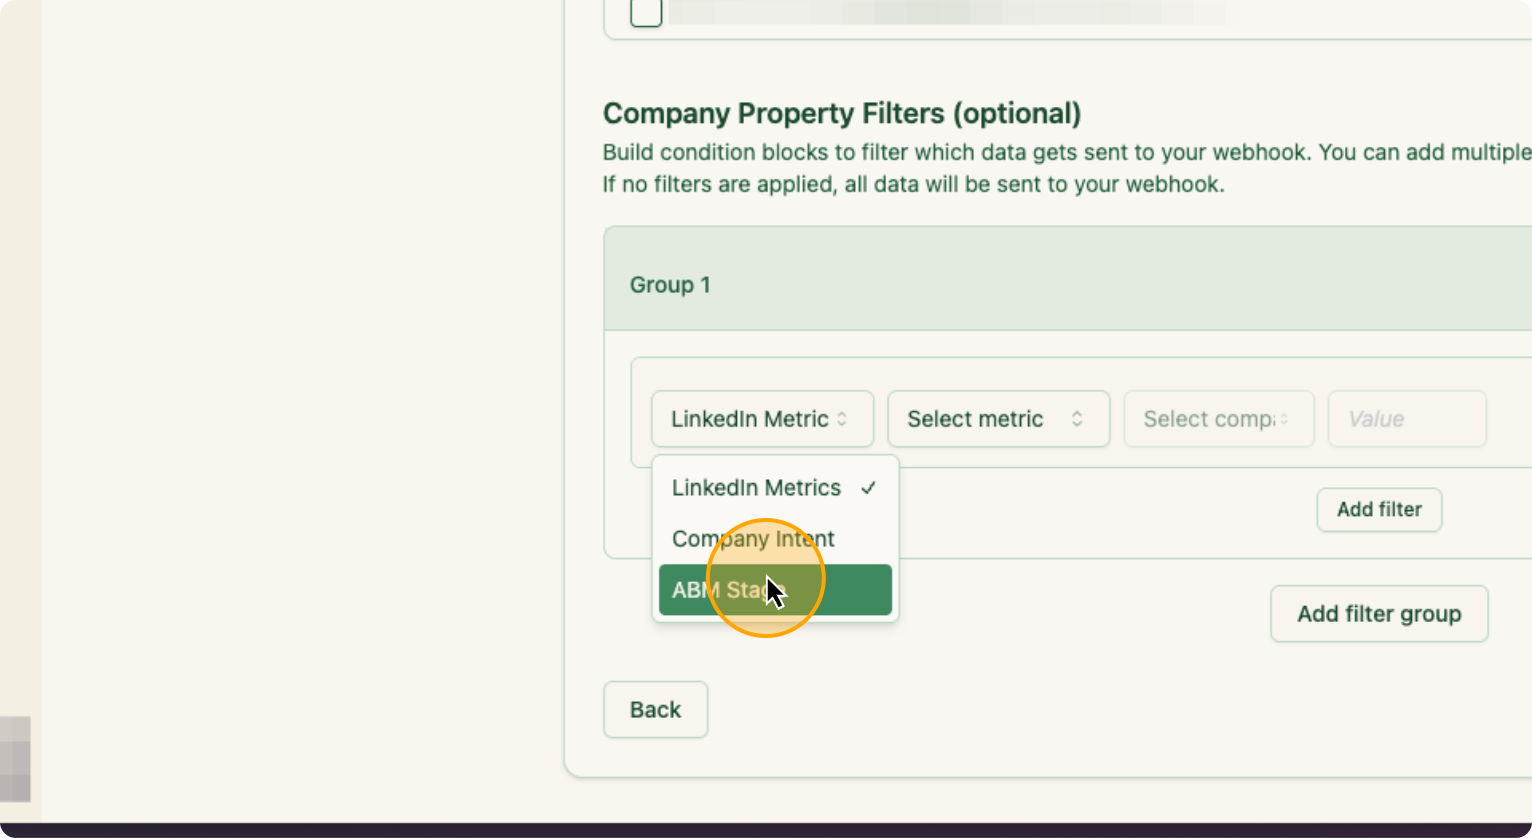
14. Click on “LinkedIn Metric”
15.
Click on “ABM Stage”
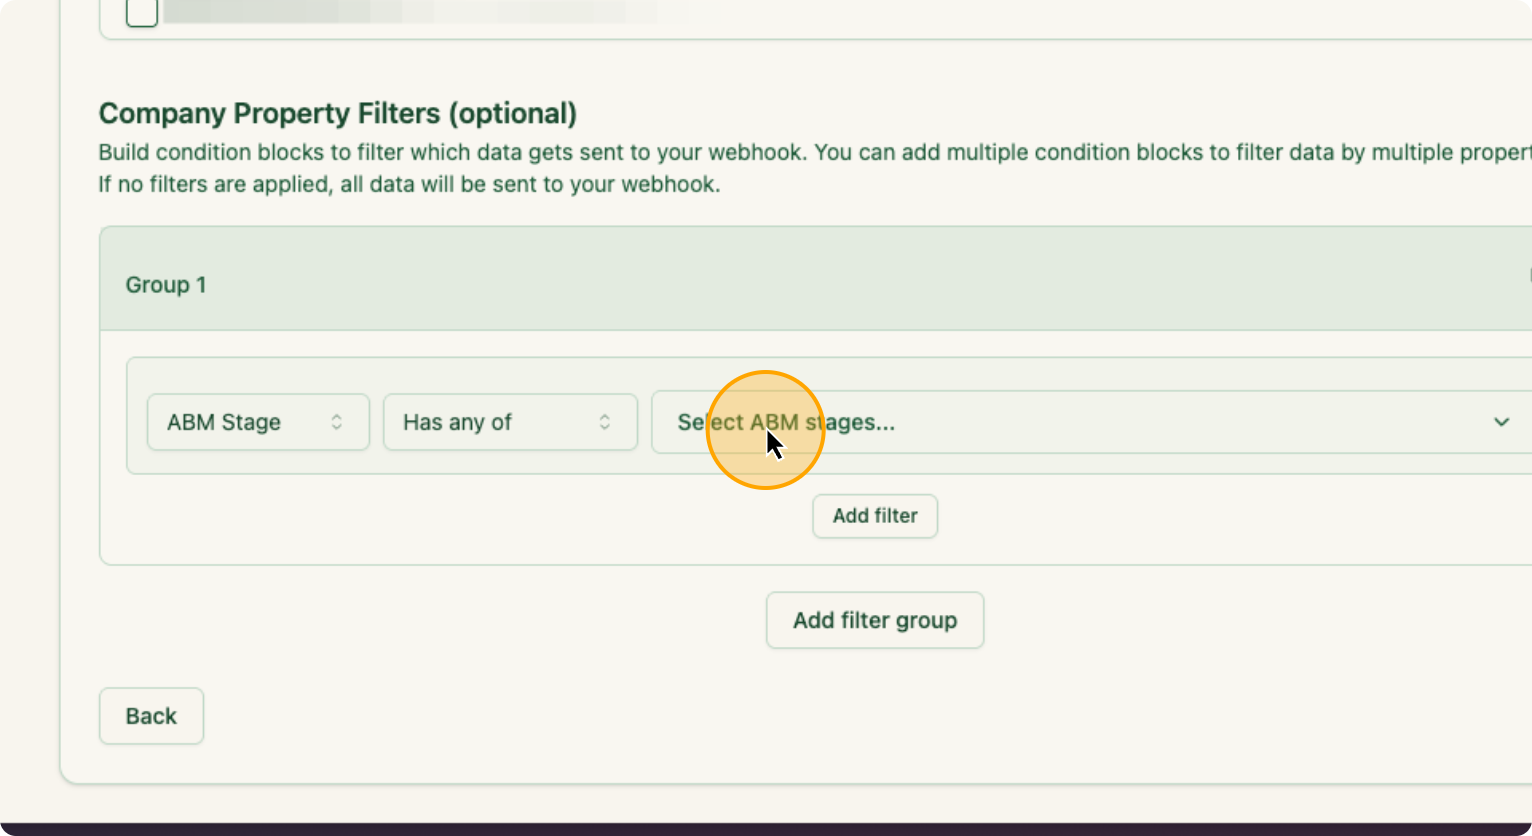
16. Click on “Has any of”

17. Click on “Select ABM stages”
18. Click on “Interested”
Then click Next.
19. Click on “Next”
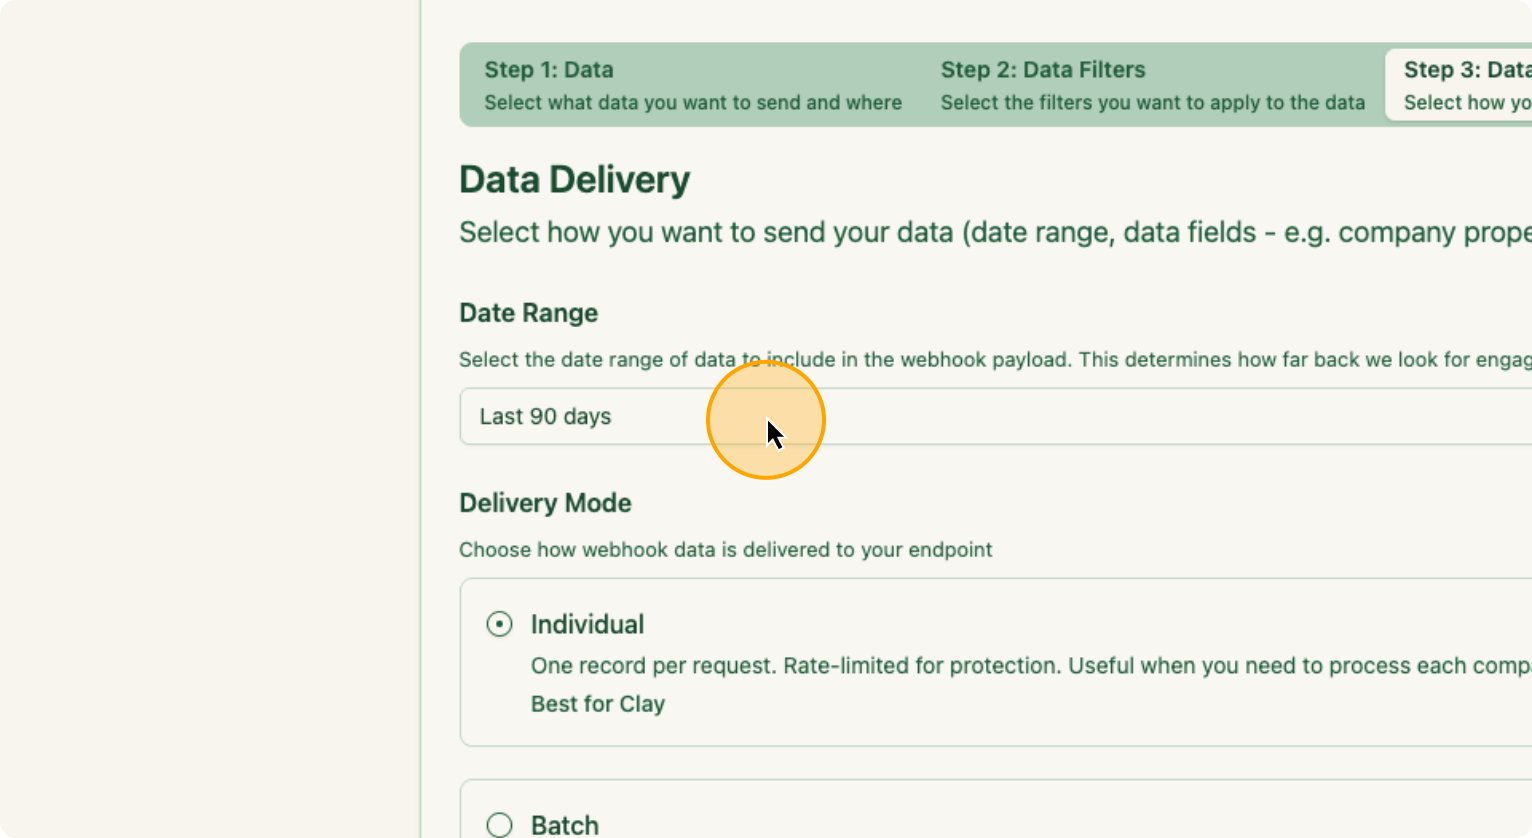
From here, I want it to recur for every 7 days, since I plan to run this weekly. So I am going to change the Date Range to “Last 7 Days”.
20. Click on Date Range
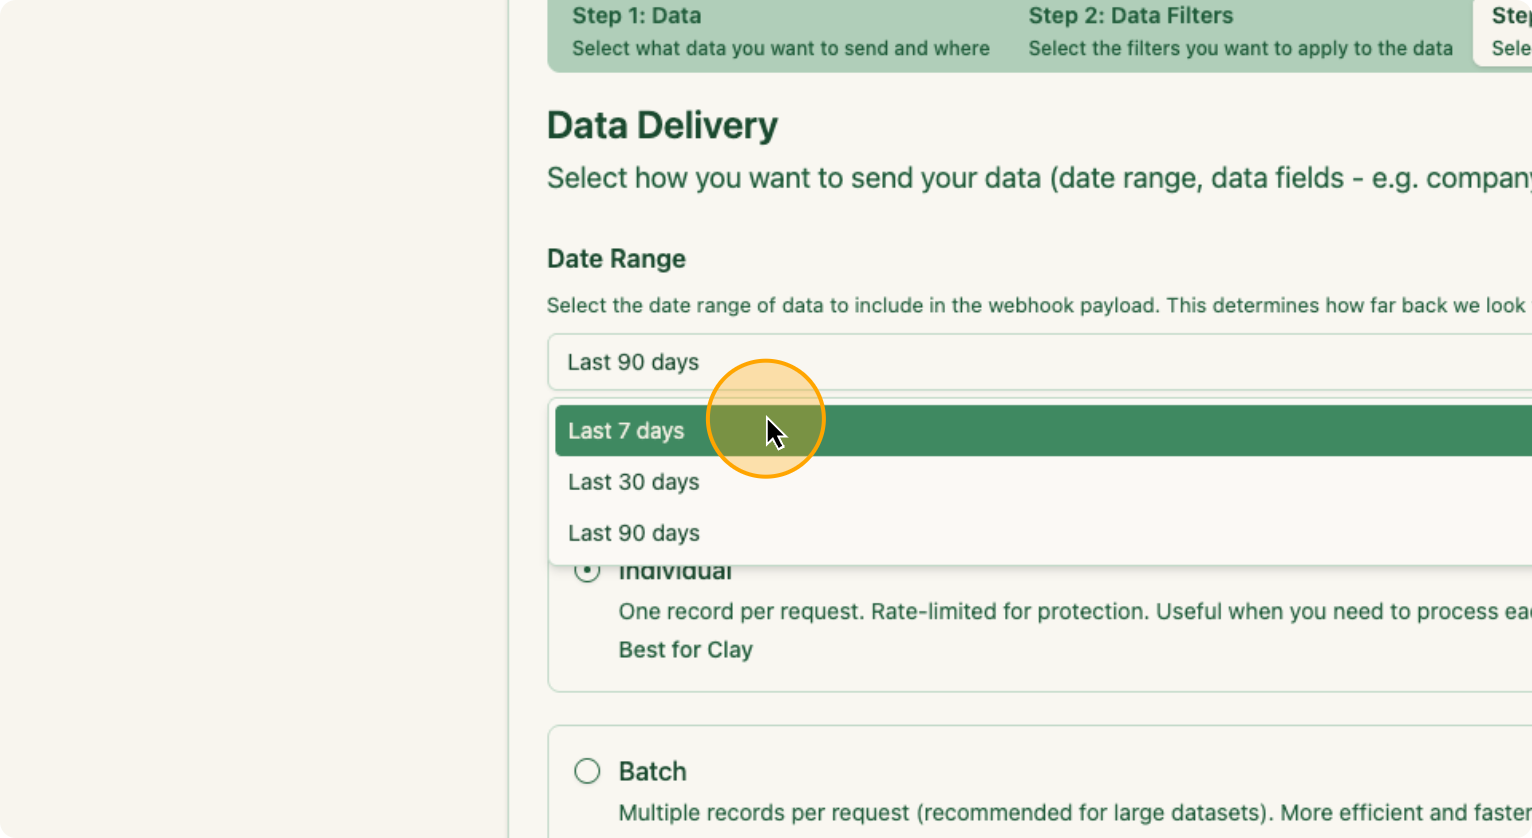
21. Select “Last 7 Days”
Each week, once this occurs, the companies are automatically included.
22. Click here:
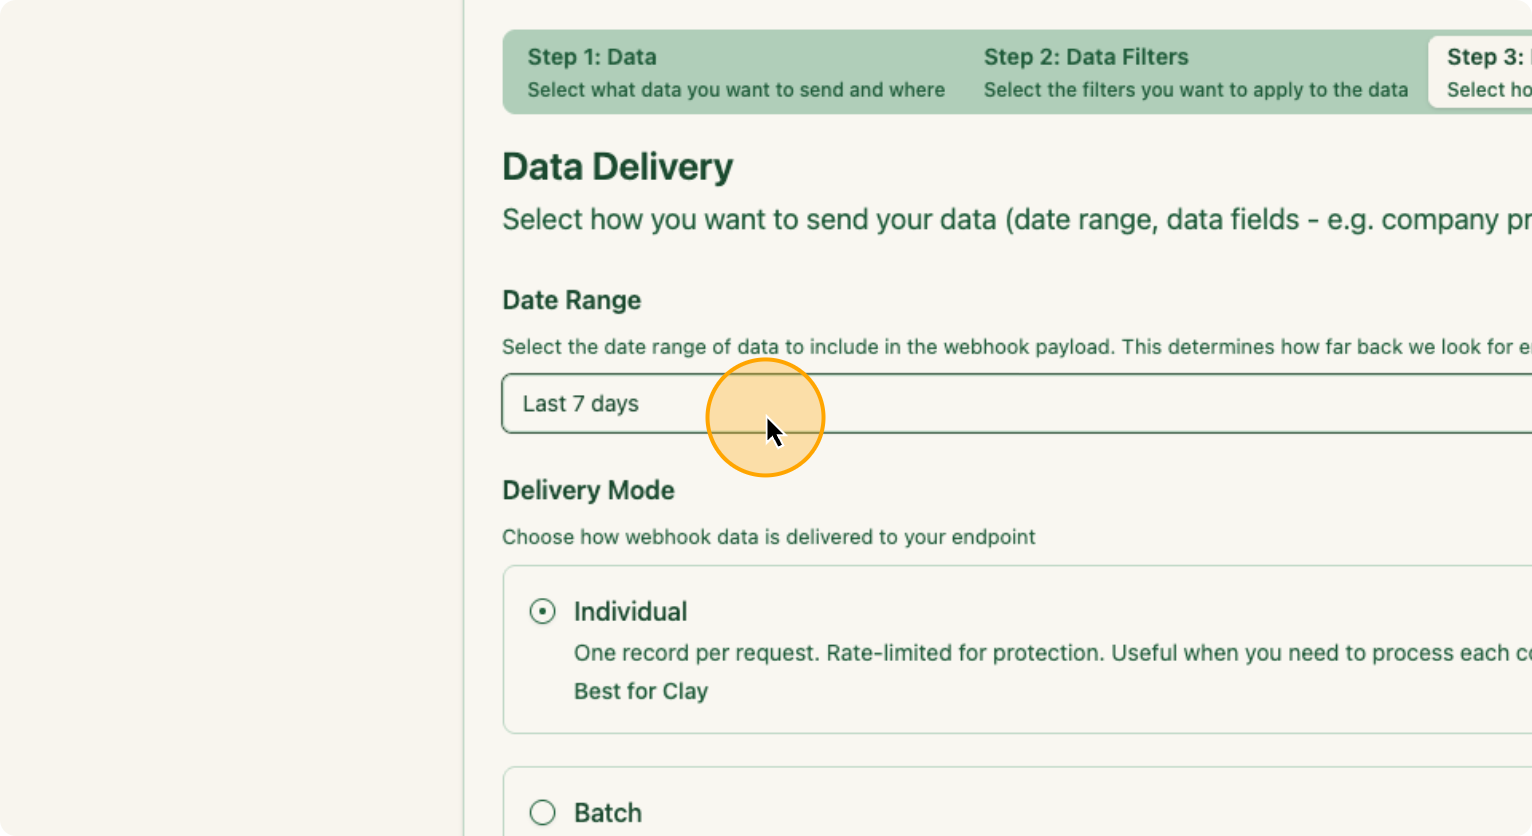
23. Click on “Individual” under Delivery Mode
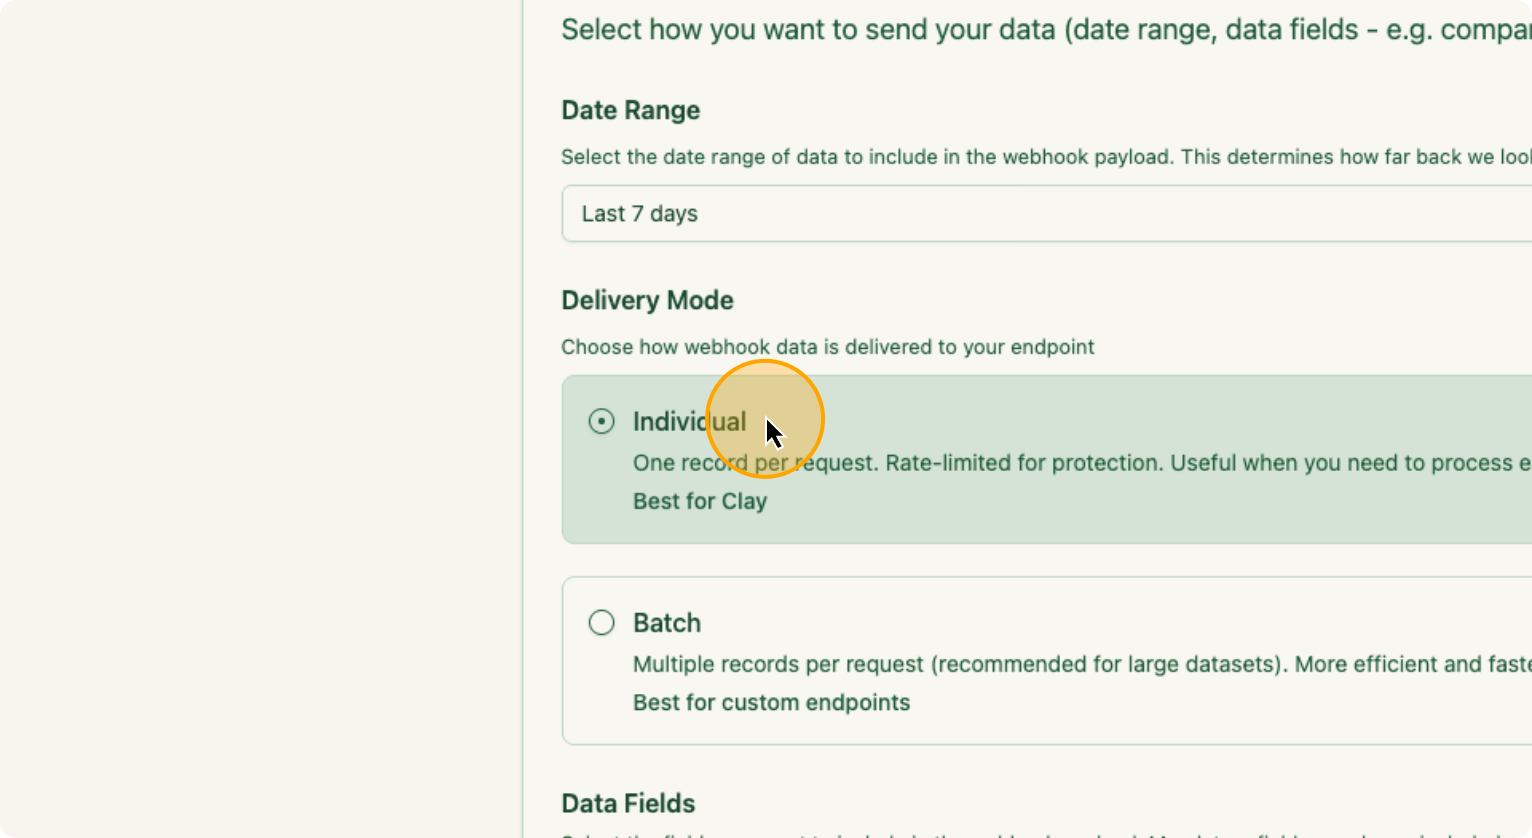
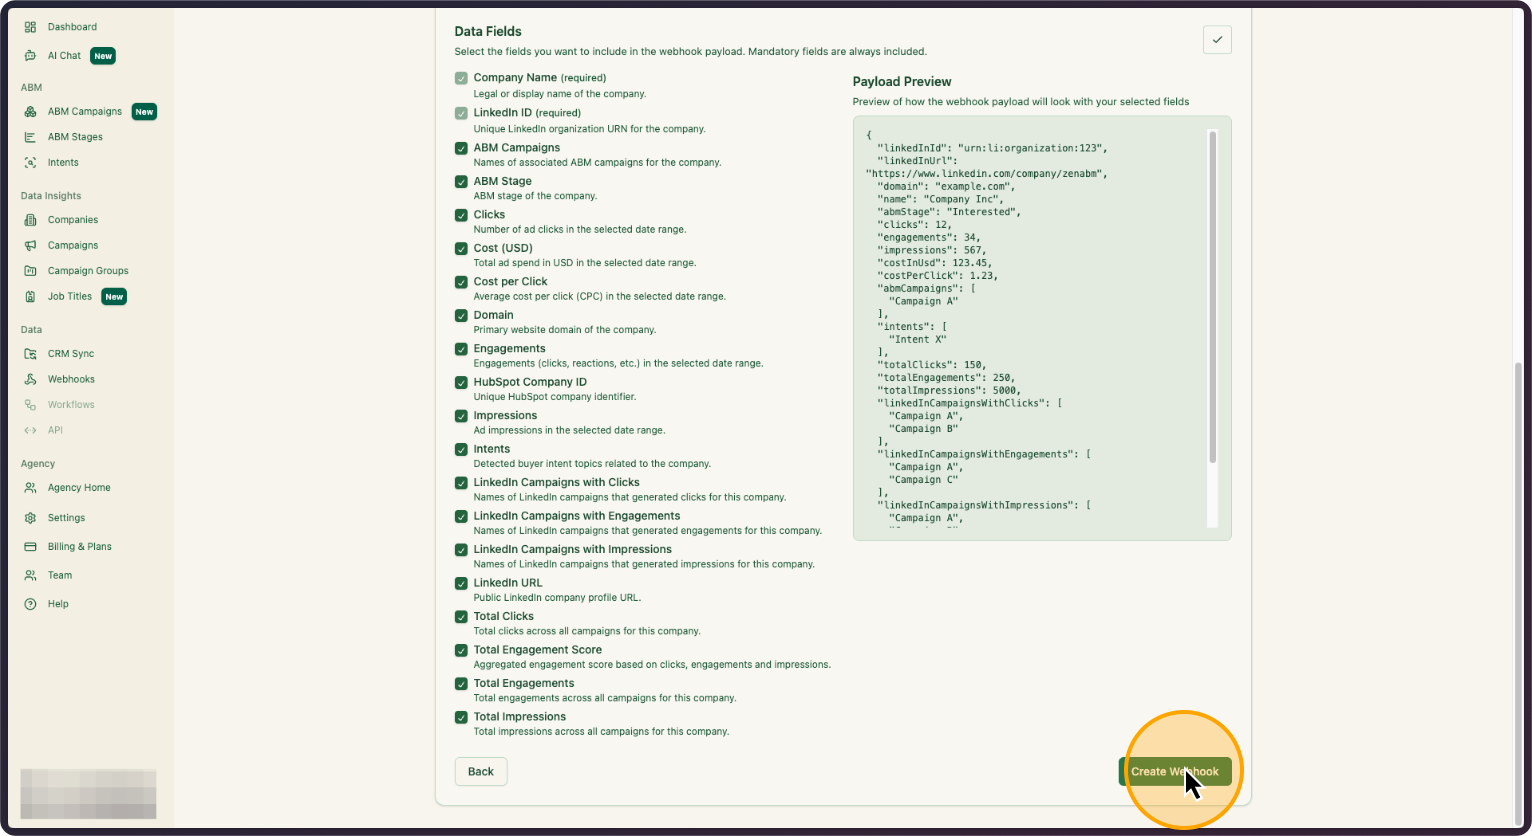
Individual, because that’s what’s best for Clay. I will select all of the “Data Fields”, then create the webhook.
24. Click on “Create Webhook”
Once I do this, I will go back to Clay for Step 2.
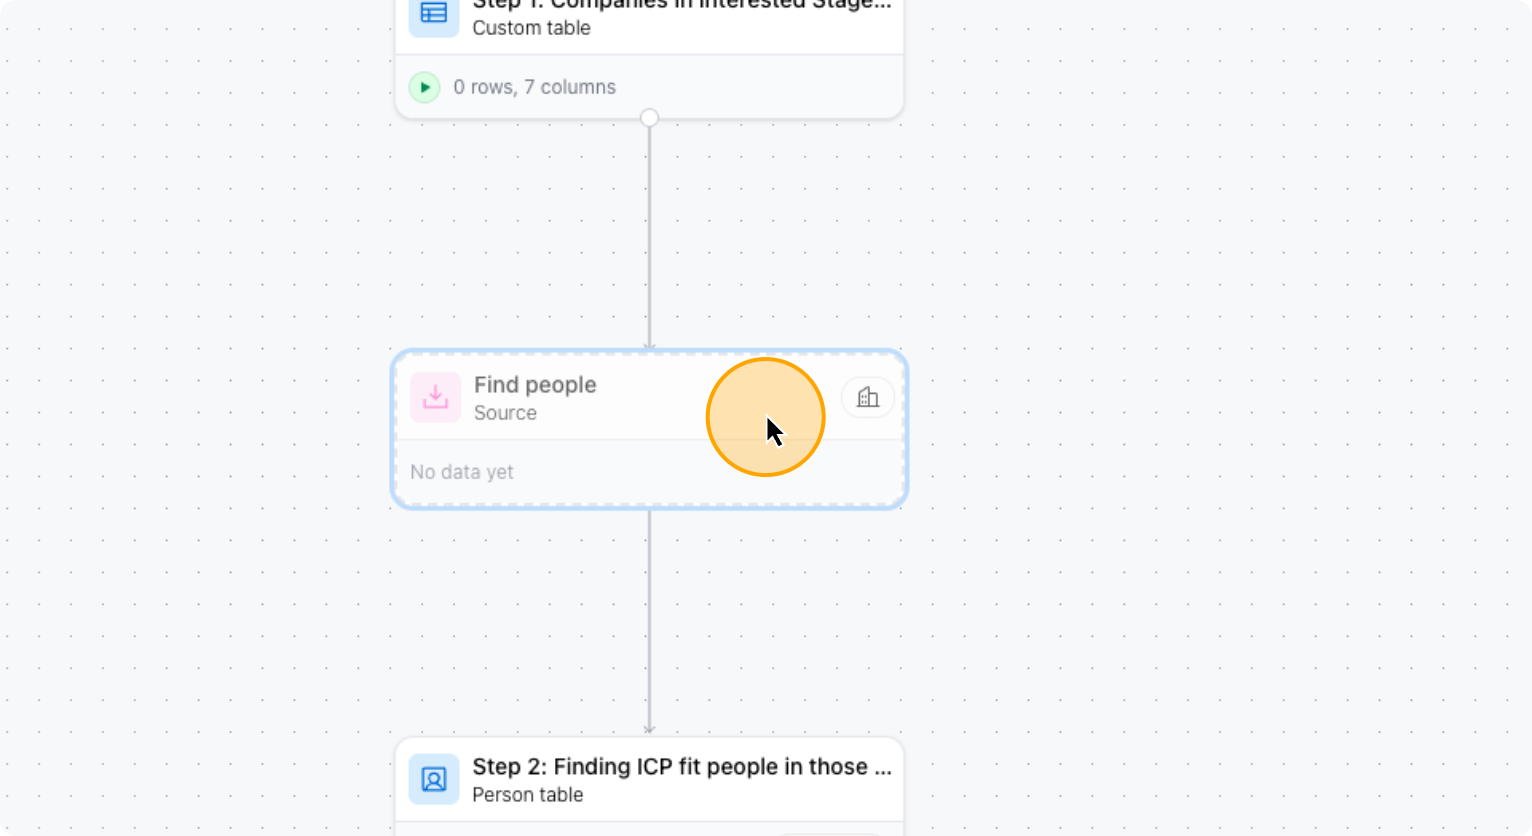
All of these company URLs will be pulled in automatically. I will click on Overview, then Find People, and then Edit Inputs.
25. In “Overview”, Click on “Find People”
26. Click on “Edit inputs”
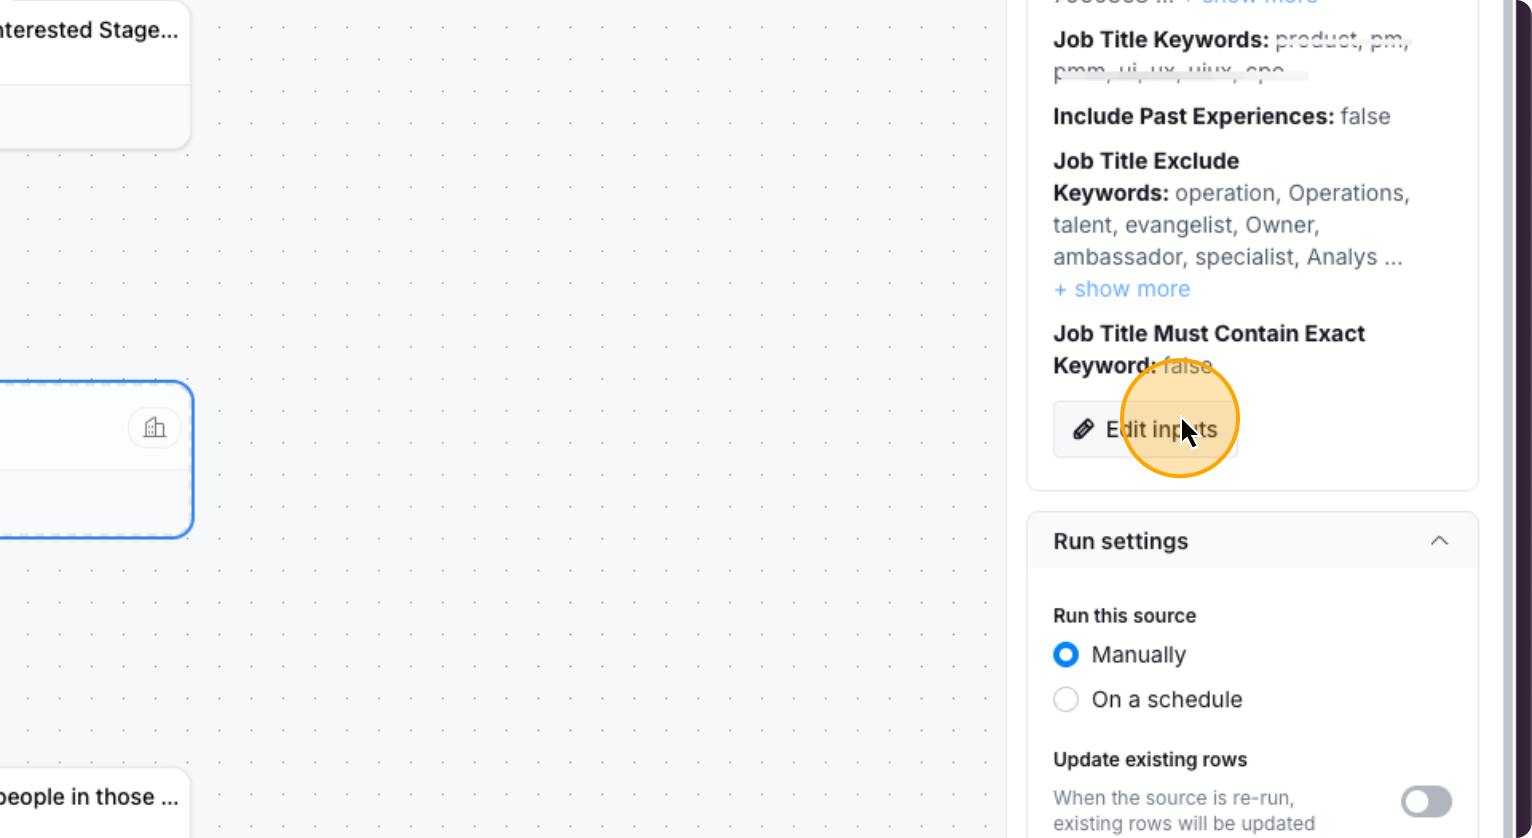
Here, select the filters for your ICP. Including Job Titles, Locations etc.
27. Edit the filters for your ICP here
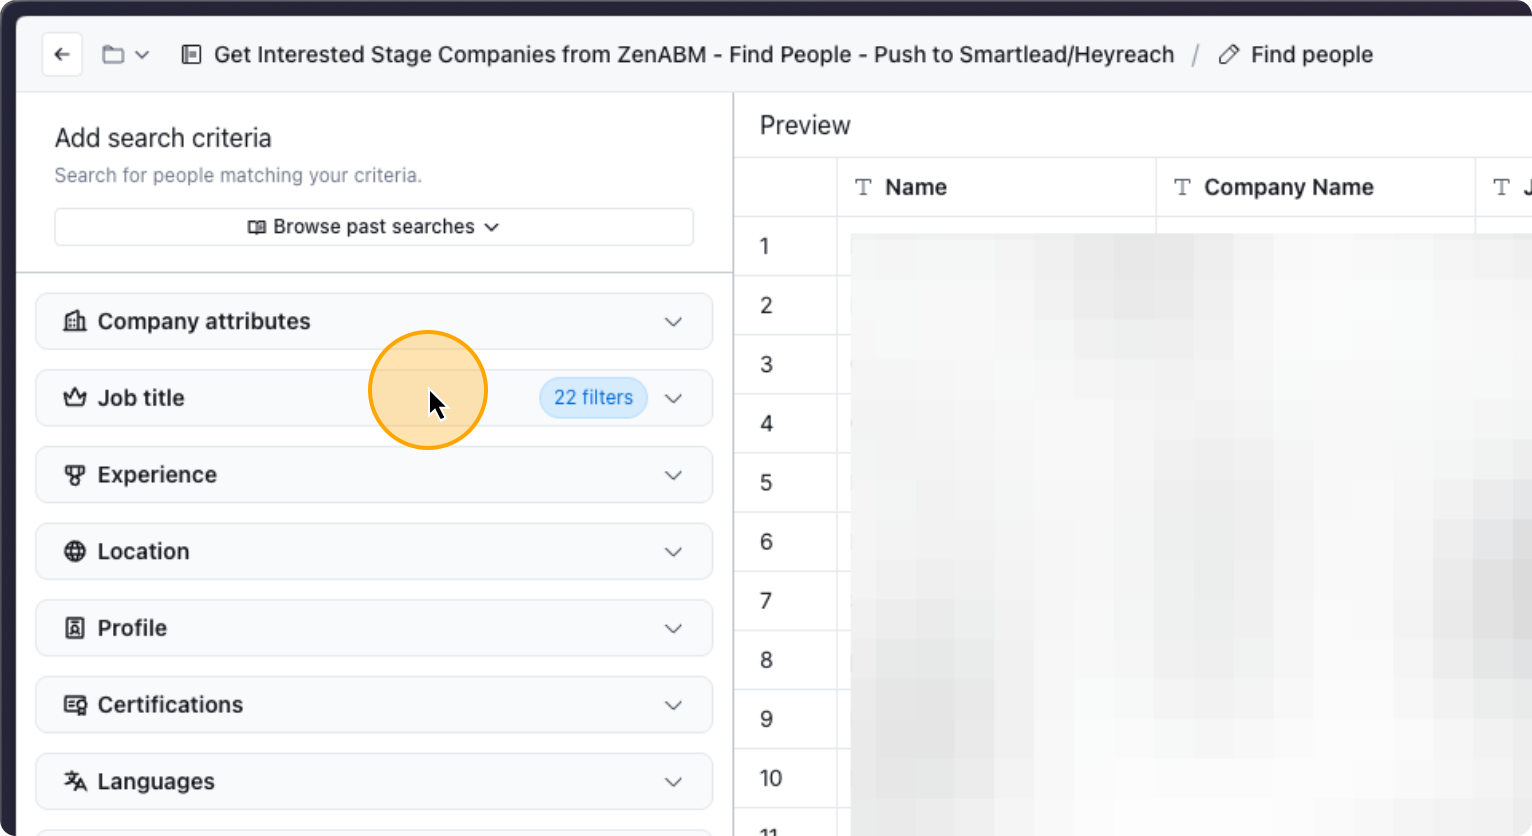
List all the job titles you want to include, as well as those you want to exclude. Add any other relevant details as needed.
Adjust the filters as needed, then click Continue.
28. Click on “Continue ✓”
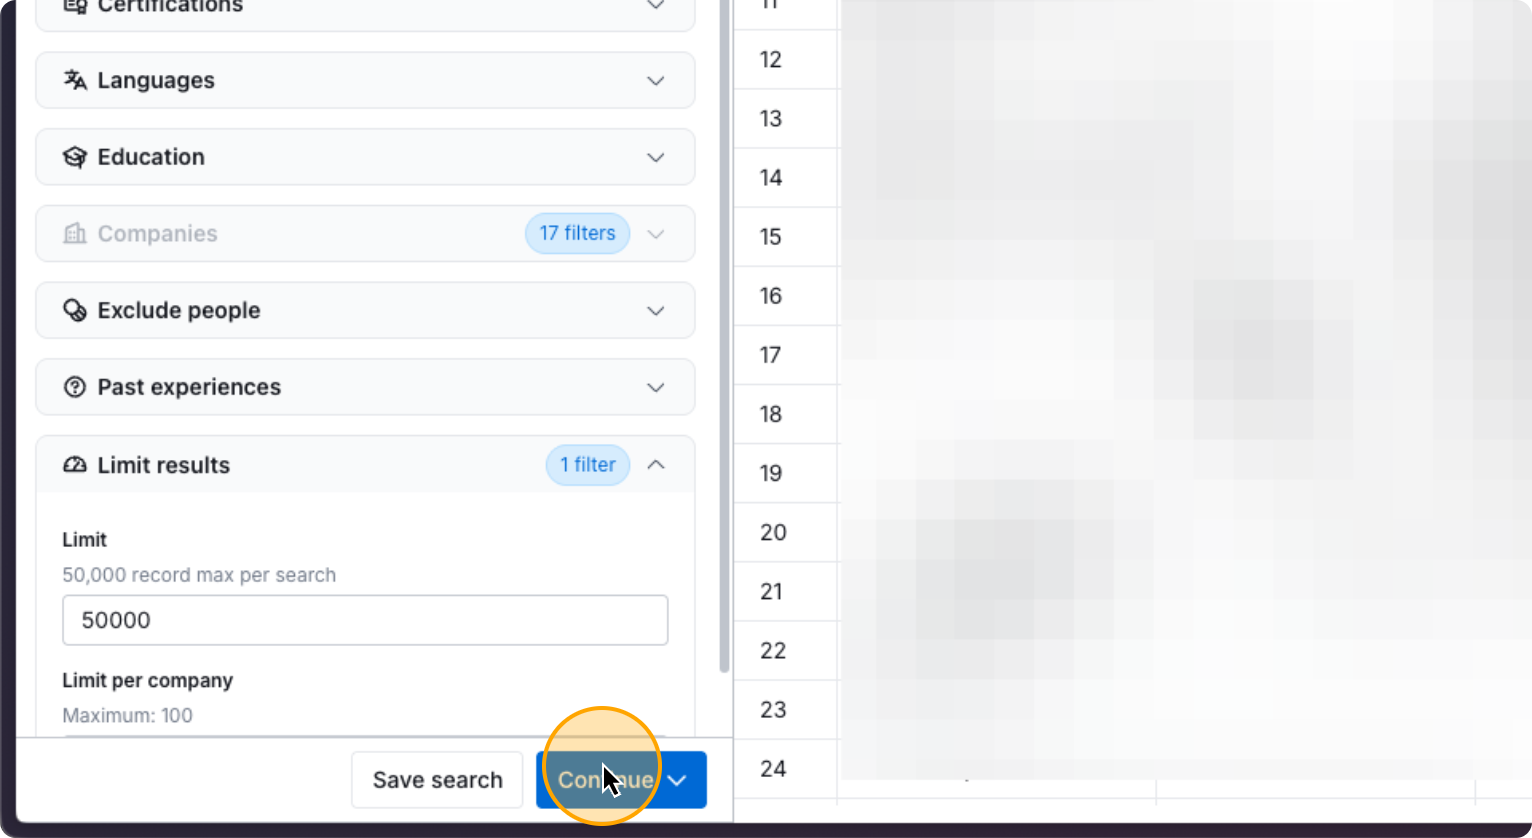
Once you do that, click on…
29. Click on “Replace existing rows”
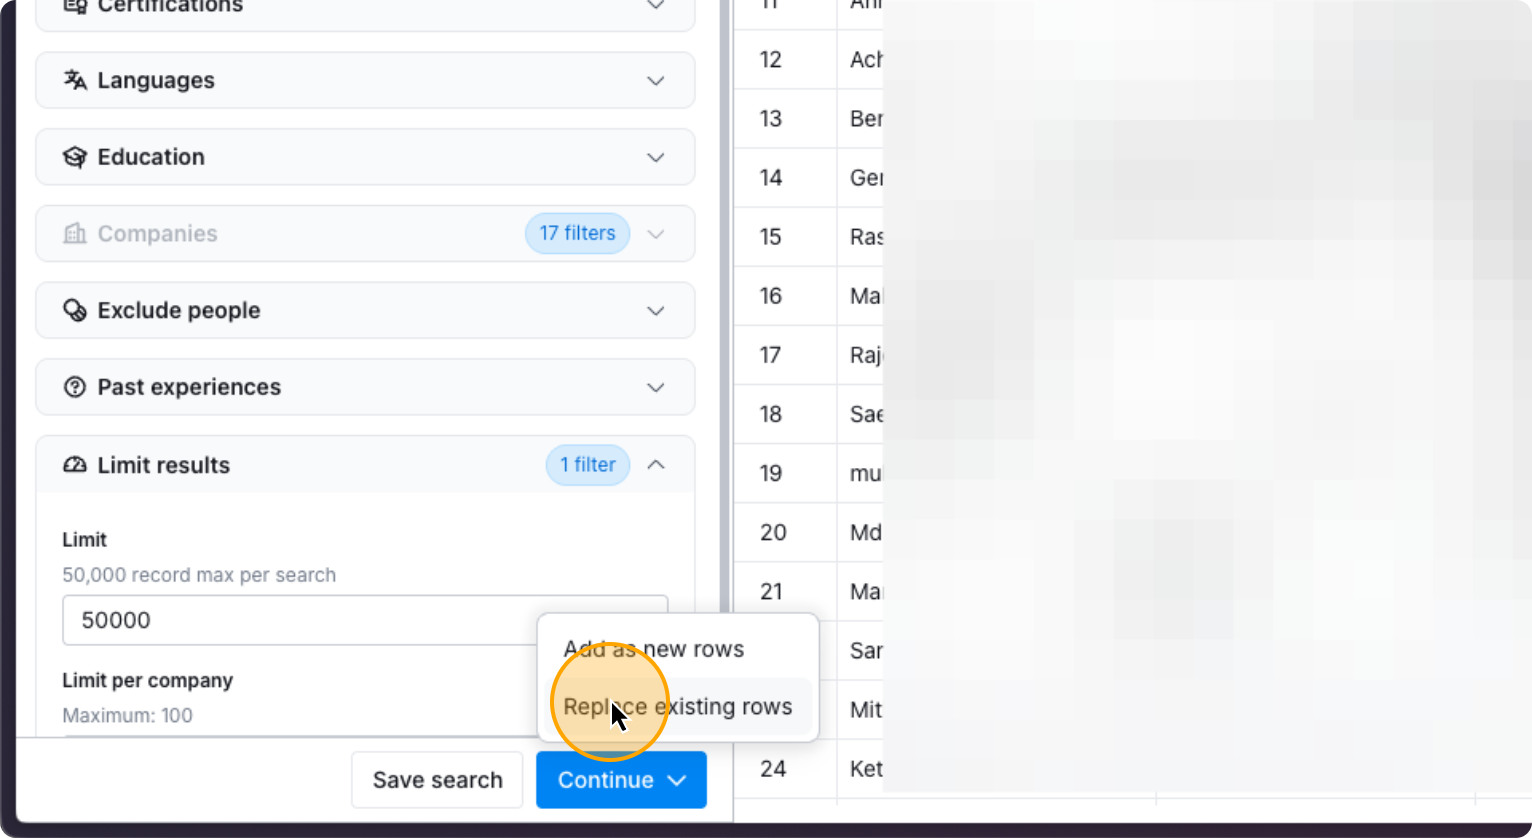
Click on “Replace Rows”, and you’re done.
30. Click on “Replace rows”
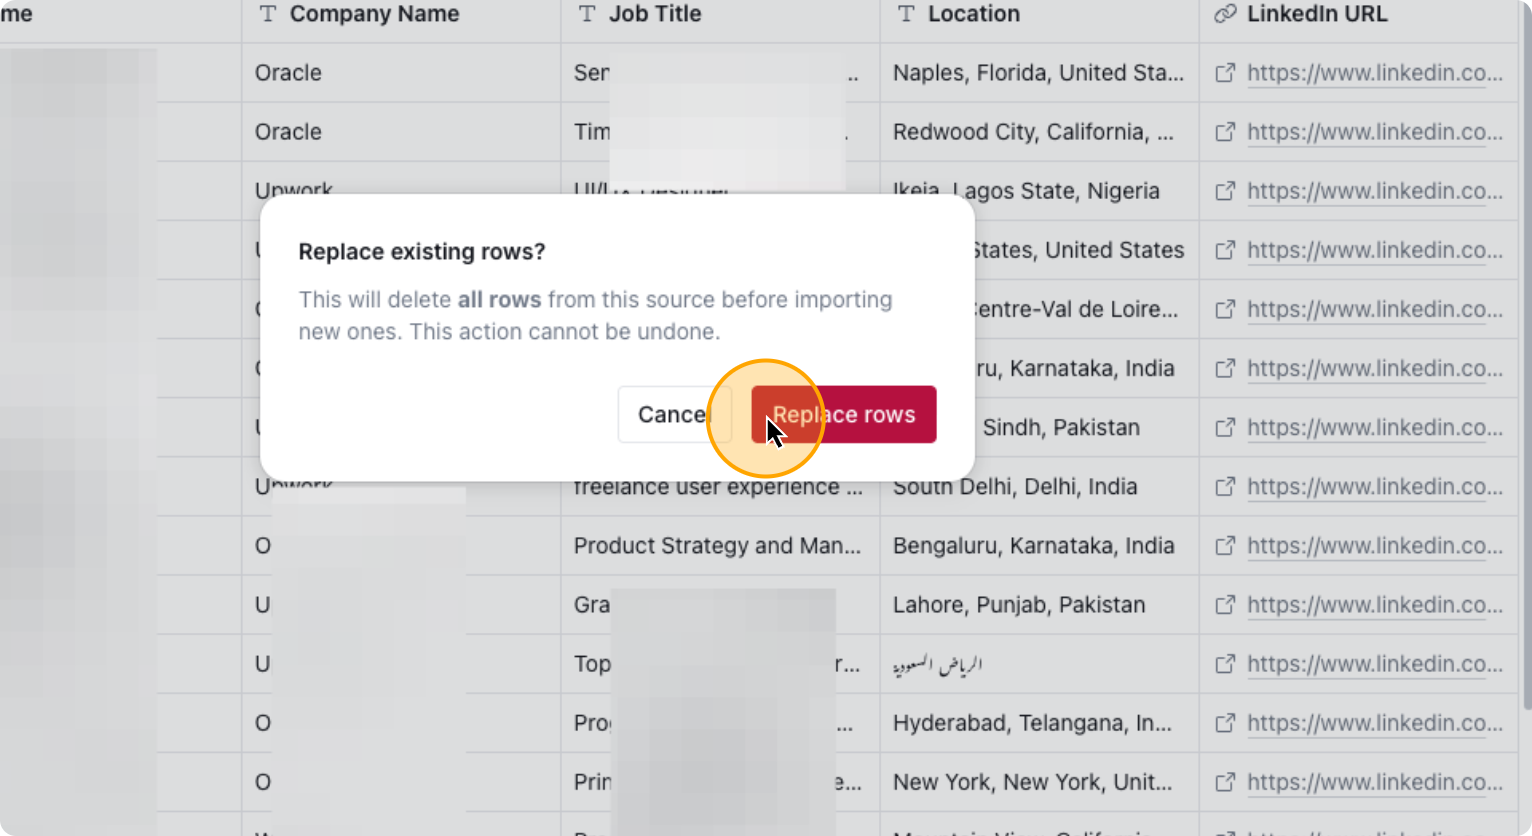
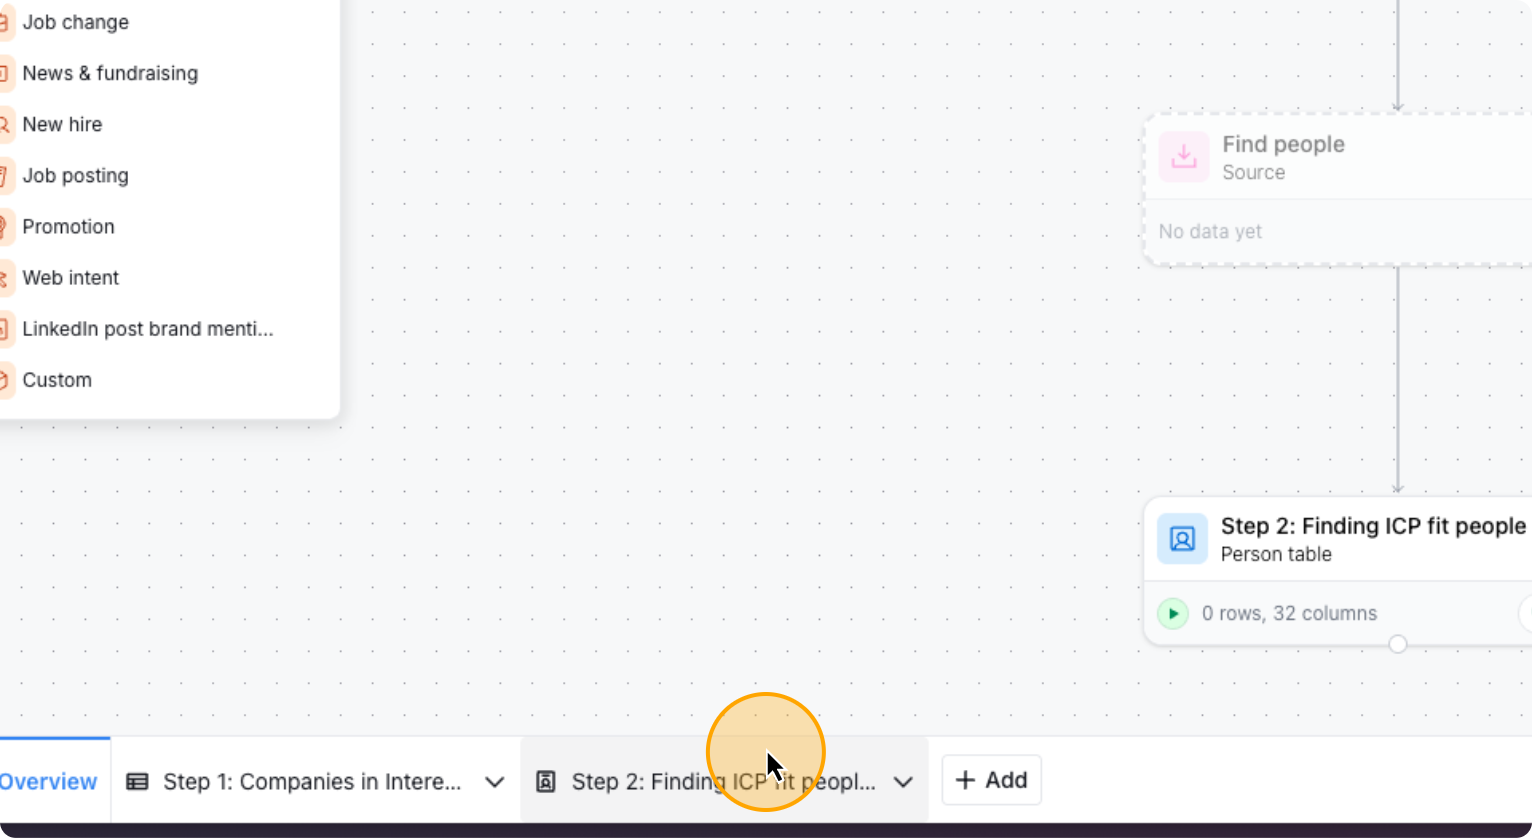
Now It will prospect into your ICP from the Interested Stage companies automatically. Go to Step 2 now.
31. Click on “Step 2”
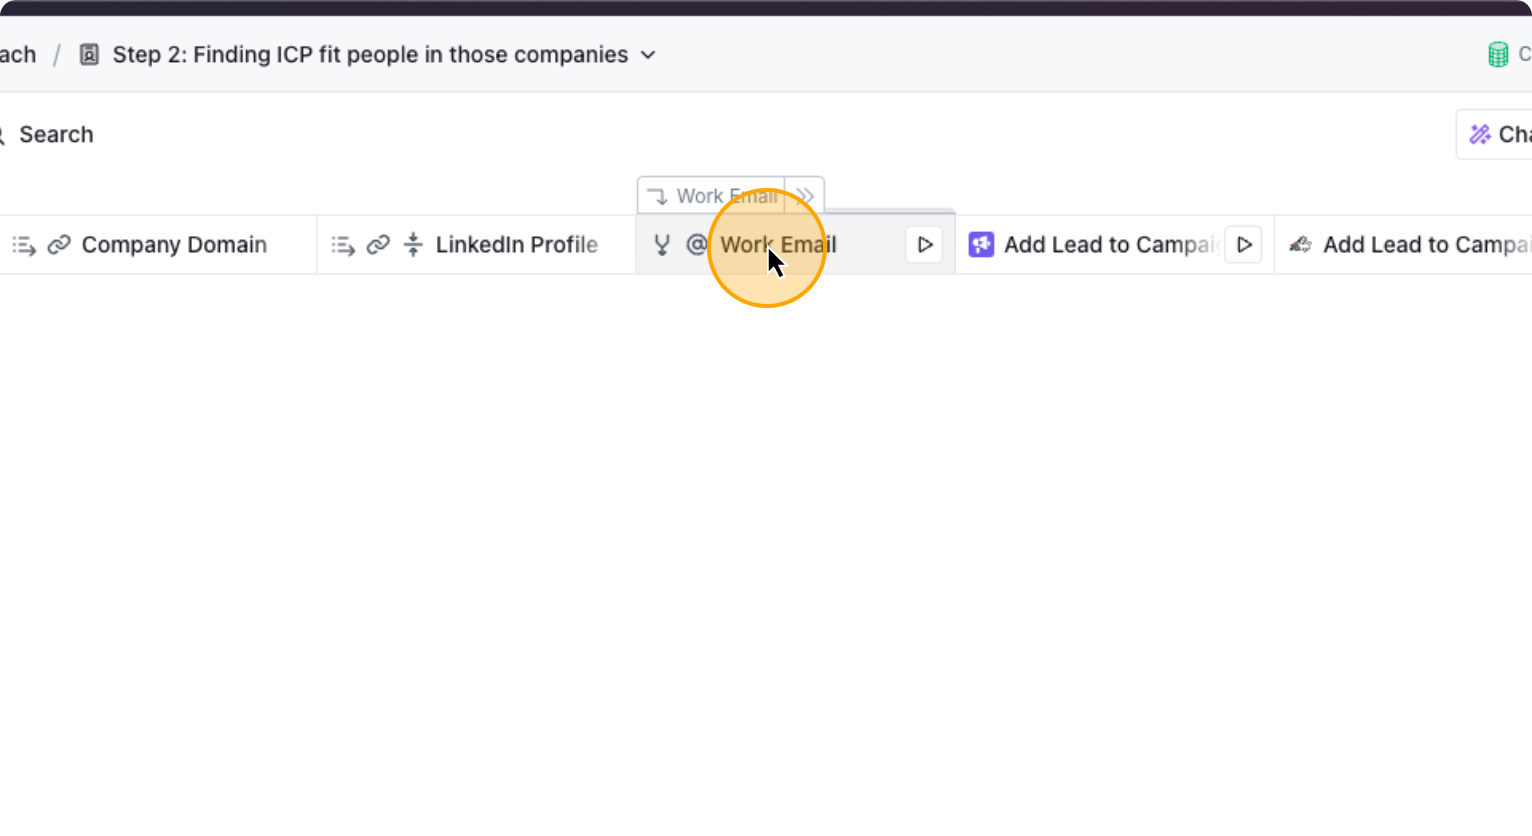
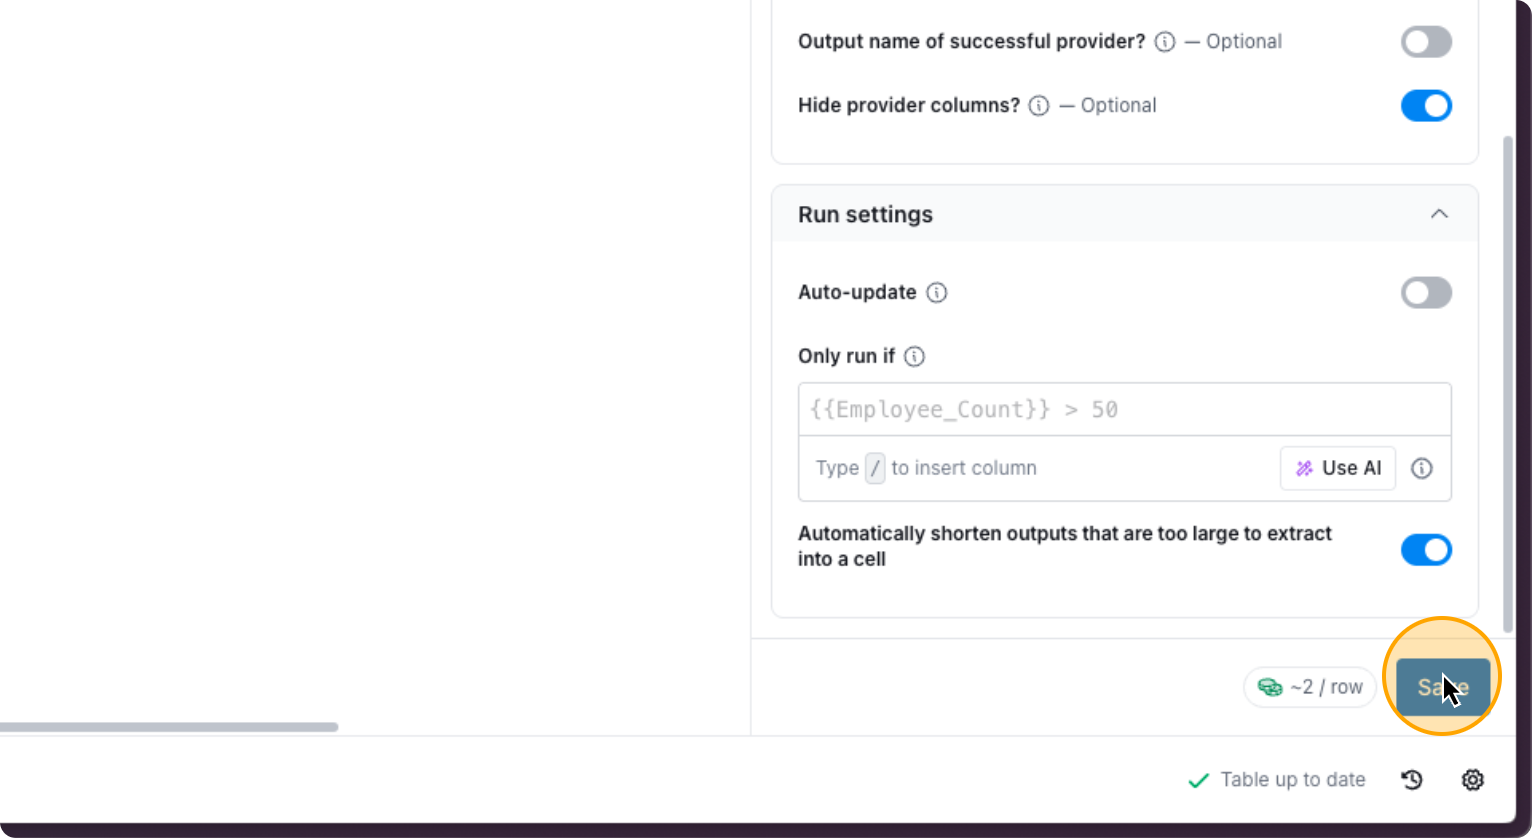
This table, finds the work emails of the prospects and pushes them to the relevant Smartlead and HeyReach campaigns automatically. By default the “Work Email” column is turned off so you don’t spend Clay credits unexpectidly. If you want to automatically find the work emails for your ICP in those interested stage companies, you need to enable “Auto Update” for this column.
32. Click on “Work Email”
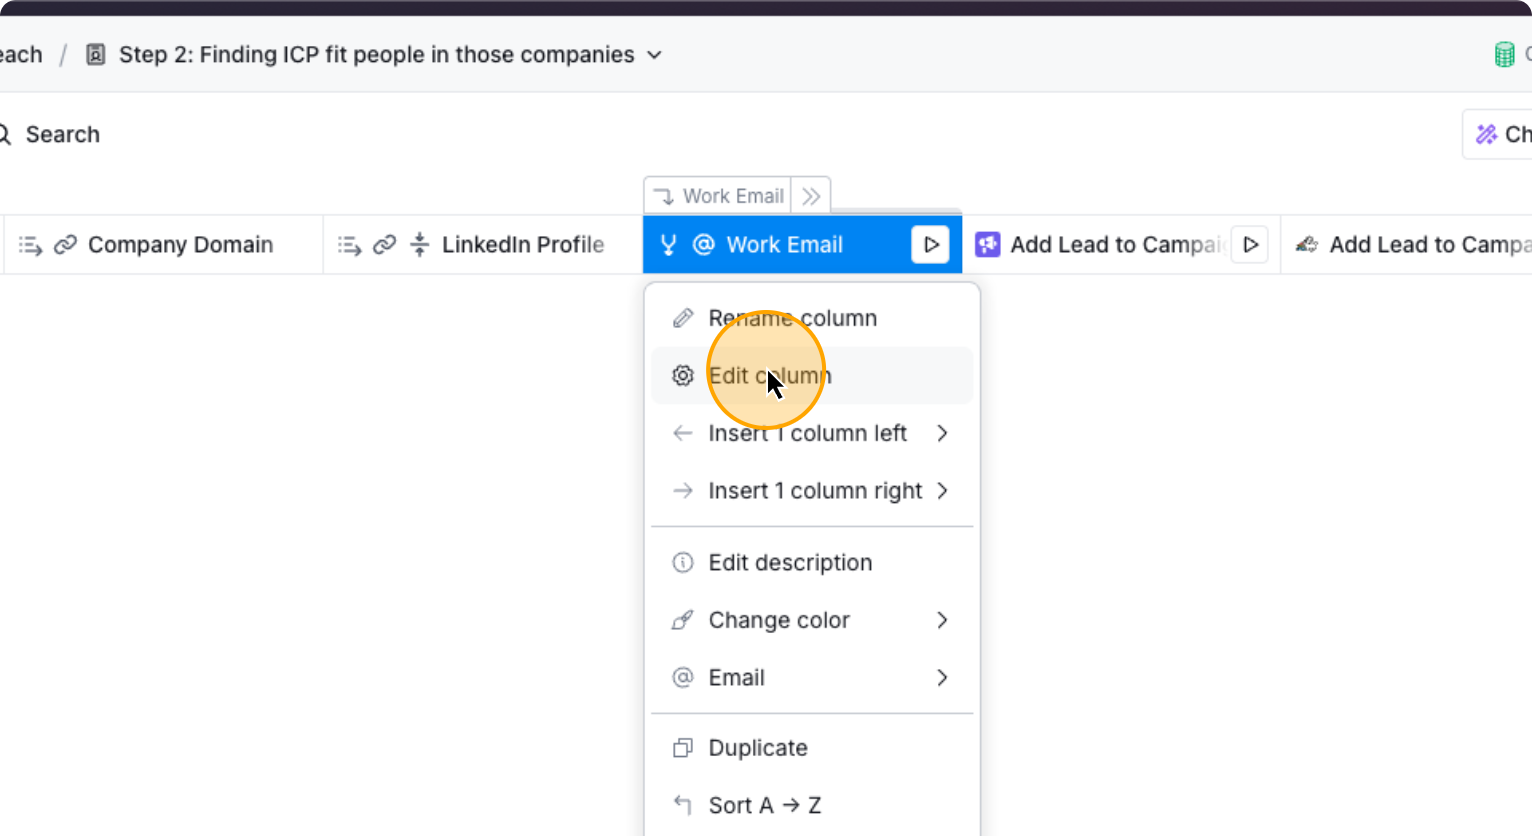
Click on “Edit Column.” Then, you…
33. Click on “Edit column”
34. Click here
35. Click here

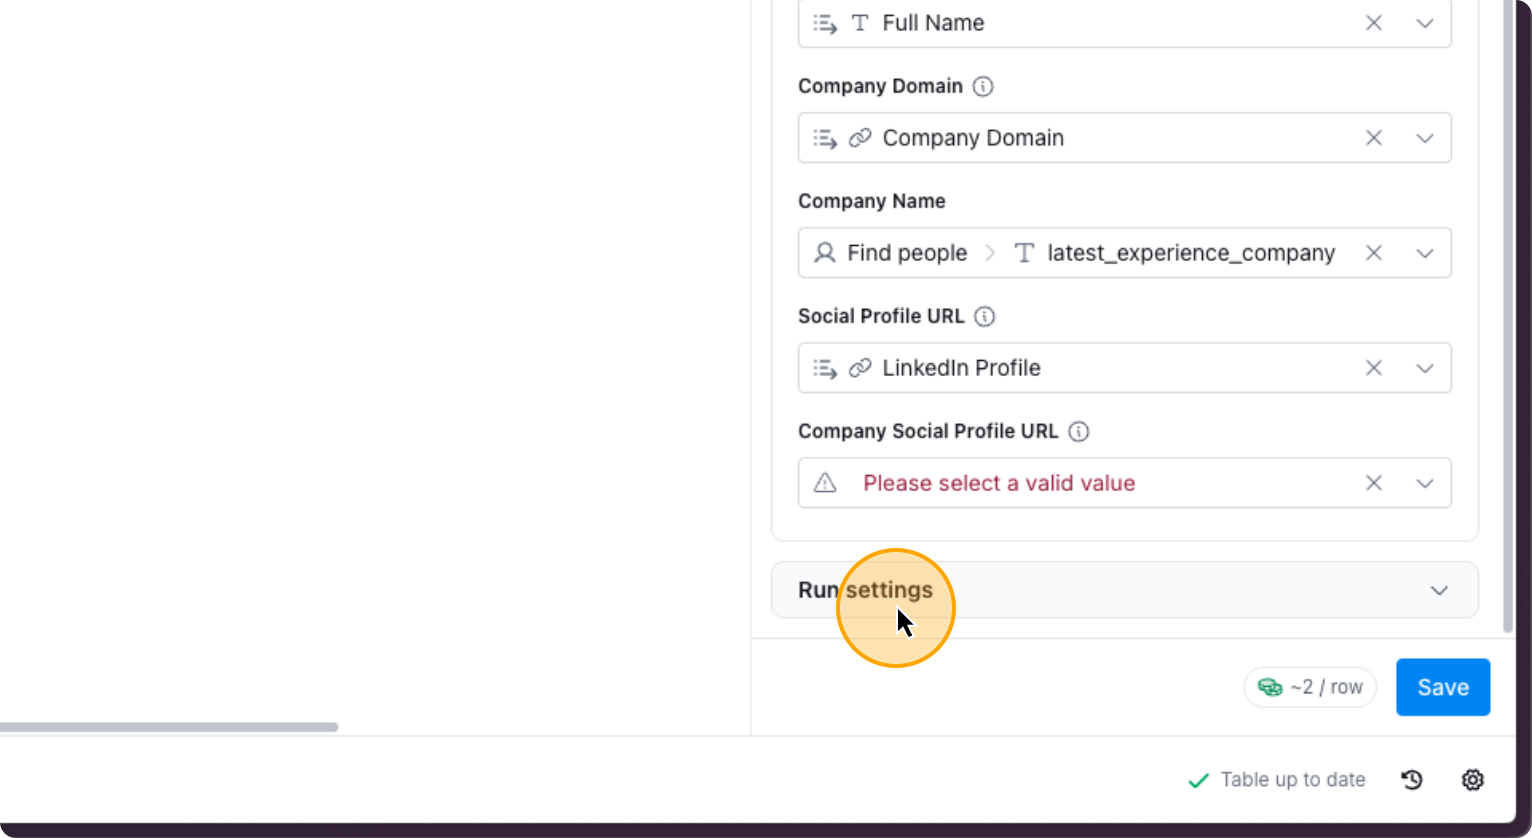
Turn on “Auto-update”.
If you want to change certain settings, you can do so in “Full Configration”. If not, let it be. Click on “Save”.
36. Click on “Save”
Now to select the right Smartlead Campaign to add the prospect to, follow these steps.
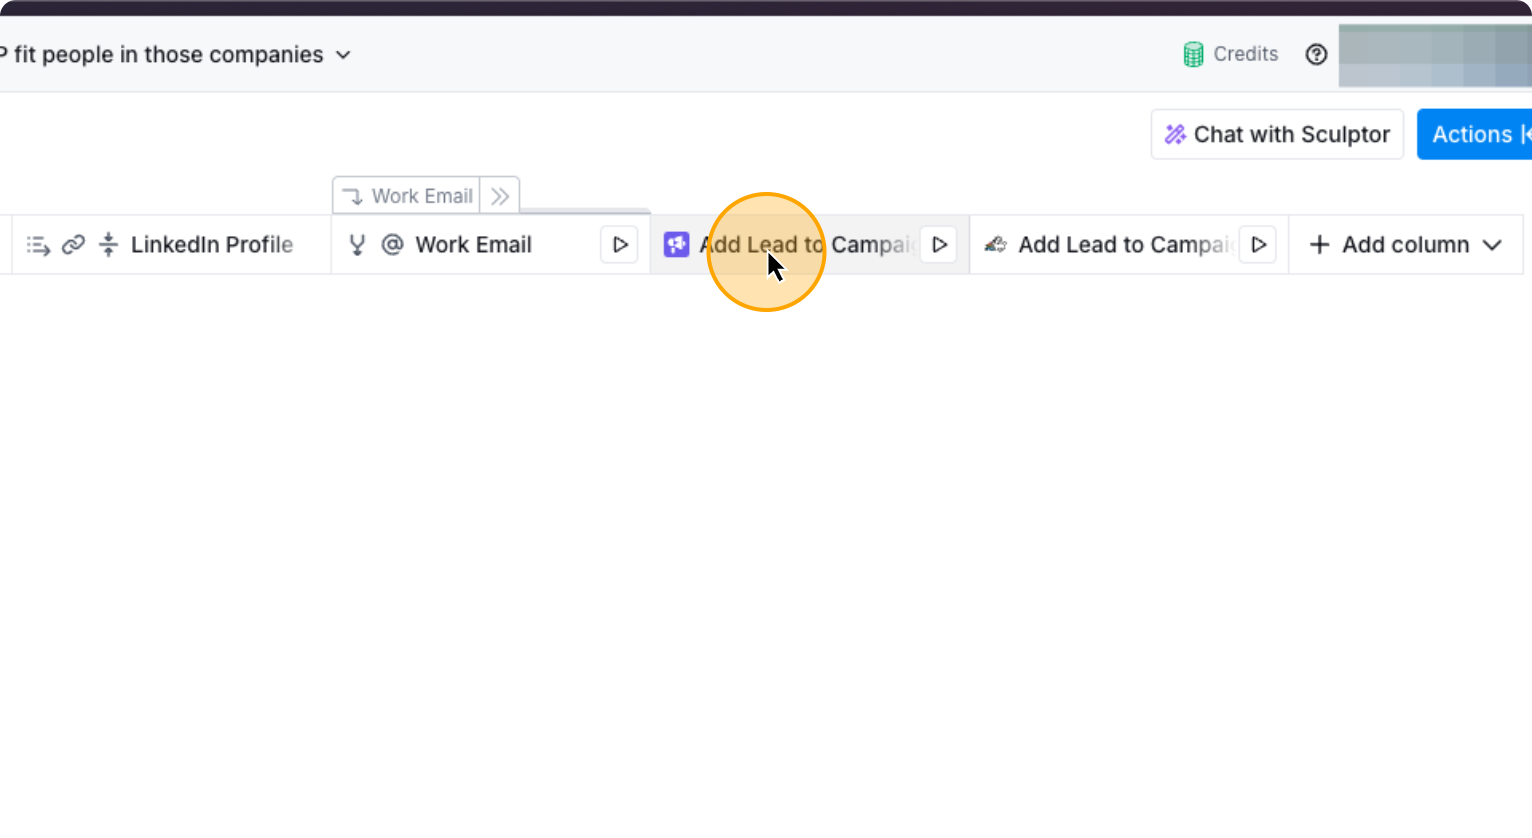
37. Click on the column “Add Lead to Campaigns”
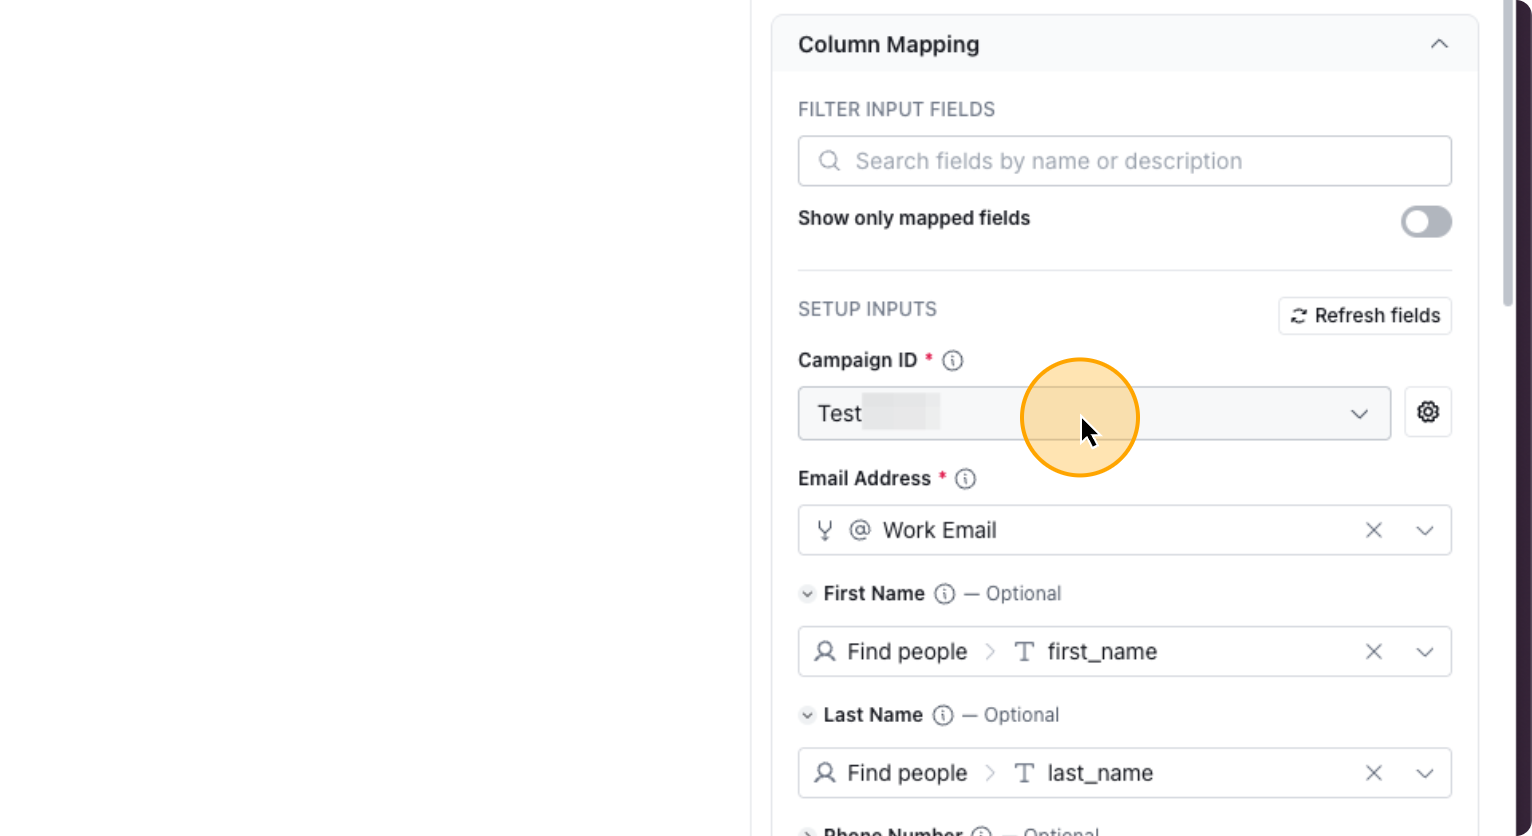
Here you need to select which Smartlead campaign do you want to add the prospect automatically to.
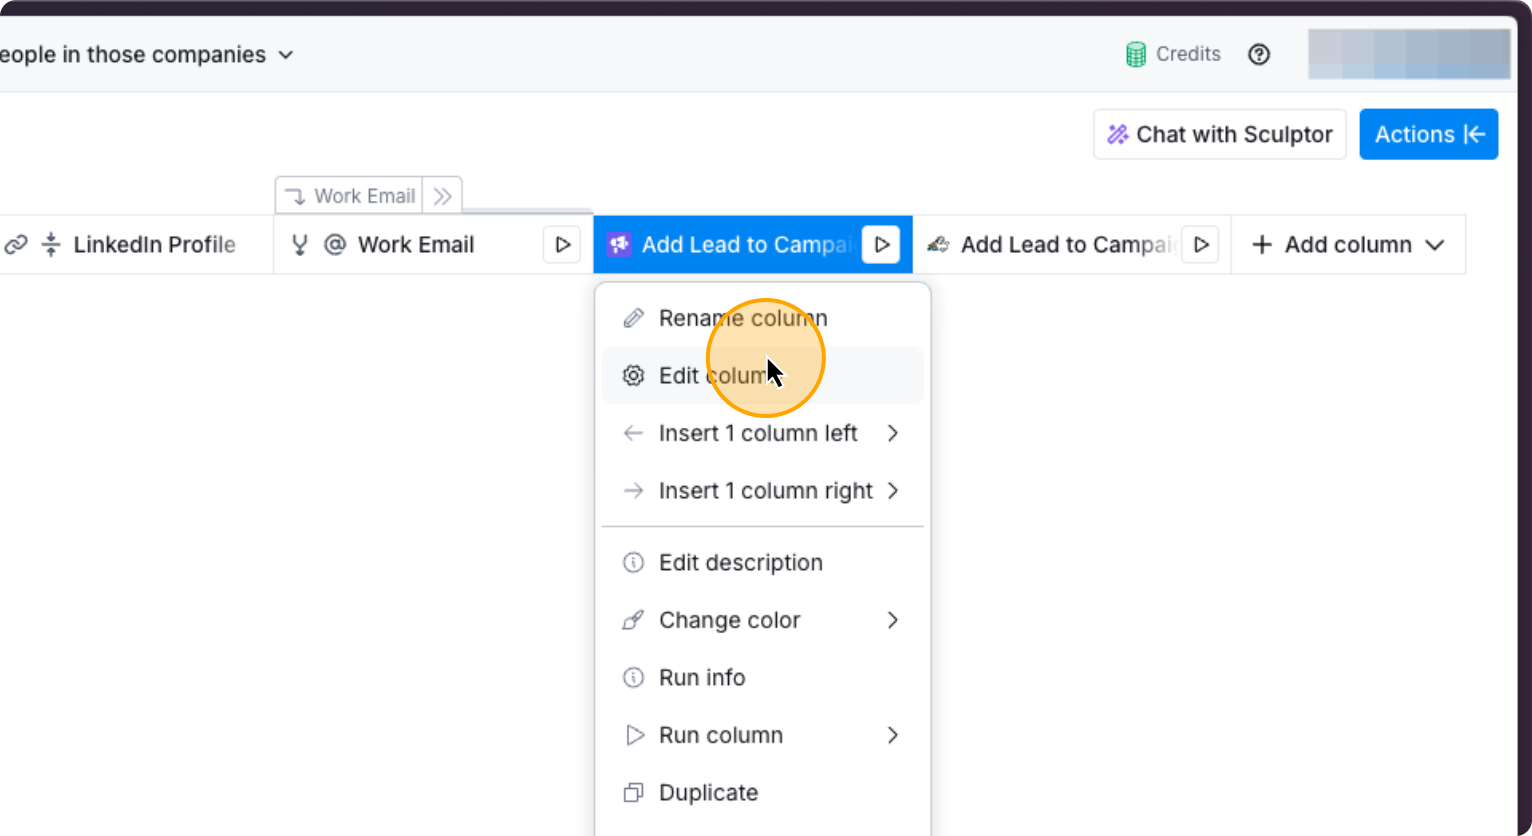
38. Click on “Edit column”
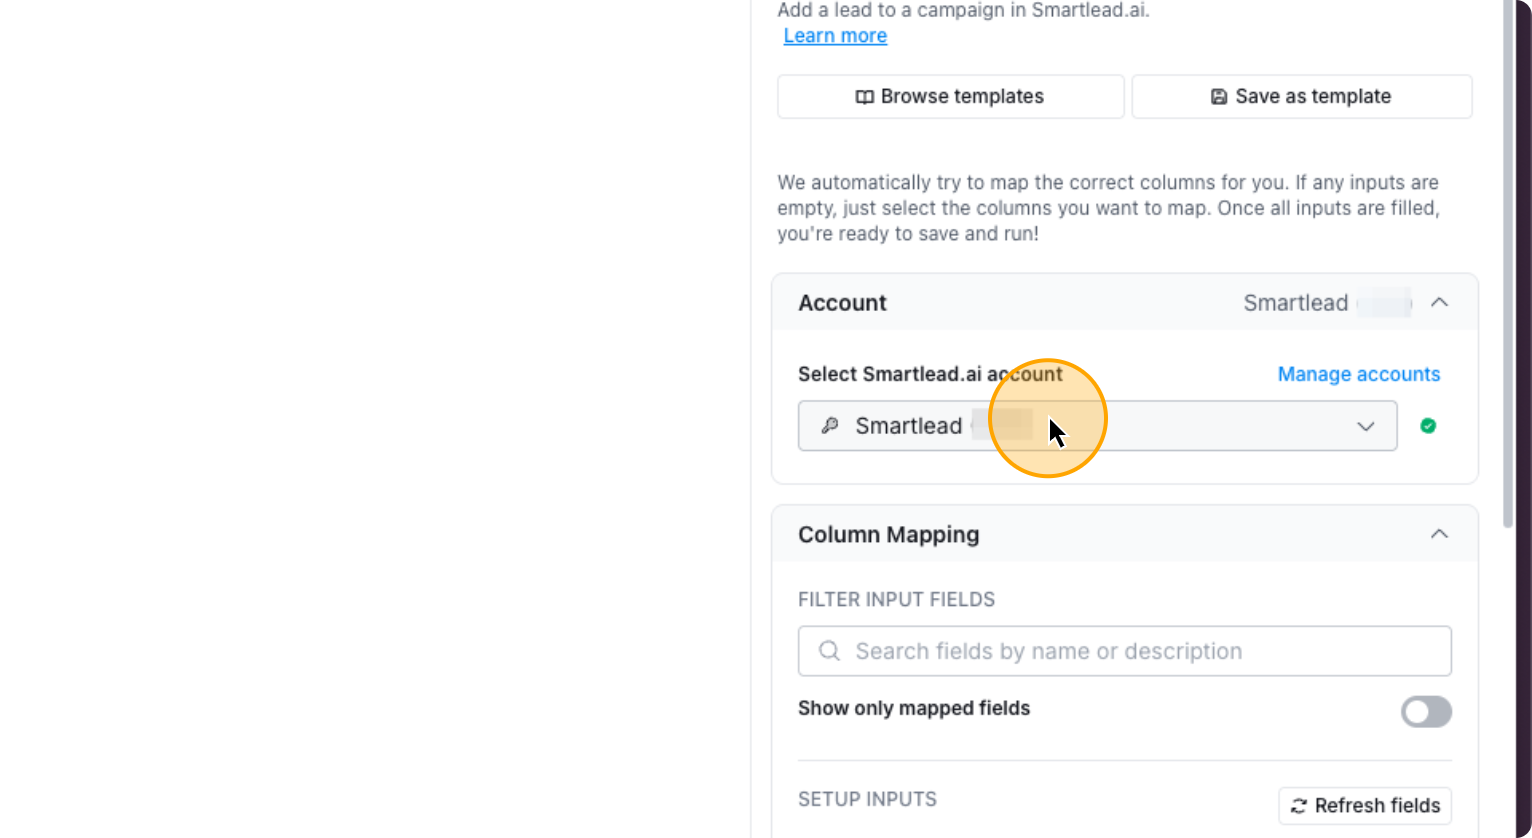
If your Smartlead account is already connected, select your account. Then, choose the campaign you want.
39. Click on “Select Smartlead.ai account”
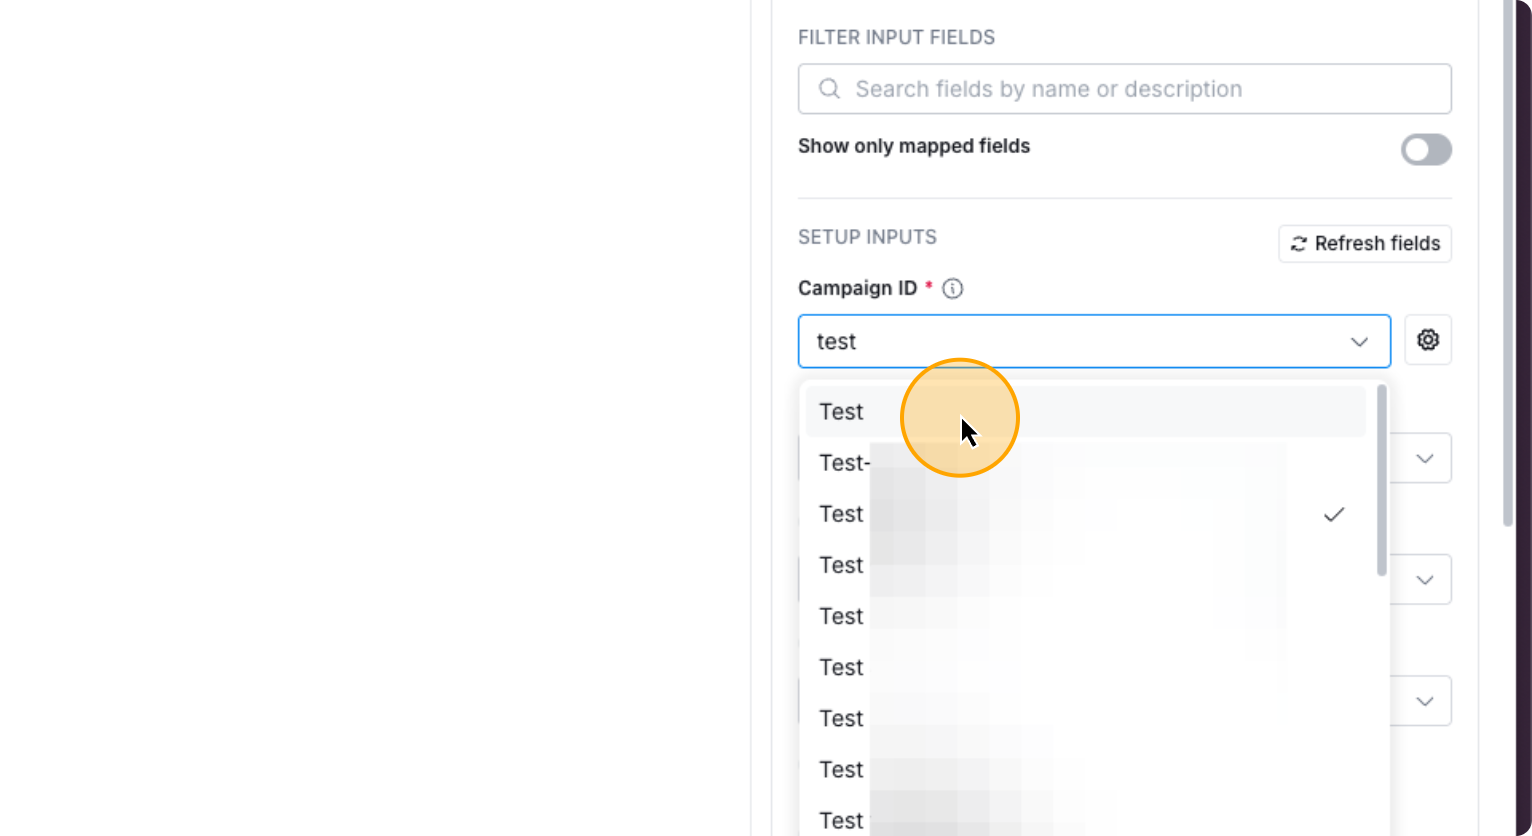
40. Click on “Campaign ID” to select the right campaign
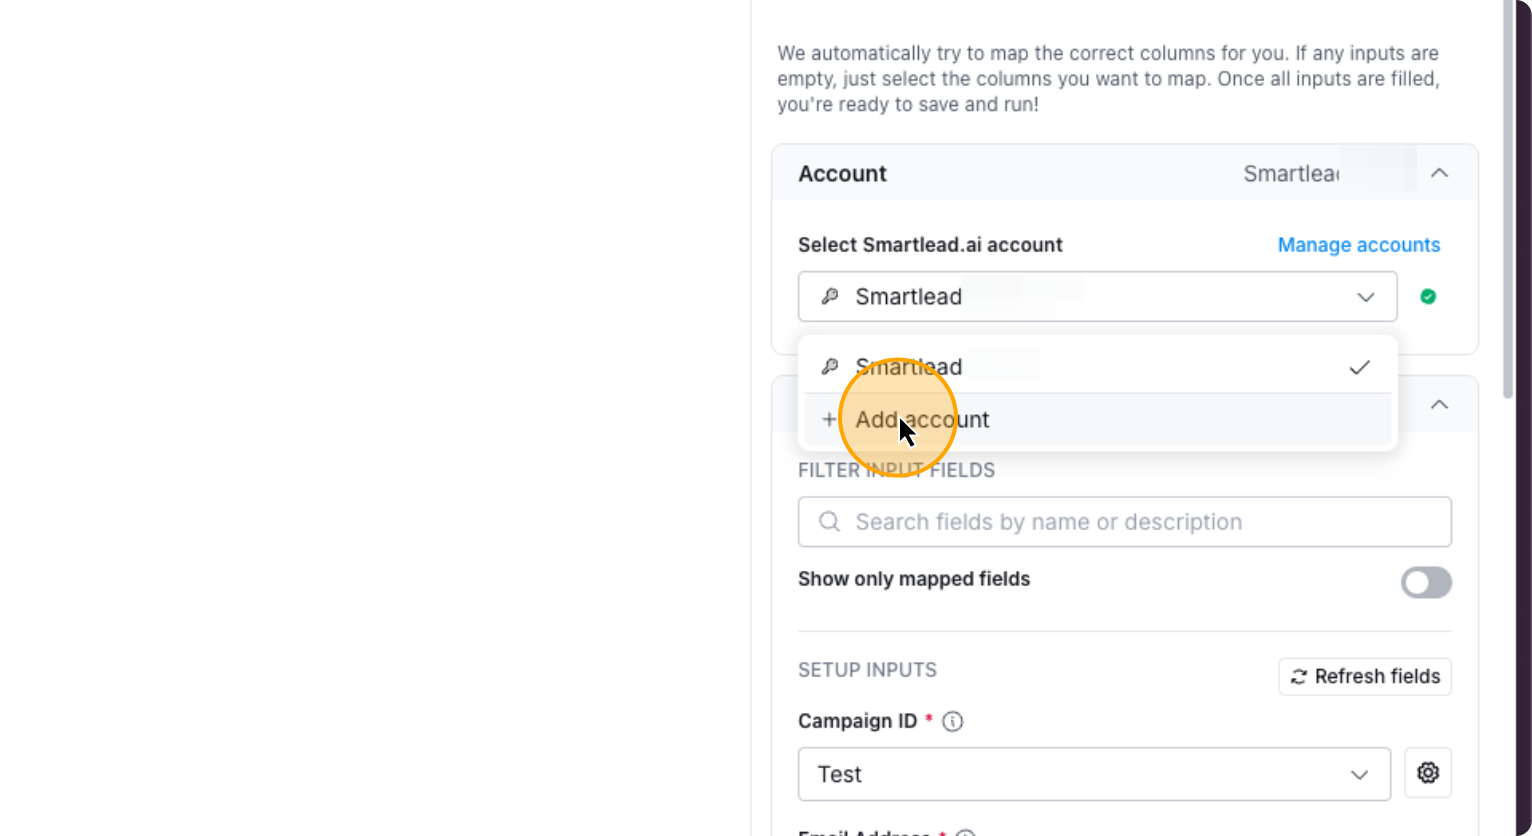
If your smartlead account isn’t connected, click “Add Account” and name your connection.
41. Click on “+ Add account”
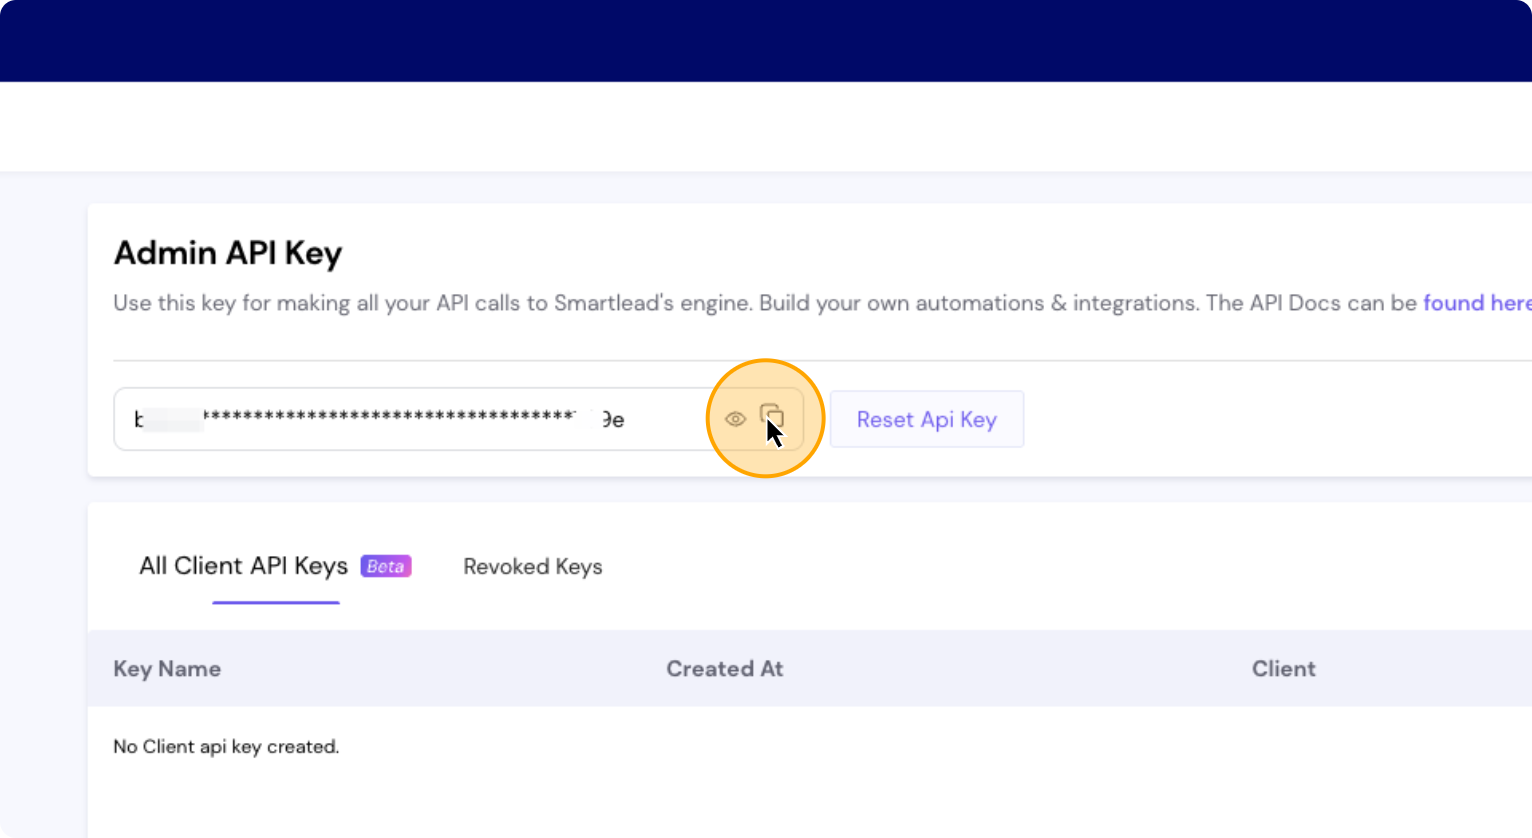
To get your Smartlead API key, go to Smartlead and click on Settings.
42. Click here
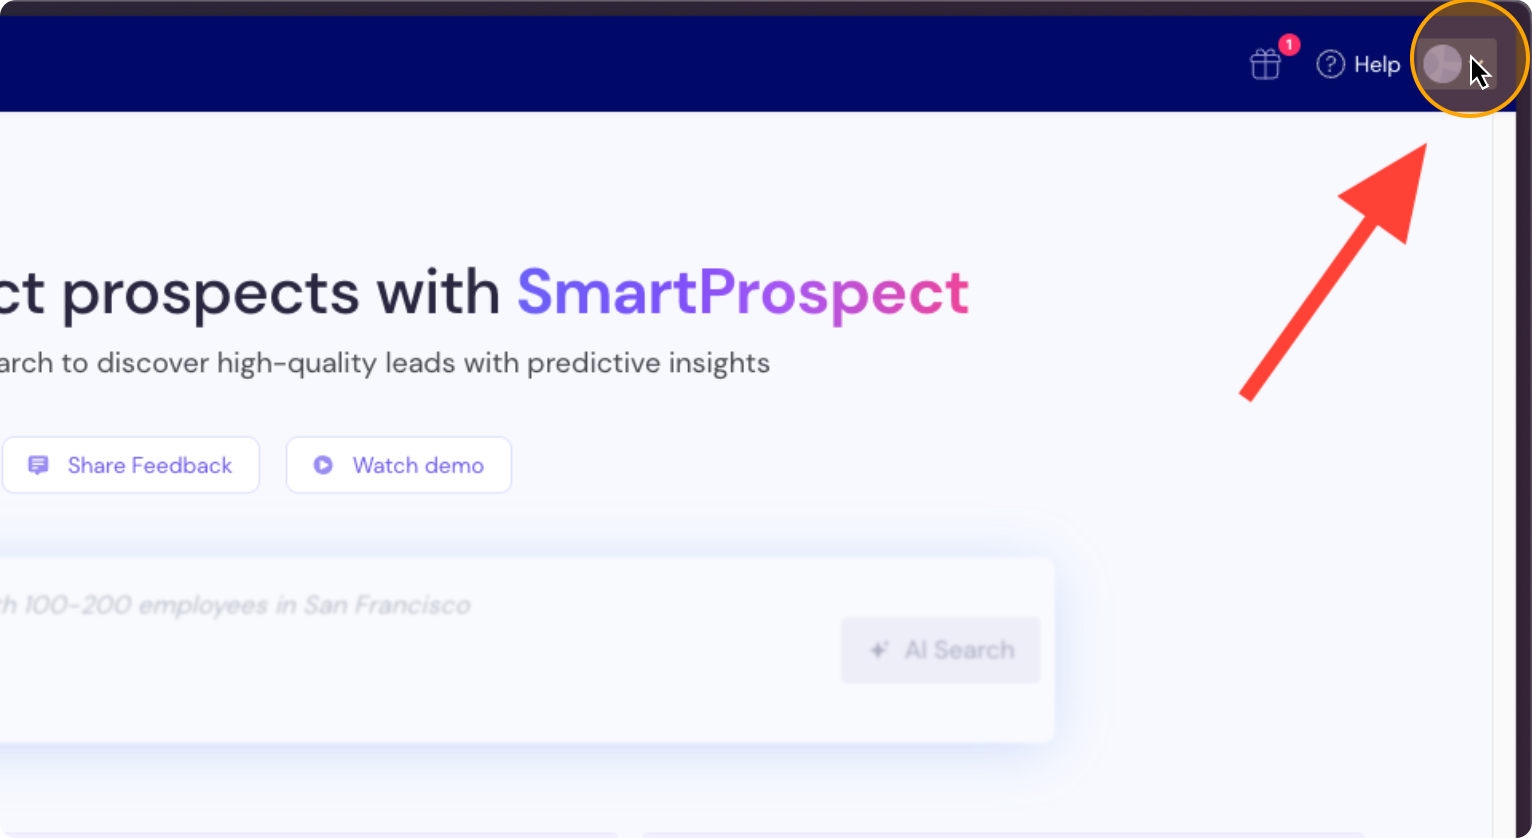
43. Click on “Settings”

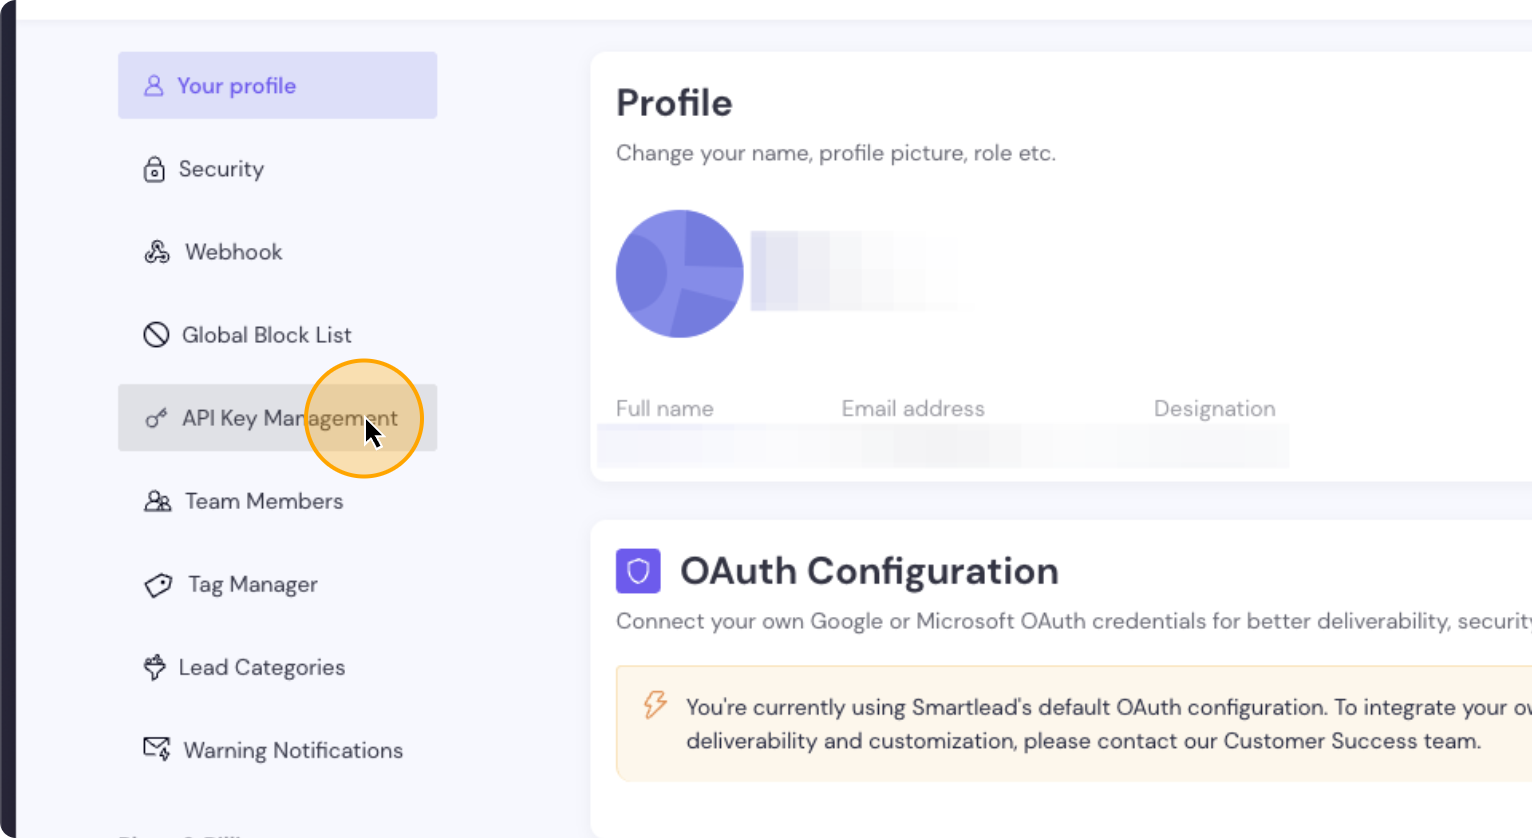
Click on API key management, then copy the API key.
44. Click on “API Key Management”
Copy the API key from this location. Click on “Copy.”
45. Click here
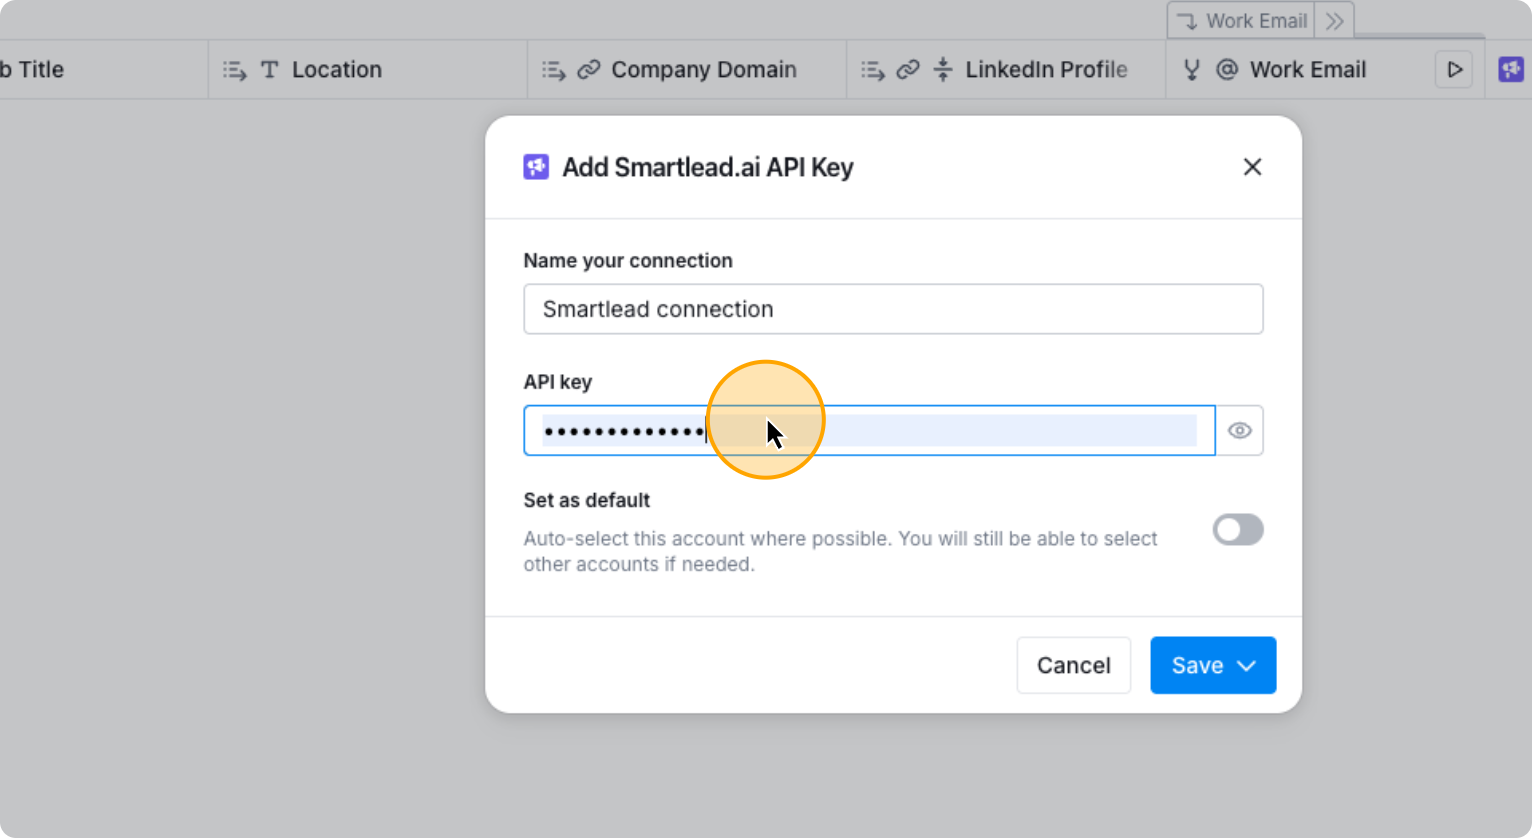
Go back to Clay and name your connection however you like.
In this example let’s name it “Smartlead connection”. Paste the key here. Click save, test, and save.
46. Click here
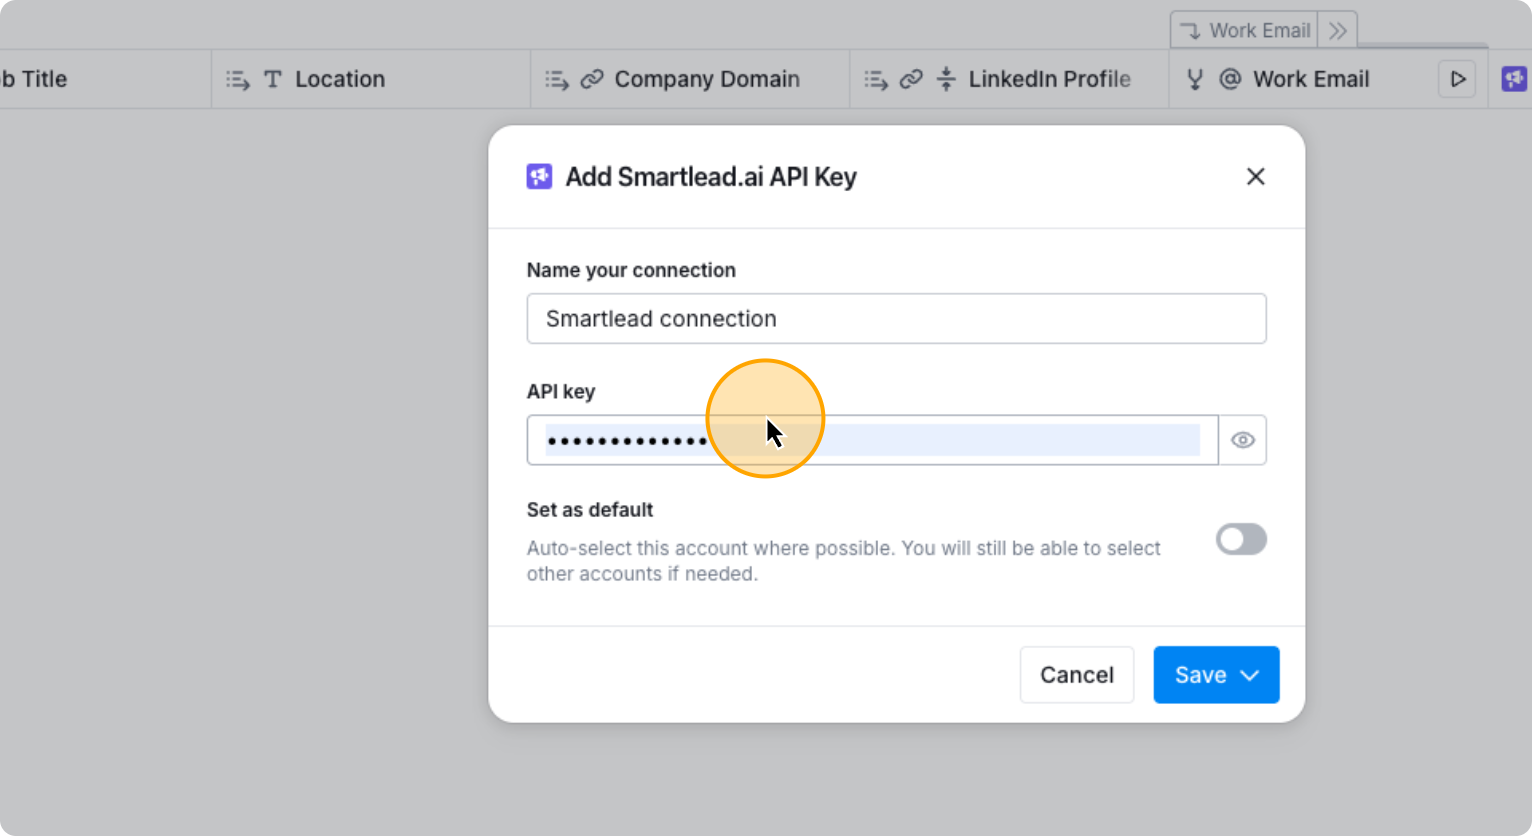
47. Paste the API key you copied from Smartlead here
48. Click on “Test account & save”
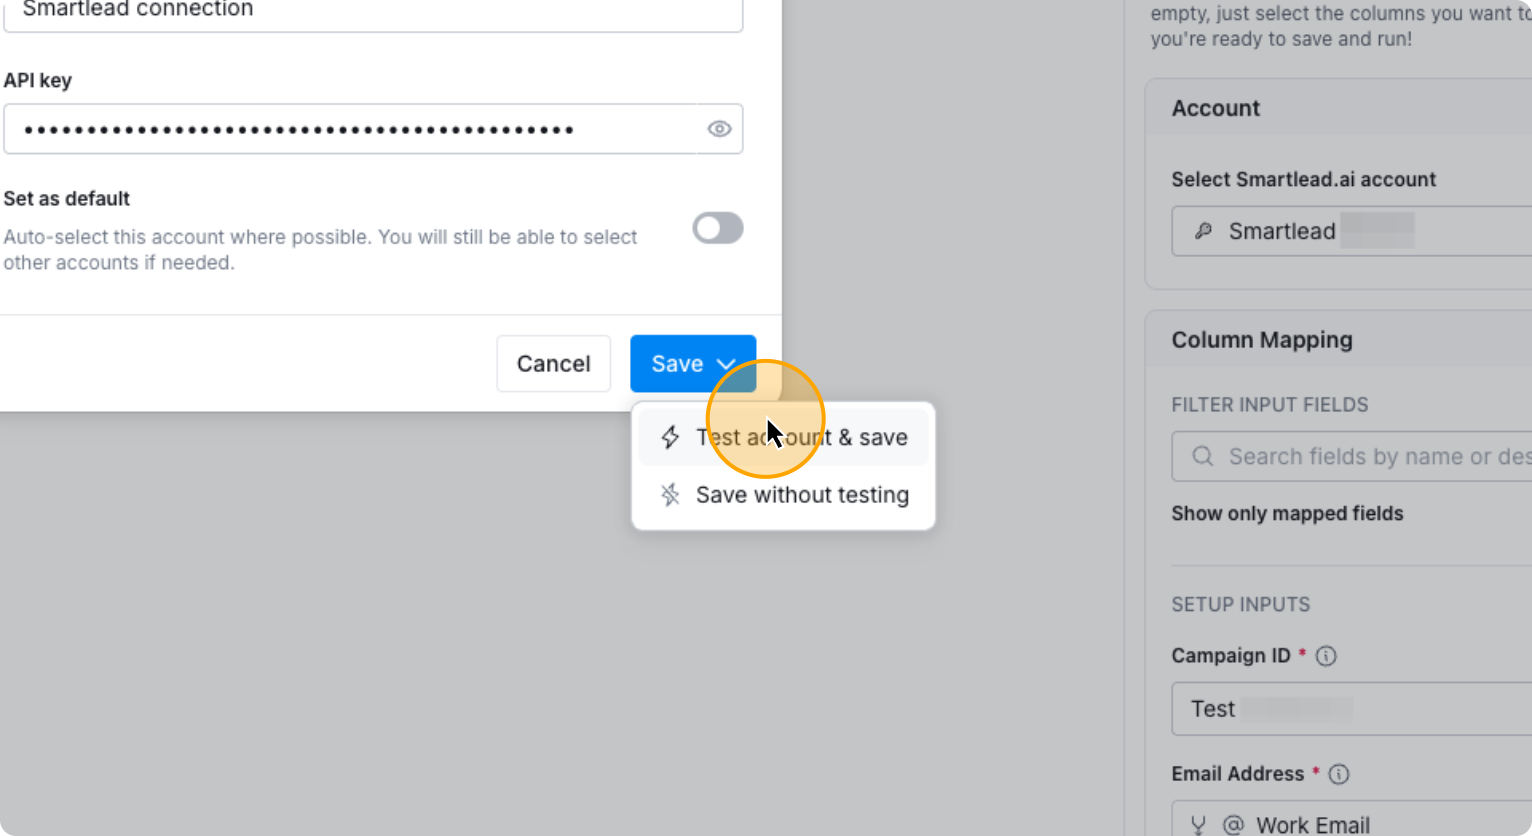
Now your Smartlead account is connected to Clay.
Simply choose the campaign you want to run and the other fields will populate automatically.
49. Select the campaign you want to push the contacts to
If you want to add custom fields, you can do so.
50. Click on “Custom Fields”

If not, you can leave it as is. To set this to run automatically, click on auto-update. Then select save and run.
51. Click here
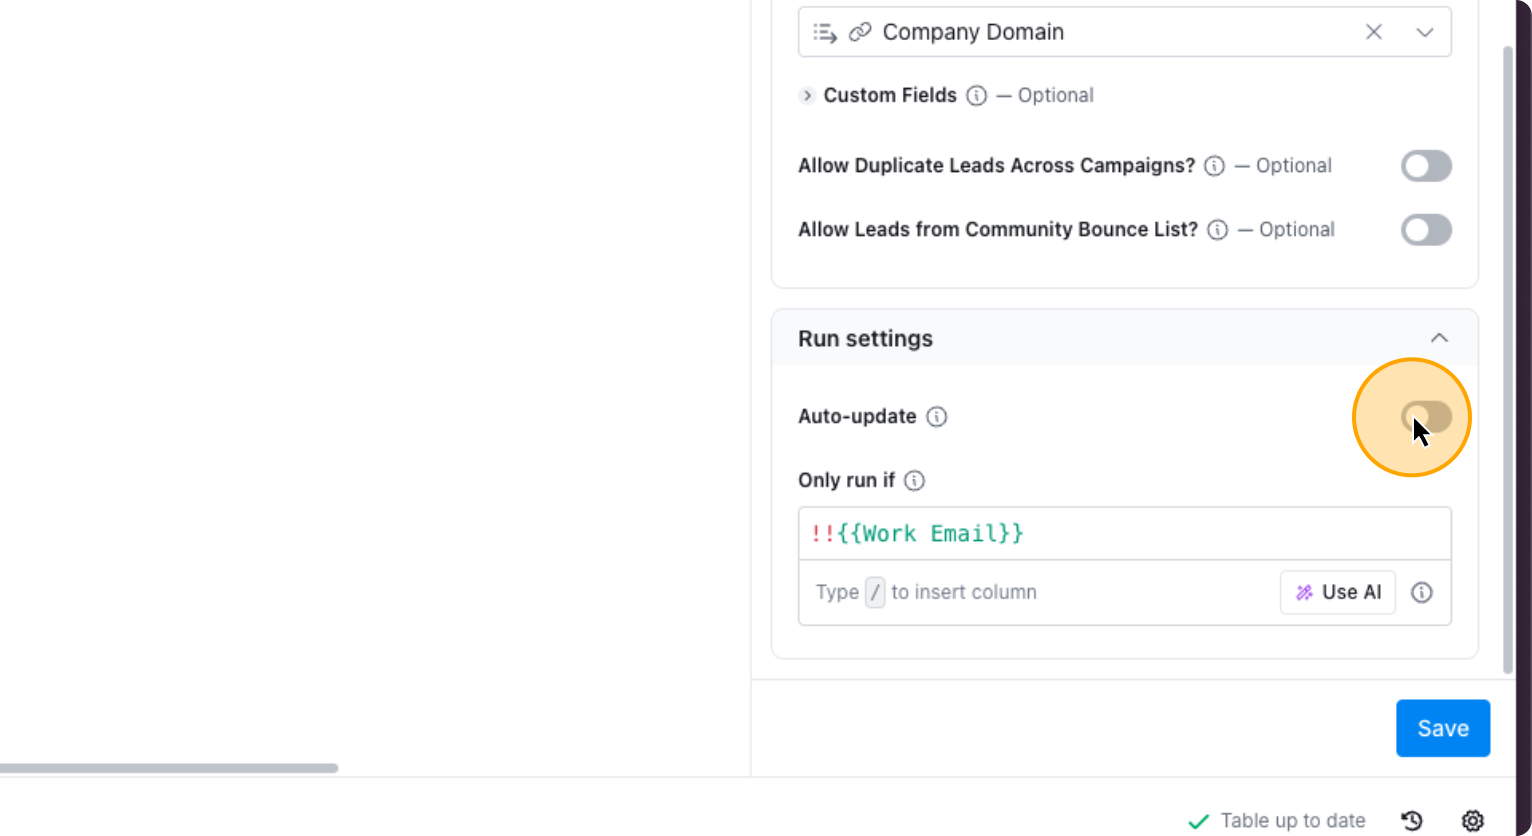
52. Click here
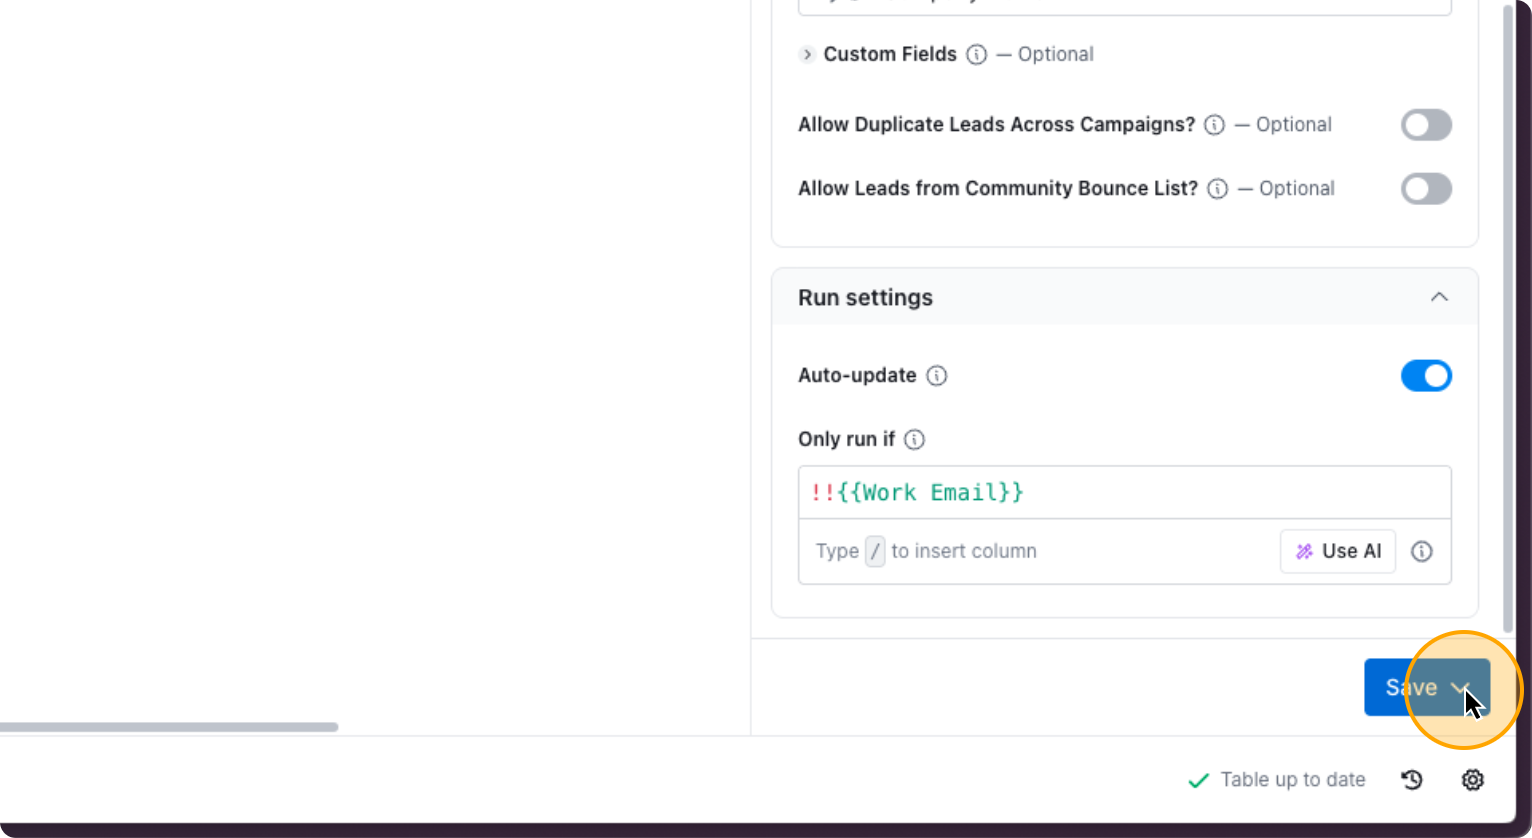
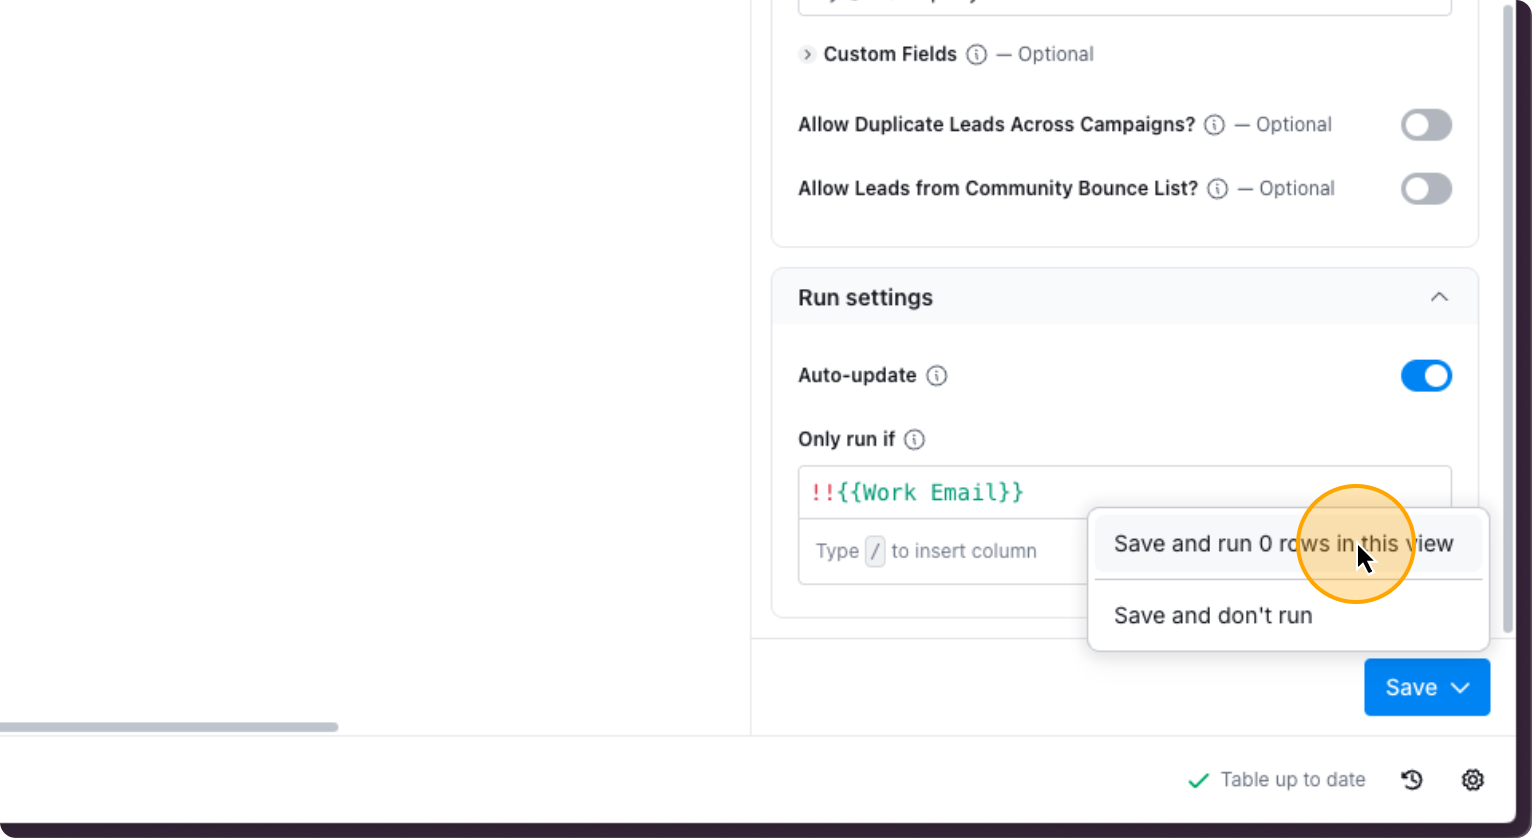
53. Click on “Save and run rows in this view”
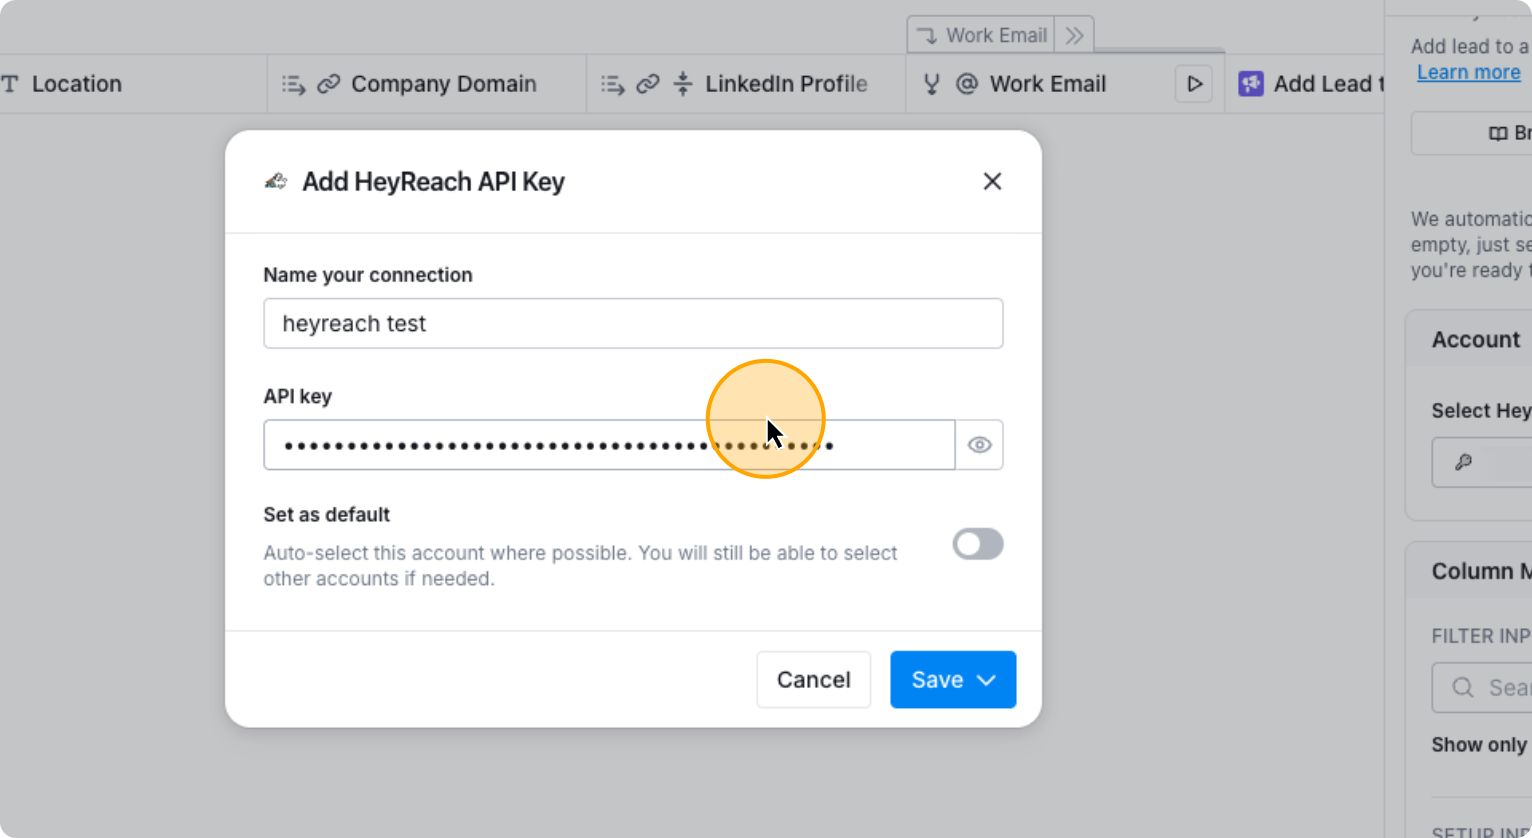
After this, you do the same for HeyReach. If it is connected, you can simply choose any campaign you want. If not, you connect it via API.
54. Click on “Add Lead to Campaign”
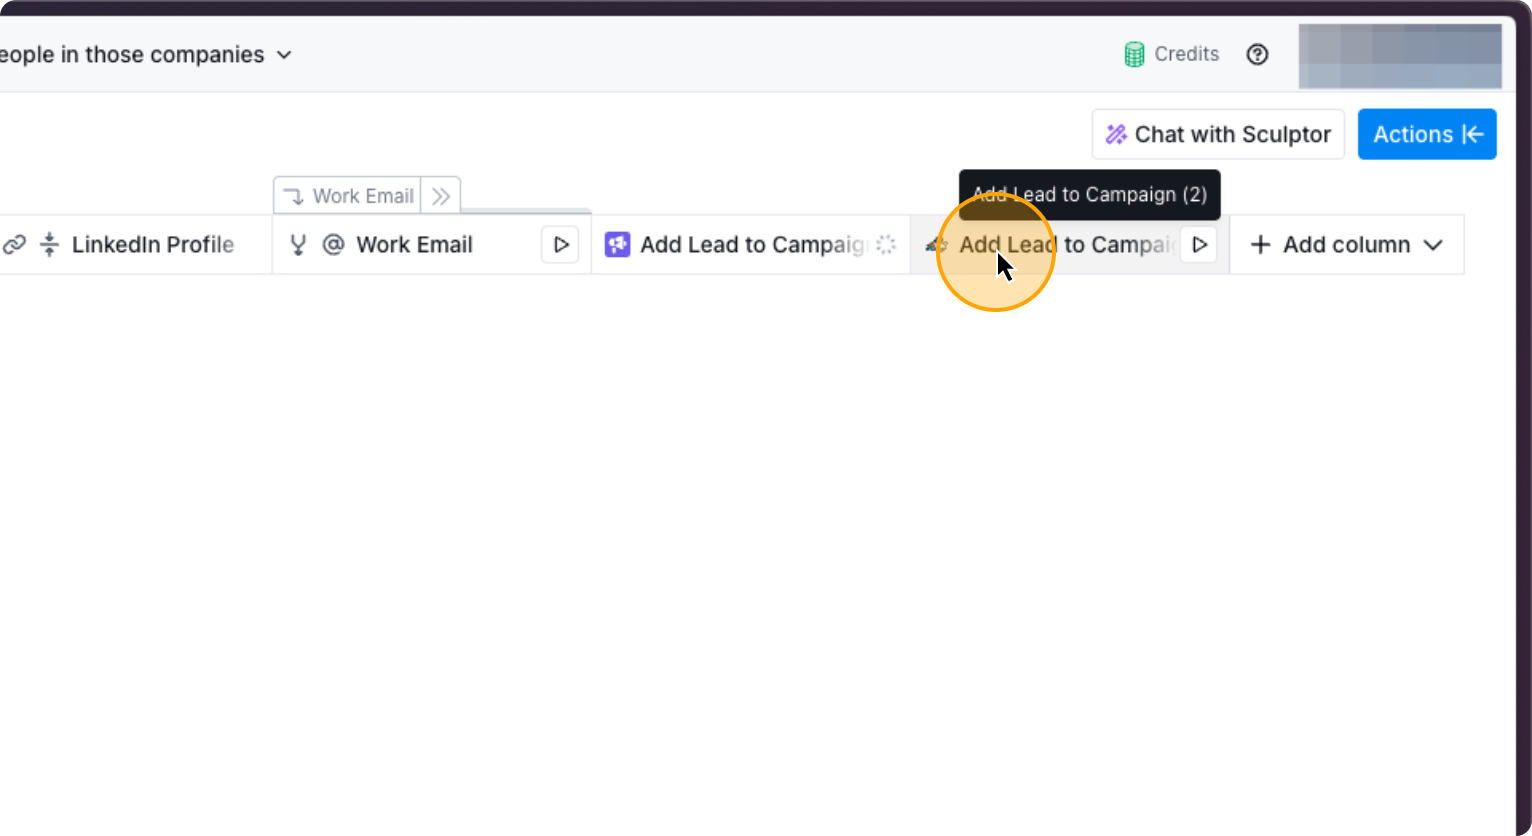
55. Click on “Edit column”
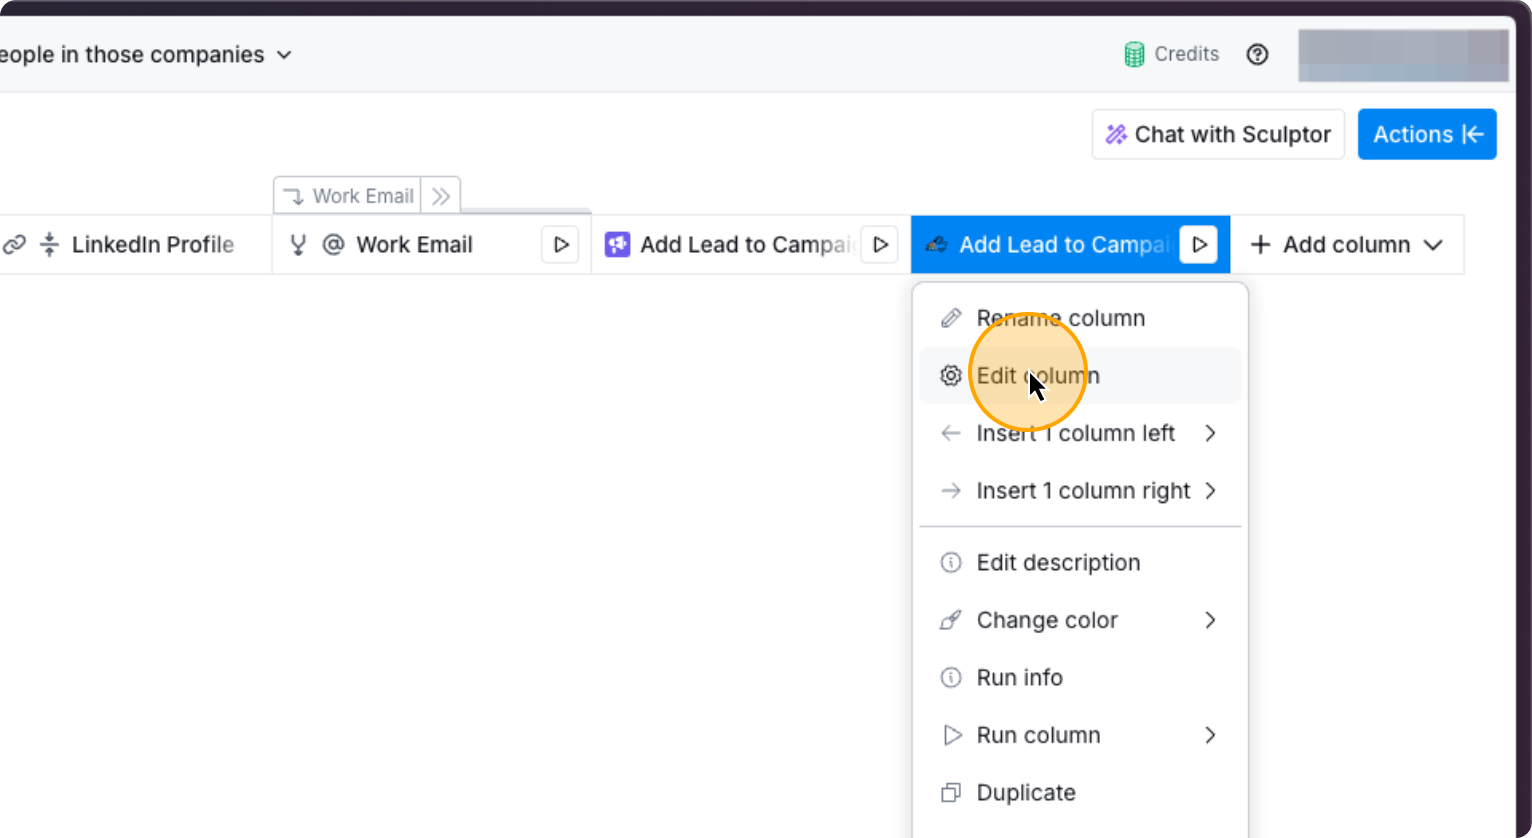
56. Click here
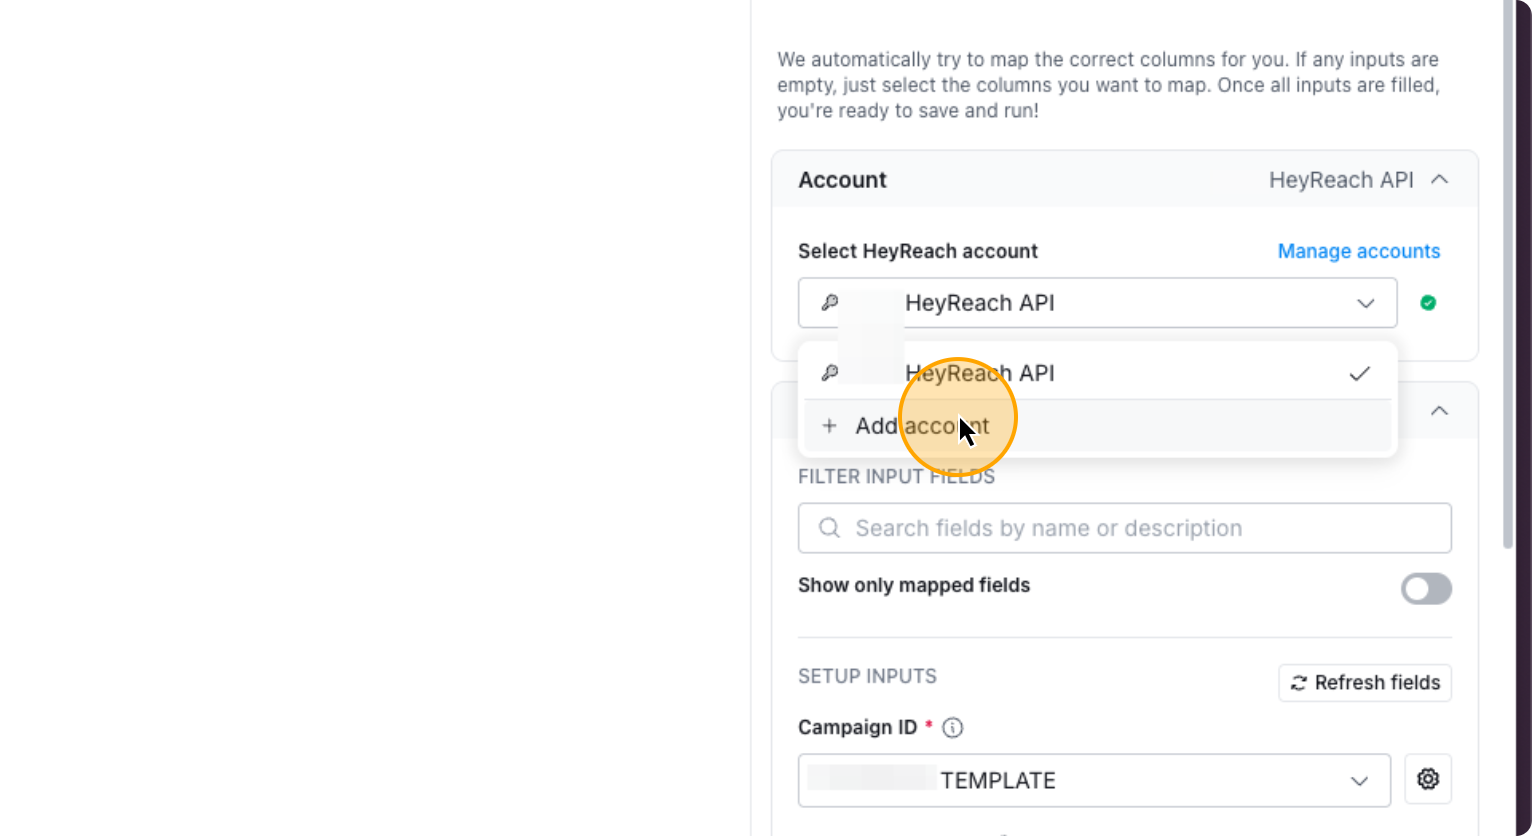
If Heyreach isn’t connected, click Add Account.
57. Click on “+ Add account”
58. Click here
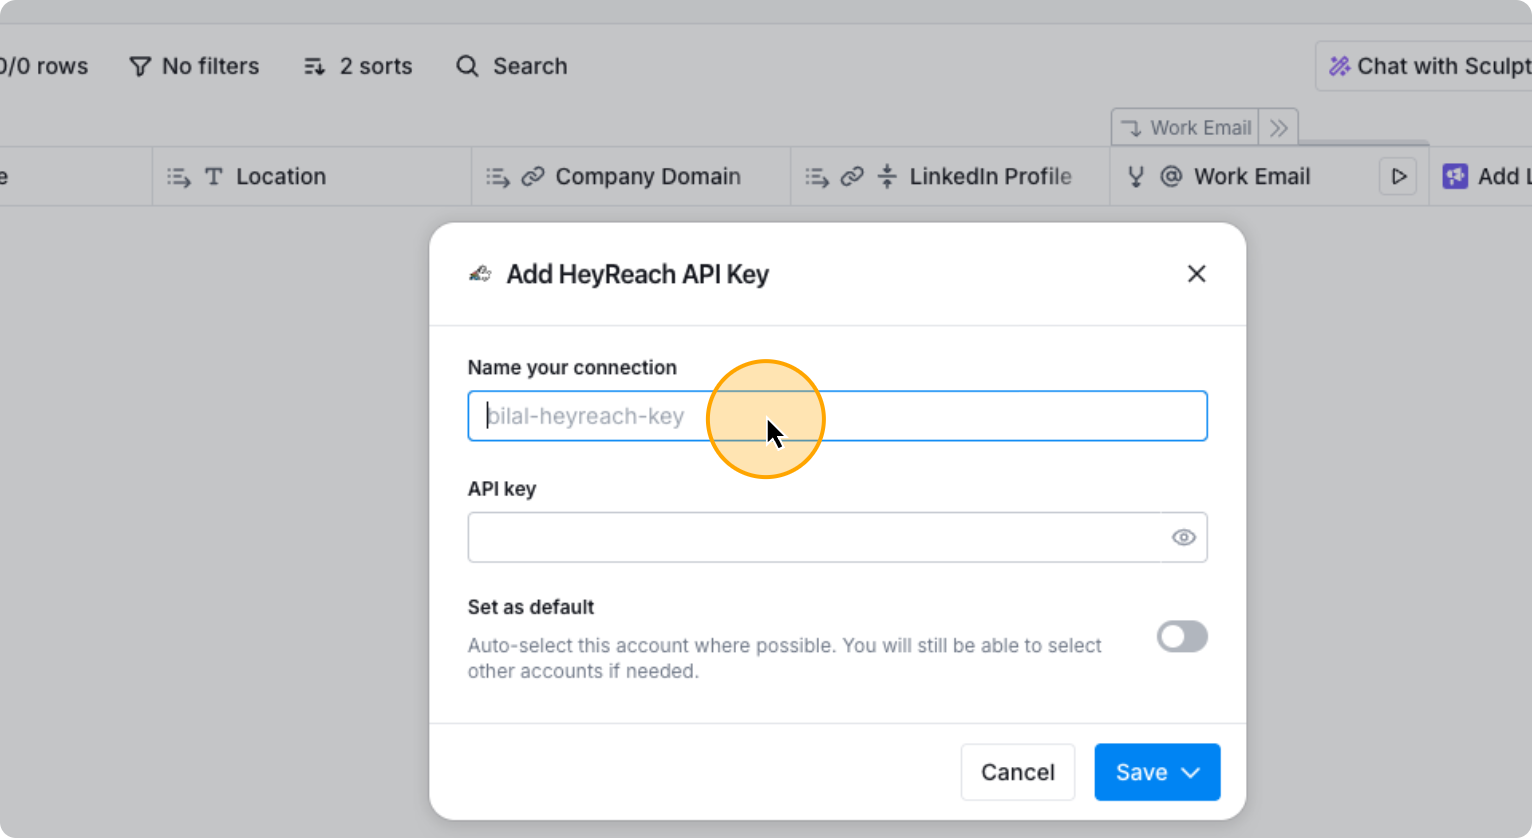
First, name your connection. Then, obtain the API key for HeyReach.
59. Click here
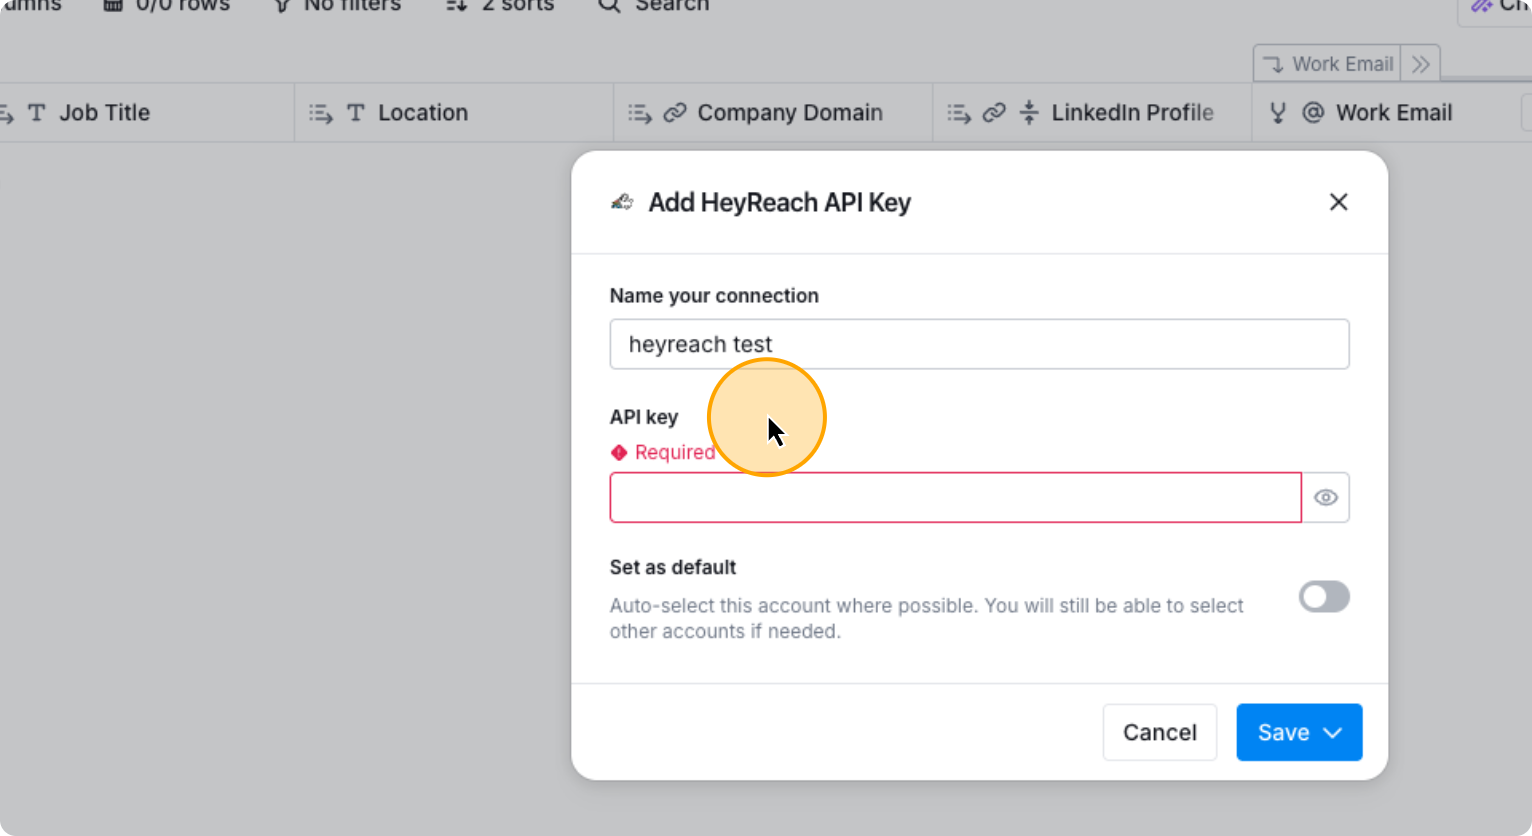
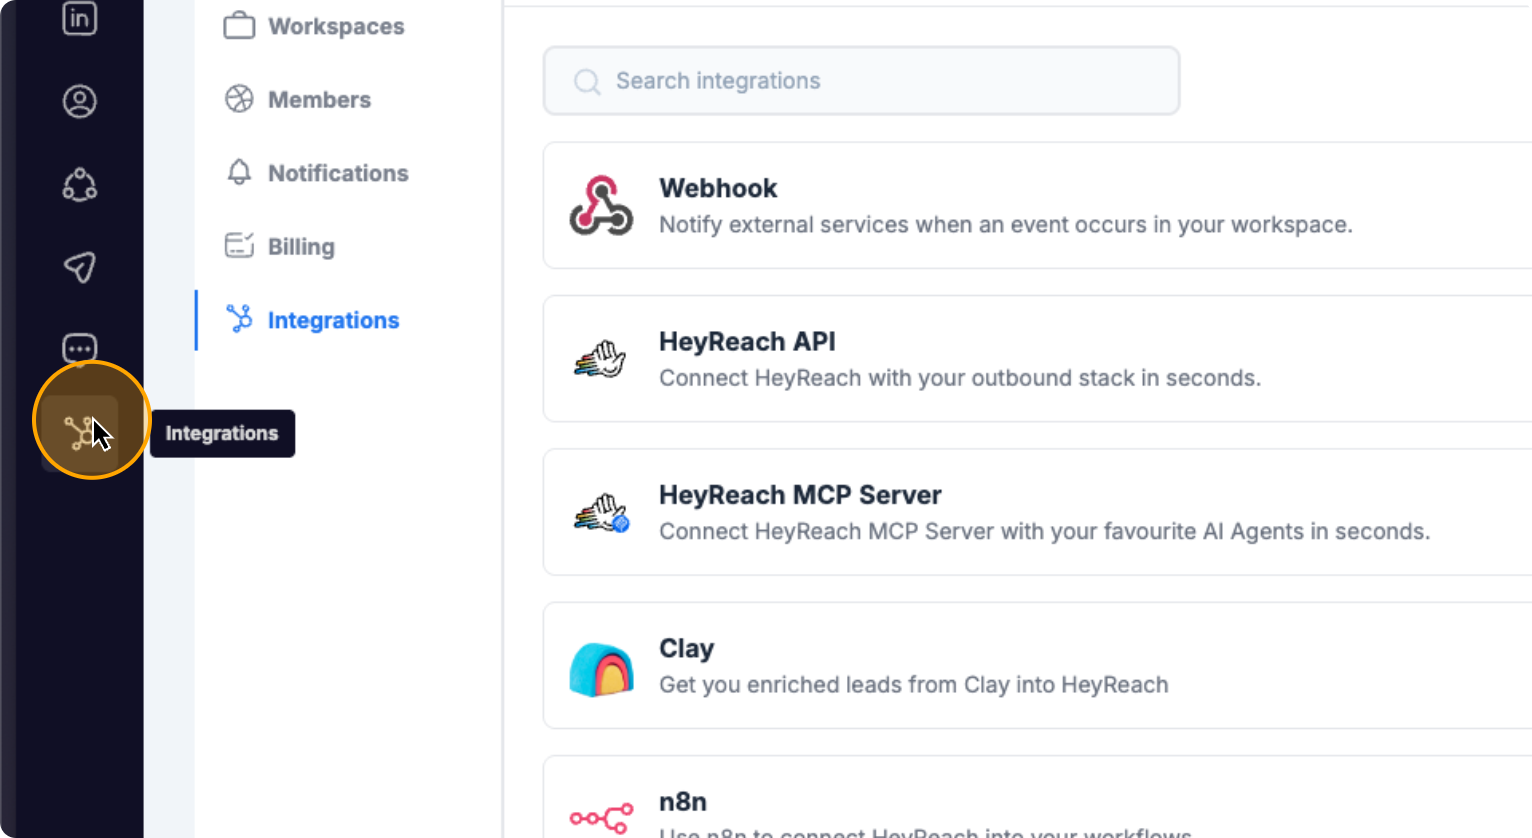
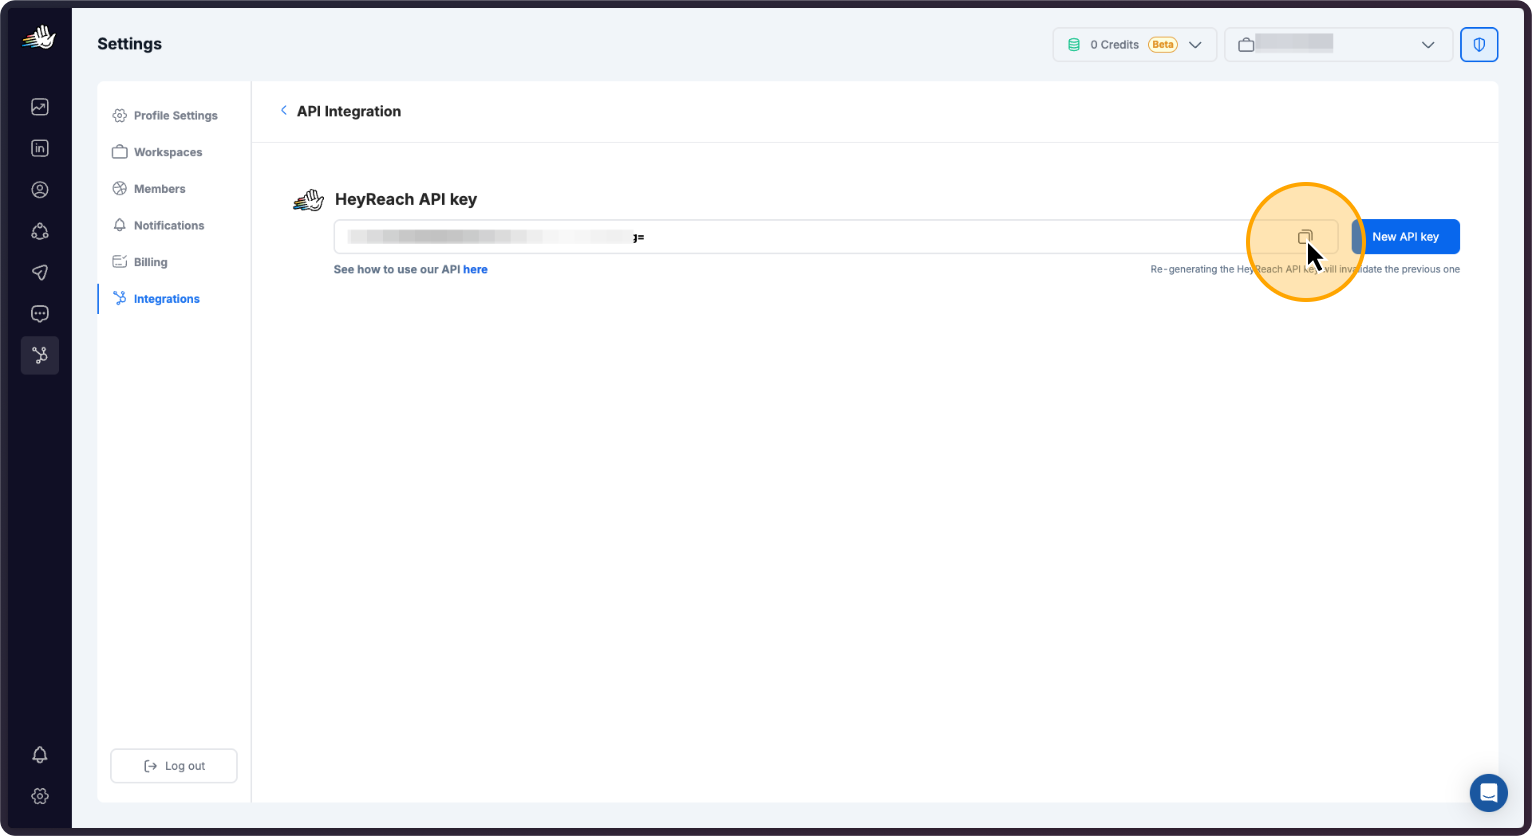
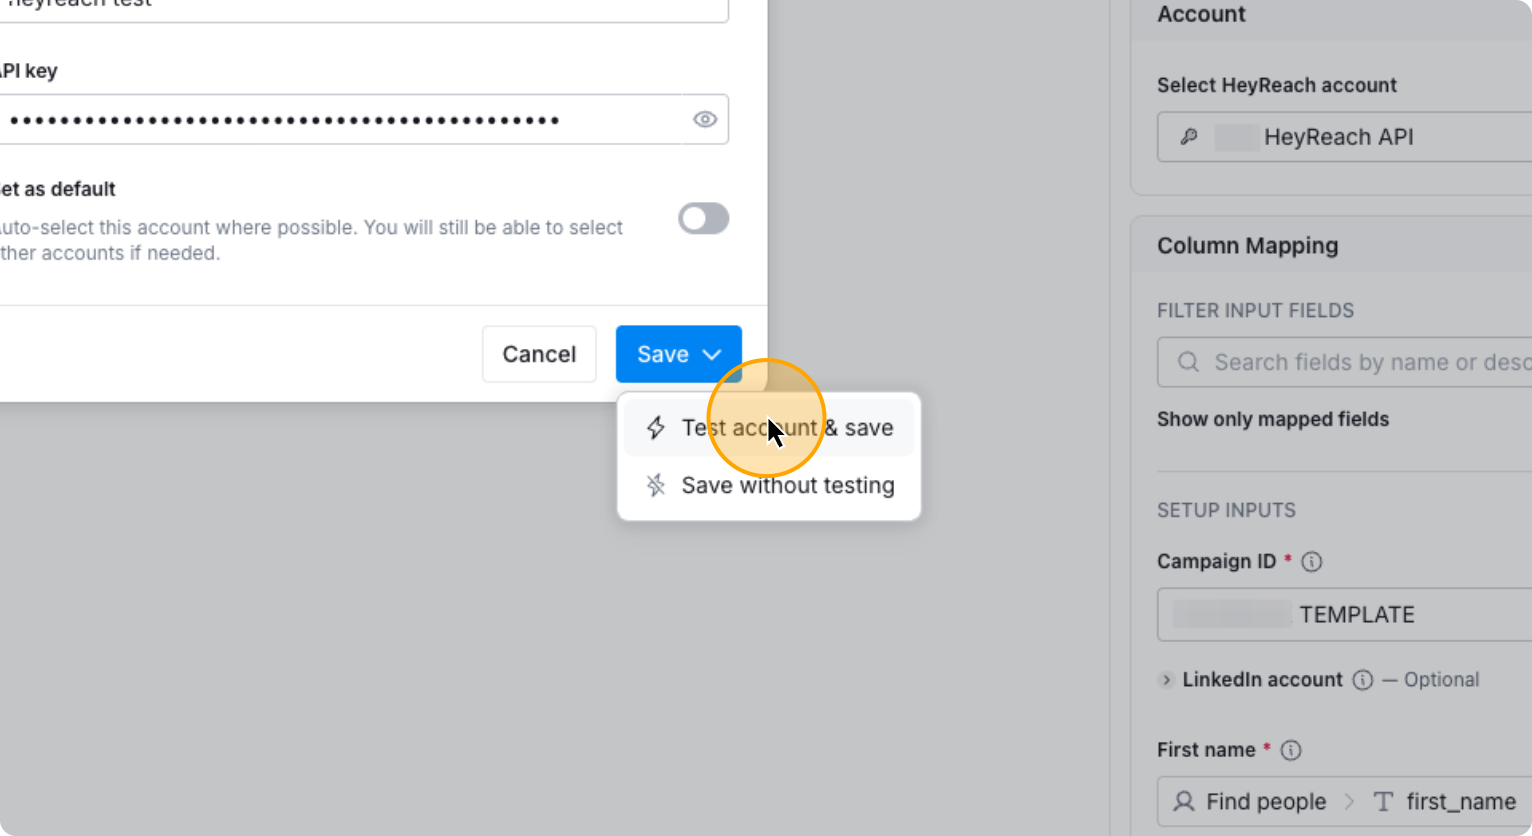
Go to HeyReach and click on Integrations. Select HeyReach API, then click Get API. Copy the API key. Go back to Clay, paste the key, then click Test Account and Save.
60. Go to HeyReach. Then “Integrations”
61. Click on “Get API key”

62. Click here
63. Go back to Clay. And paste the API Key here
64. Click on “Test account & save”
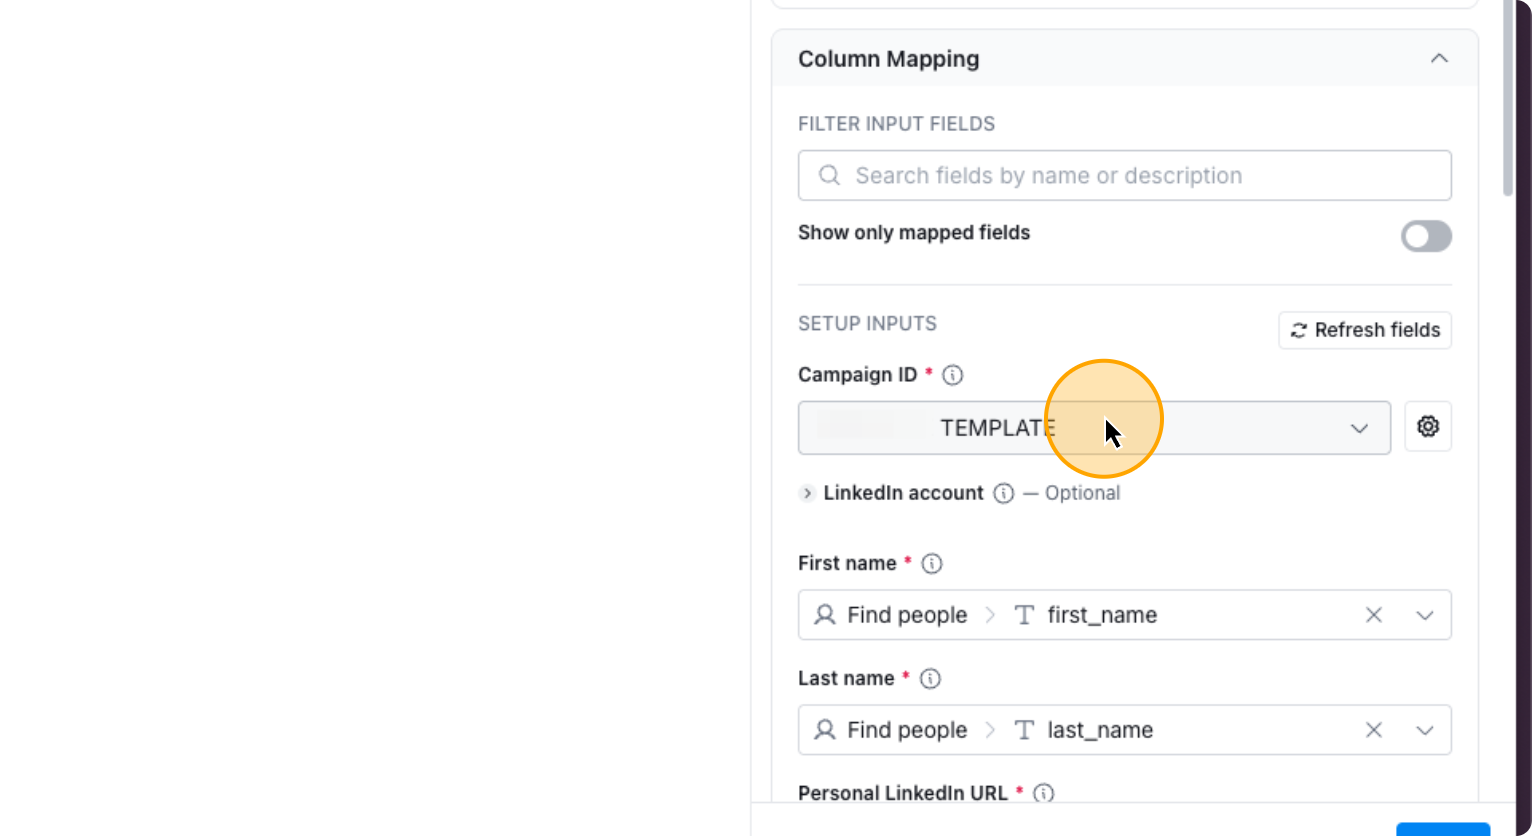
It will save, and that’s it. You can now choose your Heyreach Sequence you want to add the prospects into and add custom fields if needed. It will work automatically.
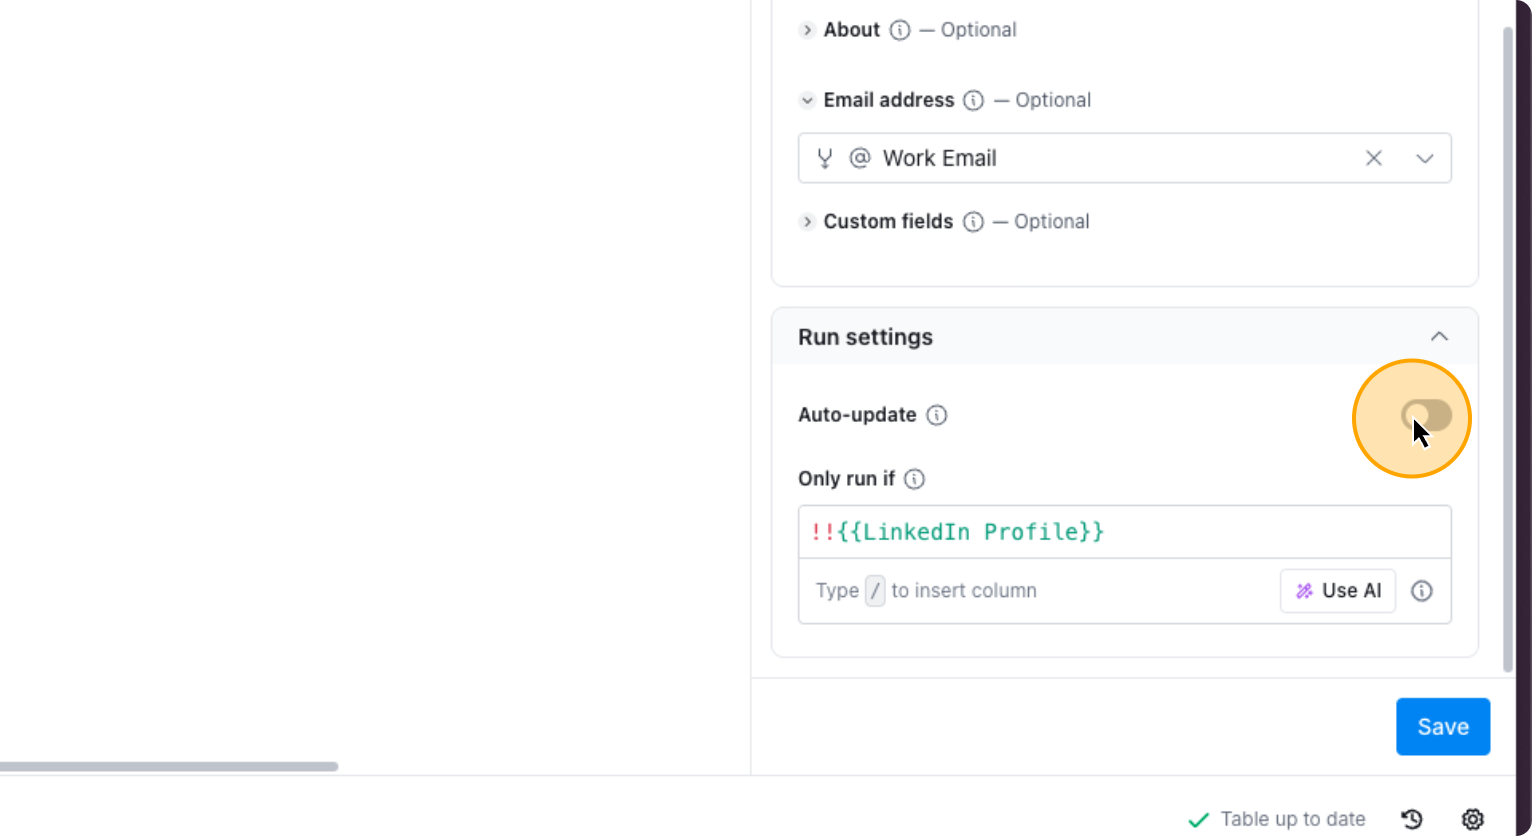
If you enable auto-update, click Run.
65. Toggle on “Auto-update”
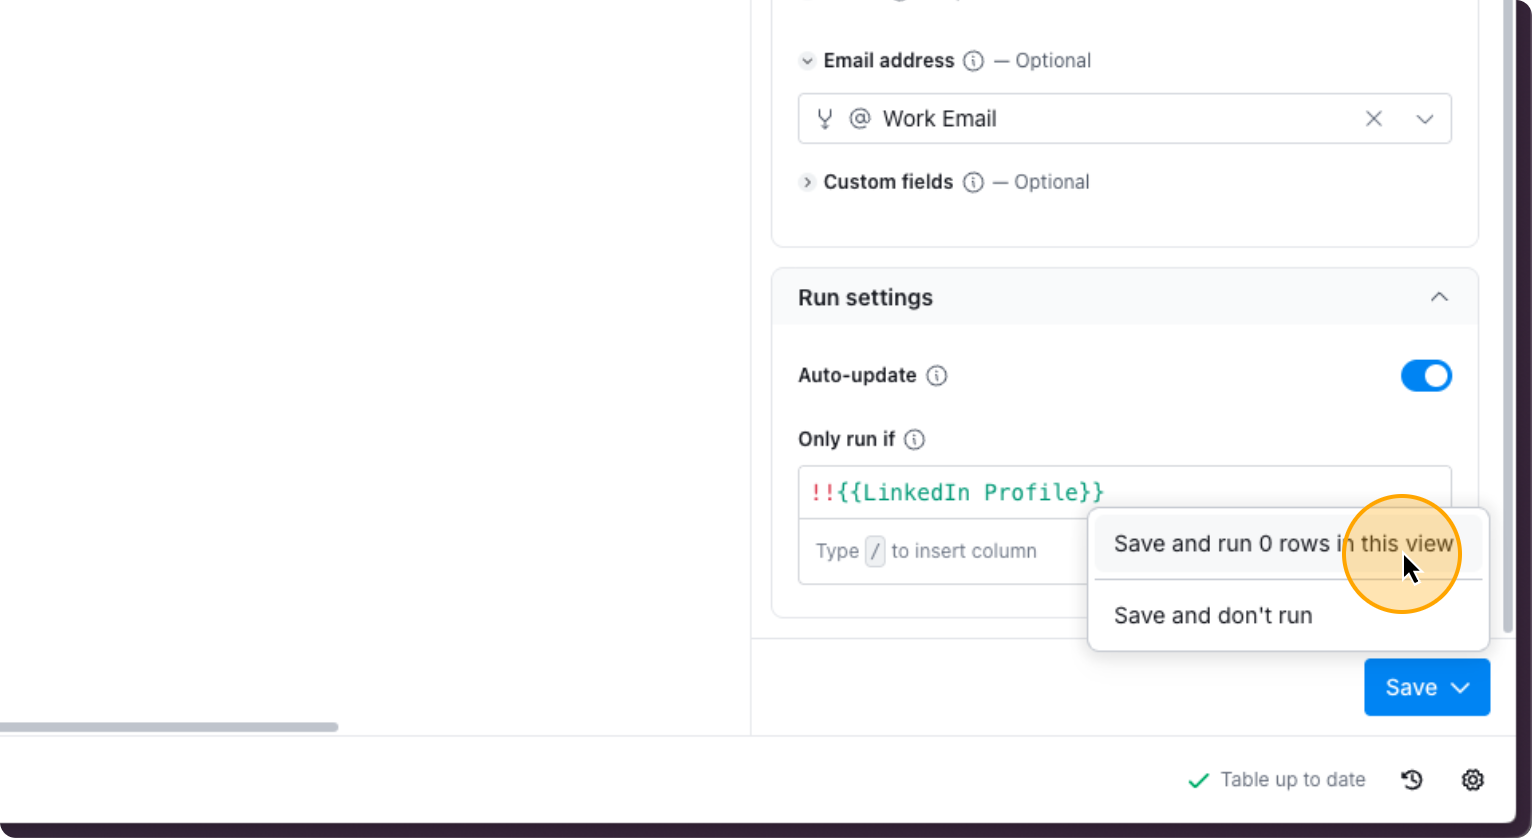
66. Click on “Save and run rows in this view”
Okay. Everything is now set.
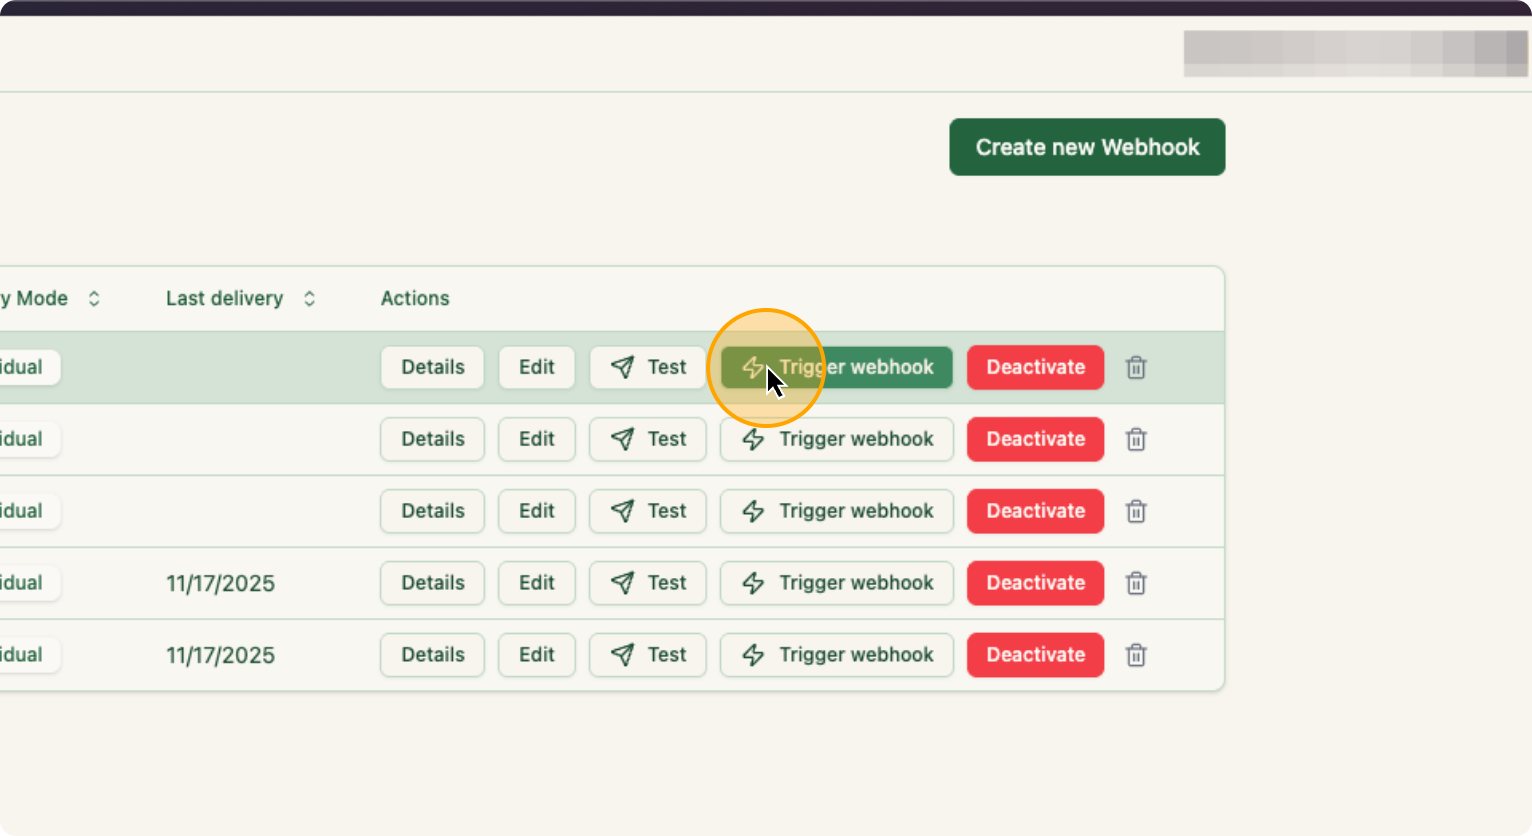
Go to ZenABM and click “Trigger Webhook.” That’s all you need to do.
67. Click on “Trigger webhook”
Now, return to your Clay account. You will start to see companies appearing gradually.
Okay, this is how it will look. It will fetch each individual webhook and automatically find people. It will find your ICP in those Interested accounts, find their emails, and add them to the appropriate campaigns.
That is all you need to do.
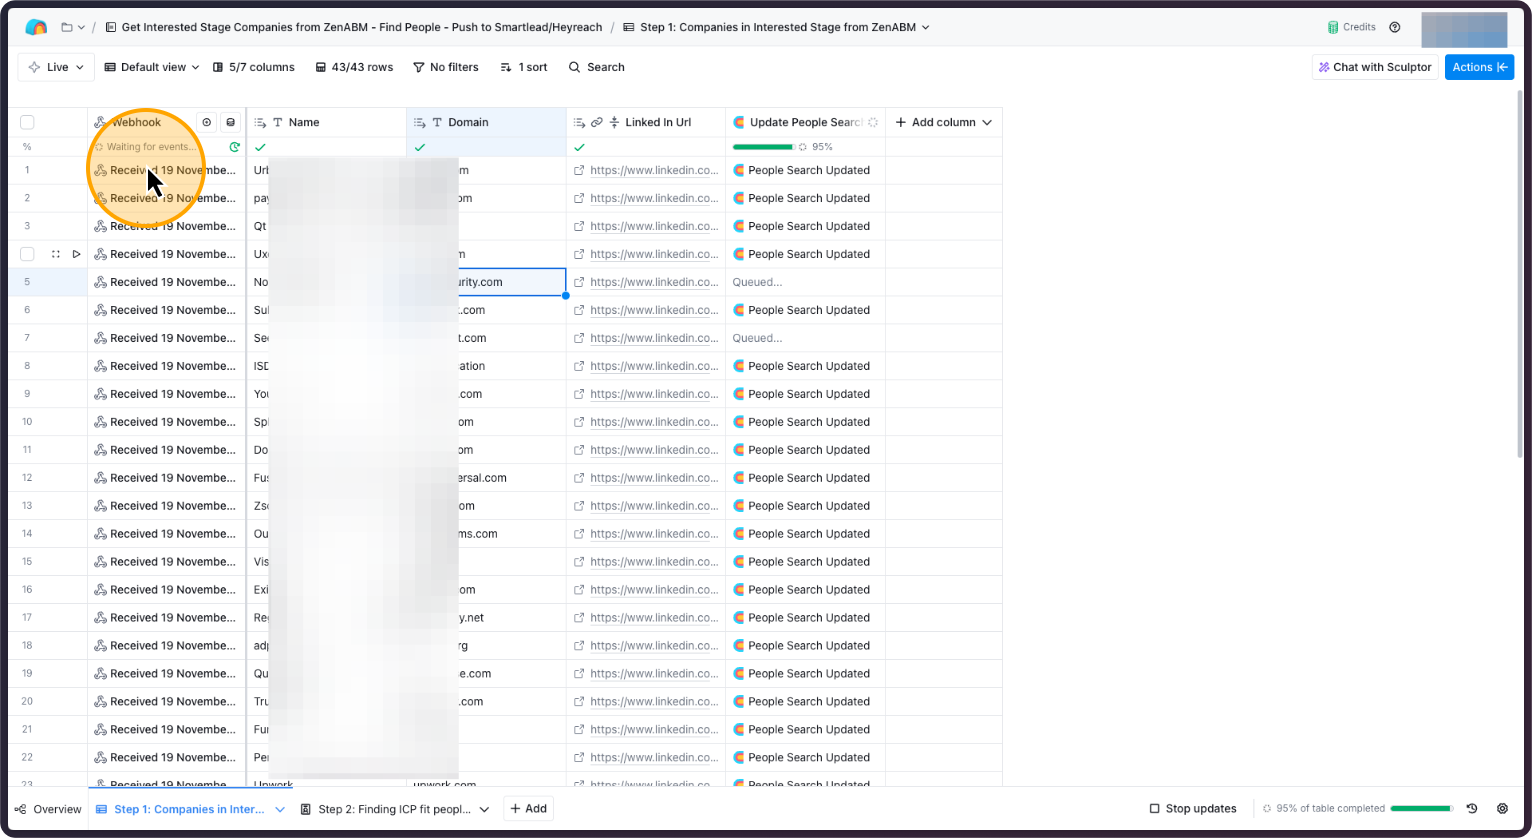
68. How it will look on Step 1
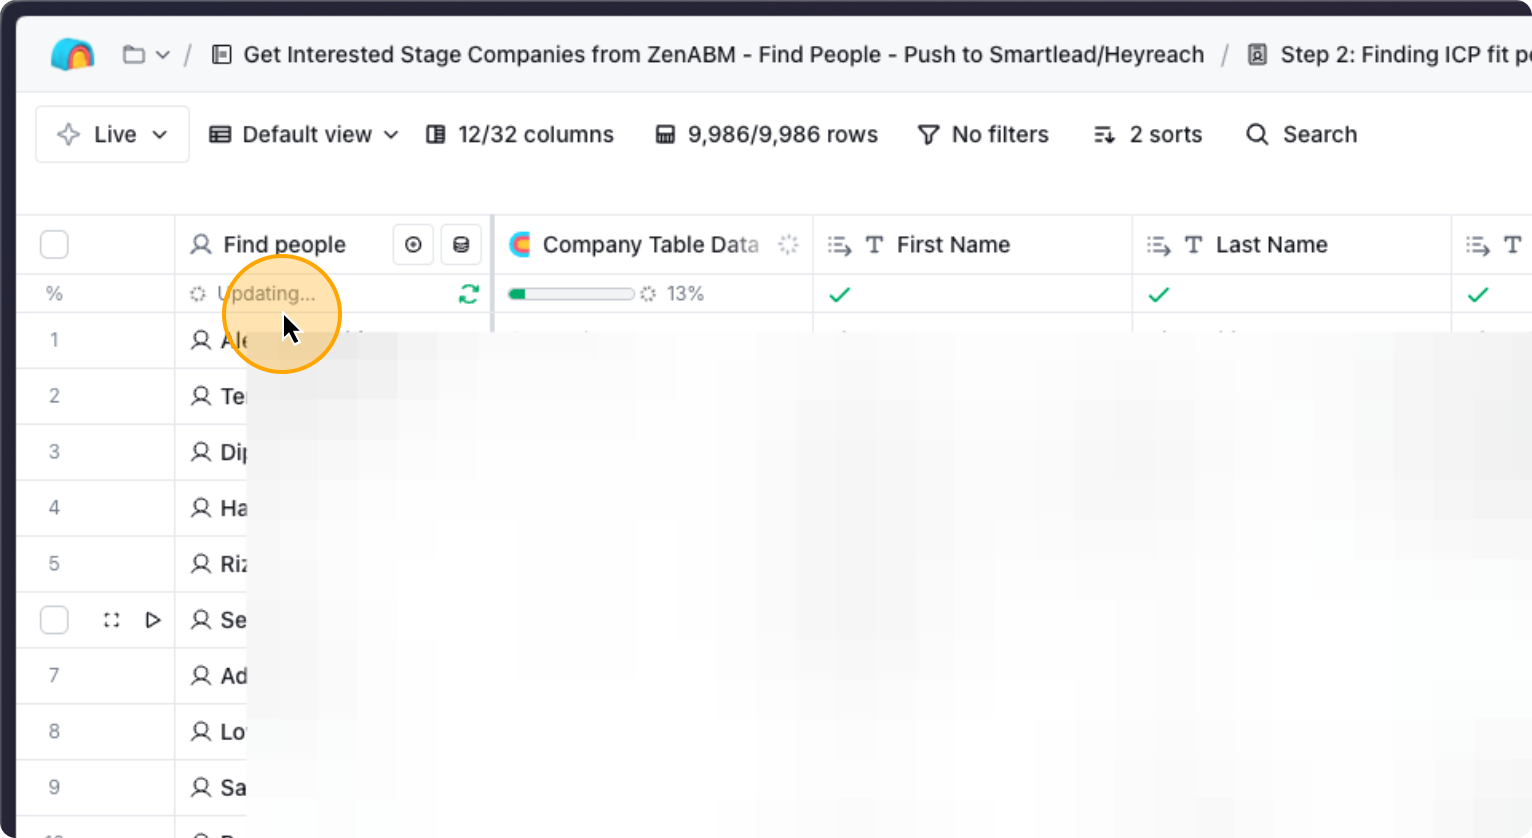
69. How it will look on Step 2
Ready to leverage intent-led outbound? Try ZenABM free for 37 days or book a demo to see how ad engagement signals can power your outbound strategy.
For a limited time, ZenABM will:
✅ Set up this entire workflow inside ZenABM
✅ Build your Clay table + auto-prospecting flow
✅ Implement Smartlead + Heyreach API pushes
✅ Configure anti-duplication logic
✅ Plus: Salescaptain will write your entire email outreach sequence for free
🎁 Deadline: 14 December
This offer is genuinely insane value — and it’s the fastest way to launch a warm-outbound motion that actually generates pipeline.
👉 Want this implemented for you?
Click below and book your slot while the offer is still available:
Once your people list is ready, Clay pushes those contacts straight into your outreach tools (e.g. Smartlead for email, Heyreach for LinkedIn DMs).
The key is that your copy references the exact signal that landed them in the list. For example:
You can even use generative AI to create personalized snippets based on the signal fields in your Clay table (campaign name, last page viewed, intent theme, etc.).

Finally, make sure your outreach tools or Clay write outcomes back to the CRM (replied, meeting booked, disqualified, timing issues).
ZenABM then pulls that data back in, so you can:
Over time, this turns your signal-based outbound into a self-optimising engine, not just a one-off campaign.
To make this concrete, here are four signal-led plays you can run with ZenABM, your CRM and Clay.

All of these can run on autopilot once you’ve defined the signal logic in ZenABM and wired up the webhooks to Clay and your outreach tools.
Signal-based outbound works – but it’s easy to mess up if you overcomplicate things. A few pitfalls I see a lot:
ZenABM helps you avoid this by:


Signal-based outbound is not a hack – it’s the natural next step for B2B teams that are tired of wasting money on cold outbound while their warmest accounts slip through the cracks.
With ZenABM’s signal-led outbound features, you can:

You’ll find the configuration for this in the “ABM Stages” tab inside ZenABM. Set it up once, and your CRM stops being a black box and becomes an always-on signal engine.
If you want help setting up your first signal-based outbound motion, book a demo and we’ll walk through your signals together. Or, if you prefer to tinker, just grab the 37-day free trial (plans start from $59/month) and start turning your intent signals into pipeline today.